


CORE SKILLS: PHOTOSHOP LAYER MASKS
Layer Masks are at the core of all Photoshop work; be it for blending, background removal or selectively applying effects – it’s hard to imagine a workflow without them. To develop a working knowledge of Photoshop, understanding this core function is essential. Fortunately the Layer Mask system is fairly simple to learn, allowing novice users to produce results in no time at all!
LAYER MASKS
Photoshop uses a stacked layer system, allowing users to gradually build up composites using visual elements. Layer Masks allow you to blend the individual layers using a ‘mask’, which controls the opacity of a given layer. In effect, this allows the user to apply transitions or selectively add / remove parts of a layer using brushes, gradients and a wide range of tools.
Further reading:
• Core Skills: Photoshop Layers Part 1
• Core Skills: Photoshop Layers Part 2
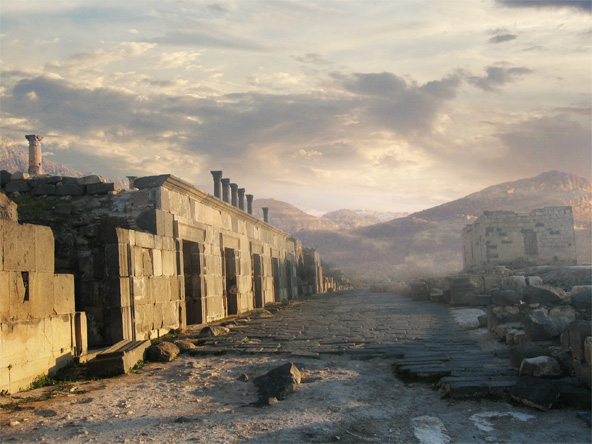
Layer Masks are often utilised heavily in landscape / matte painting work, as seen above. Work in progress, 2012 Conzpiracy .
HOW DO THEY WORK?
Layer Masks work by controlling the opacity ( visibility ) of a given layer using Black (#000000), White (#ffffff) and the monochromatic shades inbetween. Black reduces opacity to 0%, White enables full opacity at 100%. By default all Layer Masks are filled with White, allowing the entire layer to show at 100% visibility.
By using tools such as the Brush (B), you can select Black as your colour and selectively ‘paint away’ the layer for background removal or transitions. At any point you could paint the layer back in using White.
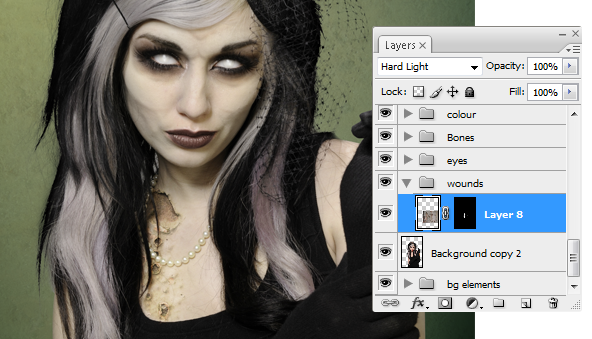
This example shows a texture layer being selectively applied using a Layer Mask and Soft Edged Brush (B).
WHY ARE THEY USEFUL?
Layer Masks are ‘non-destructive’ – which means you can return to an active mask at any point to make amendments. If you were to blend or remove elements using the Eraser (E), you would be stuck with those changes unless you undo all your actions; this is the main factor that makes Layer Masks so versatile. Aside from this point, Layer Masks afford the user a wider range of tools to work with the opacity of a given layer, such as specialist Brushes (B), Lasso Tools (L), Shapes (U) and much more.
ADDING A LAYER MASK
To add a Layer Mask, simply select the icon as shown below. The Layer will then display a ‘mask’, which you can work with using the tool of your choice. You can switch between the layer contents or the mask by clicking on them, whatever is active will have a thin black border. Always be aware of what you have selected, as it is a common mistake to paint onto your layer contents, thinking you are working with the mask. We all do it!!

SMOOTH TRANSITIONS
To achieve a smooth / wide transition between layers, you can either use a very large Soft-Edged Brush (B) ( hardness 0% ) or the Gradient Tool (G) ( set to black and white ). Working with thick brushes or gradients allow you to achieve a more tapered effect, useful for instances such as landscape work or soft-edged elements such as fur or hair.
BACKGROUND REMOVAL
By using smaller width brushes or selection tools such as Lasso (L) or the Pen Tool (P), you can use Layer Masks to perform background removals with finesse. Different scenarios will require different tools, however for utmost precision – the Pen Tool (P) cannot be beaten!
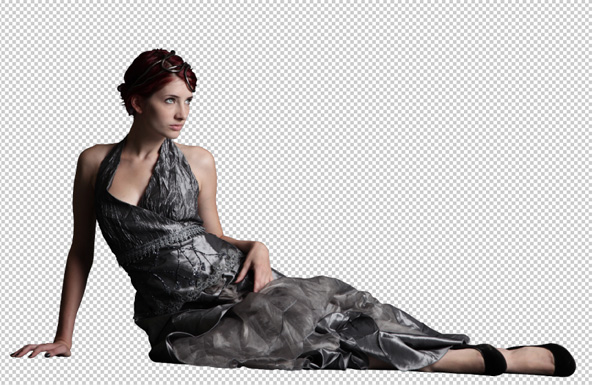
A background removal performed with Pen Tool and Layer Mask.
Further Reading: • Background Removal with Layer Masks • Pen Tool Background Removal
ADJUSTMENT LAYERS
Adjustment Layers are used to apply effects or image-adjustments in a non-destructive manner, by default they come with a Layer Mask in place. This combination makes for an extremely versatile method of working, allowing you to go back and adjust the effect or the mask at any stage throughout the creative process.

Adjustment Layers in action..
Further Reading: • Core Skills: Photoshop Adjustment Layers
TAKING IT FURTHER..
There are tonnes of uses and applications of a Layer Mask, here are a few tips and techniques to consider when taking your work further:
• Hitting ‘D’ on the keypad will set the default colours to black and white.
• Changing the shade of your foreground colour to a lighter tone will allow you to apply semi-transparent transitions.
• Using grunge brushes on layer masks brings awesome effects!
• Gaussian Blur ( Filter > Blur > Gaussian Blur ) is great for ‘softening’ brush strokes for smoother transitions.
• Inverting ( Ctrl / Cmd + I ) will quickly switch your layer mask from black to white or vice versa.
• You can even use selected Image Adjustments on Layer Masks, such as Levels ( Image > Adjustments > Levels ).
REVIEW
Users at every level should have Layer Masks as part of their workflow, in order to monopolise on the versatility and power of the software. As a core function of Photoshop, Layer Masks are essential for a huge range of techniques and processes.
Have a tip not featured in this guide? Please feel free to share in the comments section below.


