Create a Furry Little Monsters Wallpaper in Photoshop
In this Tutorial we’ll learn how to create a cool Furry Little Monsters Wallpaper in Photoshop creating a custom Brush, using some Filters and Layer Styles.
Step 1 – Custom Fur Brush
Before creating the Furry Little Monsters, let’s create a custom brush for the Fur. Open up Photoshop and create a new document, mine is 500x500px. Select the Pen Tool (P) and create a shape like below:
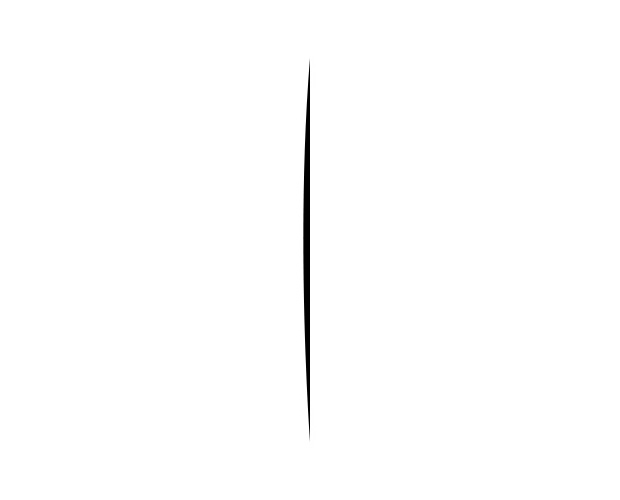
Duplicate this shape, go to Menu > Edit > Transform > Flip Horizontal and place the shape next to original one.

Merge the two shapes layers. Duplicate this merged layer and rotate the new duplicated layer using the Free Transform Tool (Ctrl+T) and rotate it 22,5° , Duplicate the original merged layer again and rotate the new one -22,5° using the Free Transform Tool (Ctrl+T) again.
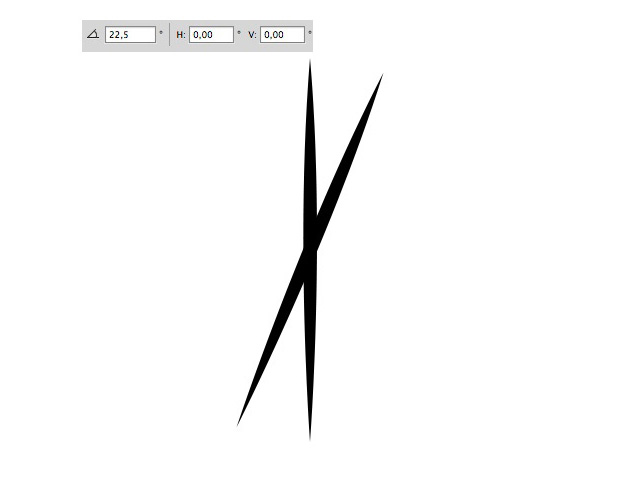
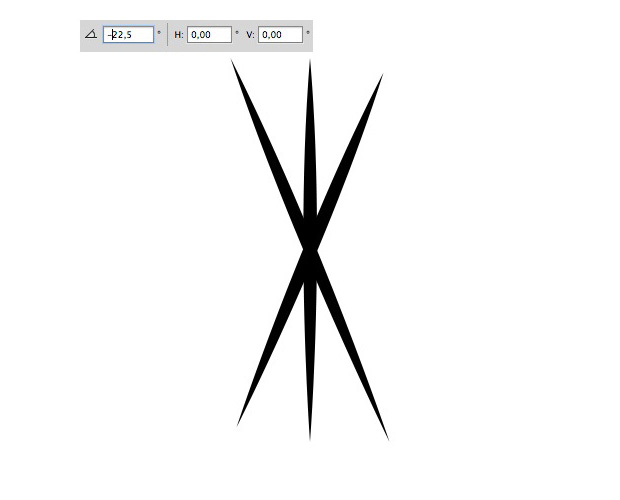
Make sure the Background is tranparent, select all the canvas, Select – All (Ctrl+A) , go to Menu > Edit > Define Brush Preset and save the brush.

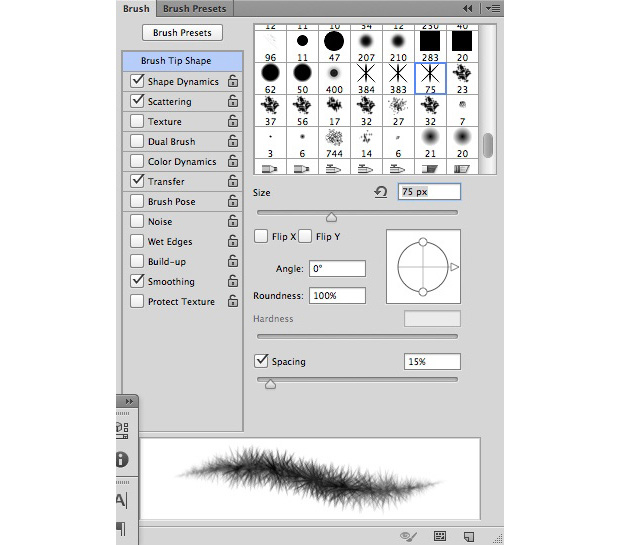
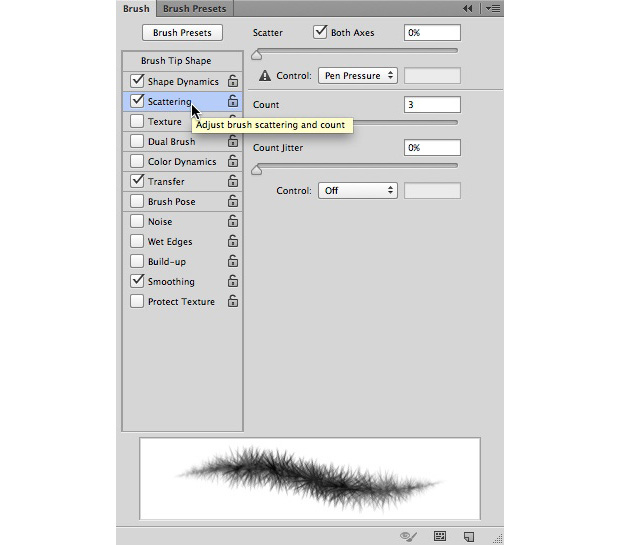
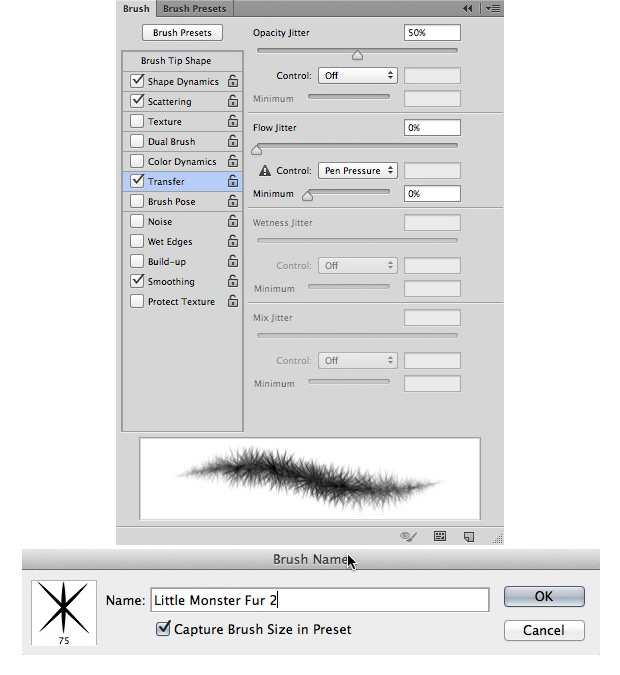
Now we have our brush let’s add some tweaks to it, select the Brush Tool (B) and open up the Brush Panel By pressing F5, or Menu > Window > Brush, select the Brush we created, it should be at the end of the list and enter those parameters, when you’re done make sure to save the new modified brush (click on the bottom right icon in the brush panel).

Step 2 – Fur Part 1
Create a new document in Photoshop, mine is 500x500px with a White Background. Select the Ellipse Tool (U) , make sure the option is set to create a Path and create a perfect circle path (hold the Shift key while creating the circle) in the centre of the canvas.

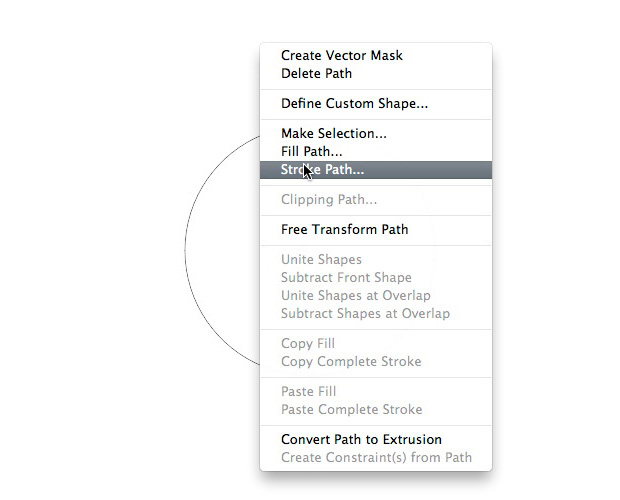
Before applying our custom Fur brush to this path select the Brush Tool and select our brush. Create a new layer, select the Pen Tool (P) and right click on the circle path we just created and select Stroke Path . For the Tool select Brush and click OK

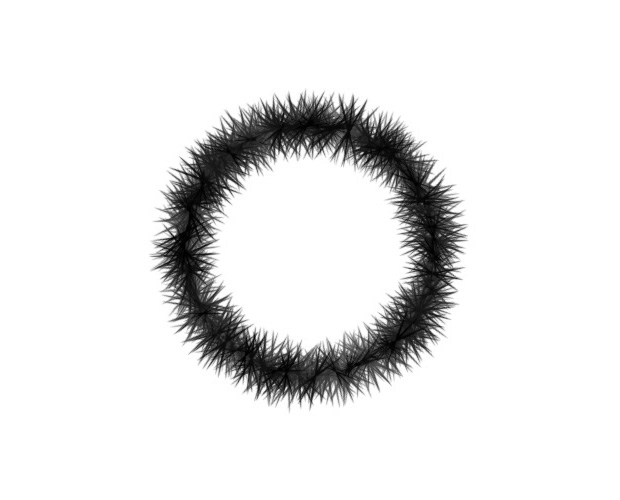
Now we have the around Fur, select the Brush Tool with a Rounded Brush paint in the centre of the circle with black.

Add a Gradient Overlay layer style to this shape with those parameters.

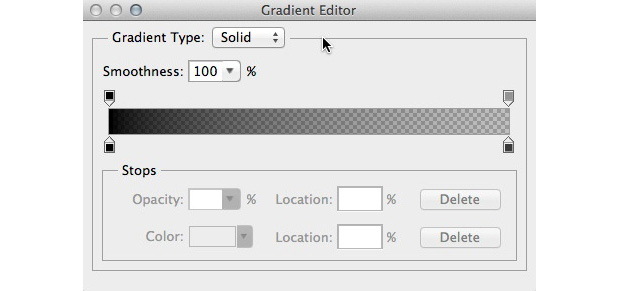

Create a new layer, place it under the Fur layer we’ve been working on, repeat the same process than before to create an other Fur circle using a circle path and the Fur Brush but this time with a dark grey colour.

Step 3 – Fur Part 2
Let’s add some more details on the fur, duplicate the Fur Src layer twice, clear the layer styles from the duplicated layers (right click on the layer and select Clear Layer Styles). rename the two new layers, Fur 1 and Fur 2. Let’s work on the Fur 1 layer, Add some noise on the duplicated layer, Menu > Filter > Noise > Add Noise with a 25% amount , Gaussian for the Distribution and check the box next to Monochromatic .

Add an other filter on this layer, we’ll add some blur using the Radial Blur Filter ,Menu > Filter > Blur > Radial Blur with an amount of 25, Zoom for the Blur method.
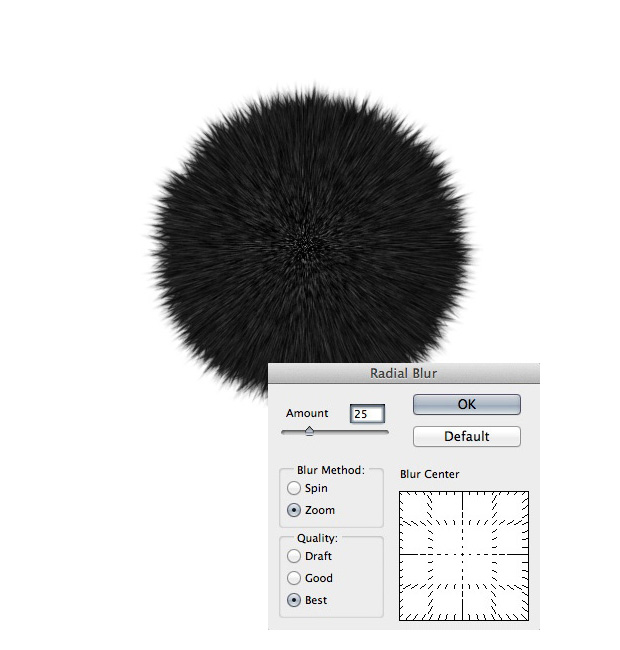
Change the Fill of the Fur 1 layer to 50%.

Let’s now work on the Fur 2 layer, add the same Noise Filter than before, with the same parameters. Apply a Motion Blur Filter , Menu > Filter > Blur > Motion Blur with a 45° angle and a 10px Distance . Change the Fill of the Fur 2 layer to 20% .

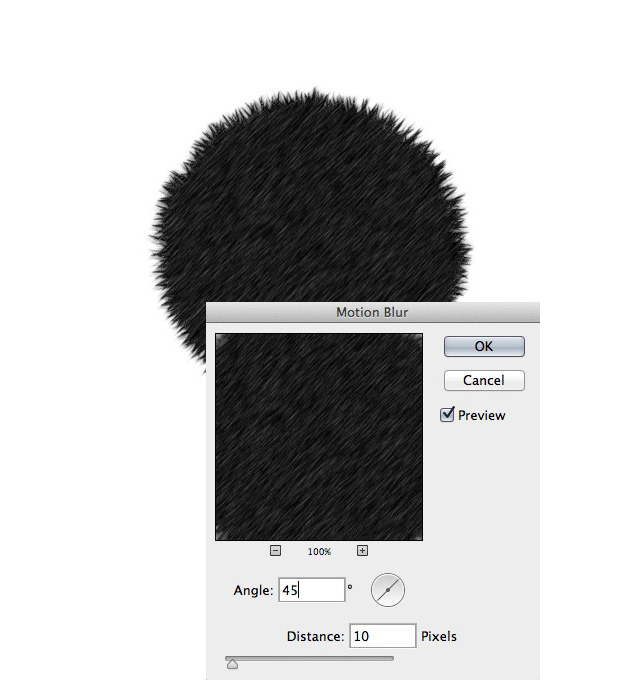

Merge all the Fur layers we’ve created from the beginning, select all the layers and go to Menu > Layer > Merge Layers (Ctrl+E) . Duplicate the new merged layer, rename the new layer Fur Sharpen and go to Menu > Filter > Sharpen > Sharpen , change the Fill of this layer to 20% .

Step 4 – Eyes
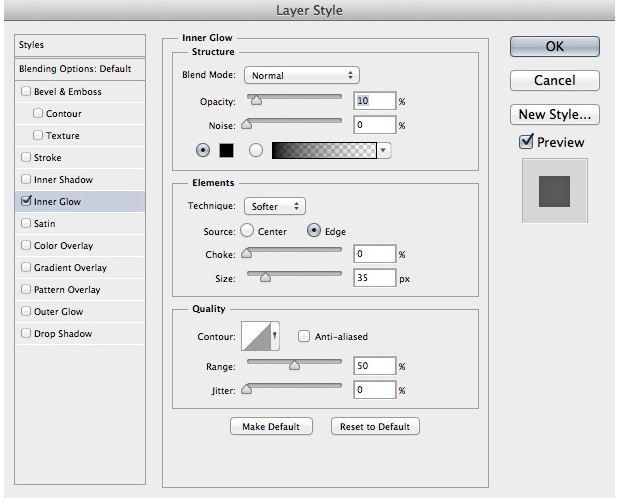
Now we have created some fur for our little monsters, let’s create those scary eyes. Select the Ellipse Tool , this time change the option in the option toolbar to Shape and create a white perfect circle. Add an Inner Glow layer style to this shape layer with those parameters:
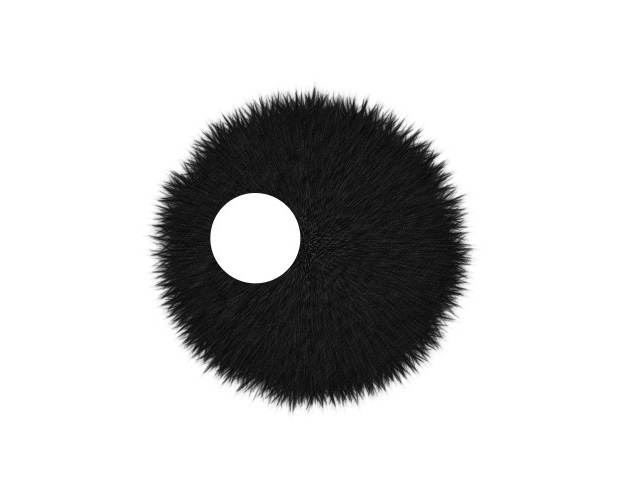
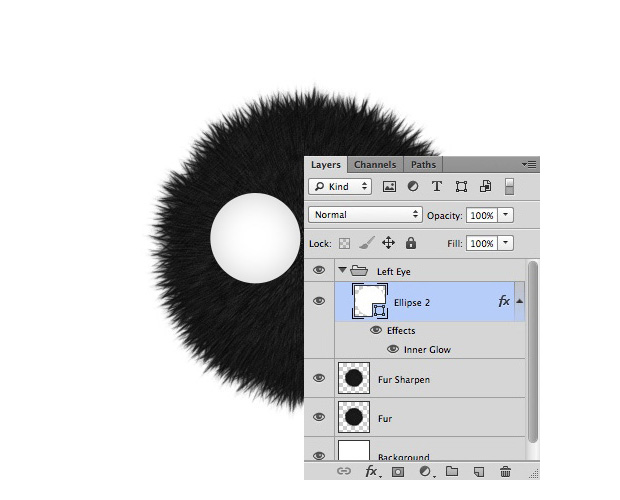
Select the Pen Tool (P), create a grey shadow shape on the left bottom part of the white circle, we’ll need to create a layer mask on this shadow shape, make a selection of the white circle (Ctrl+Left click on the small white circle thumbnail in the layer panel) then create a layer mask, Menu > Layer > Layer Mask > Reveal Selection, change the Fill of this shadow layer to 25% .

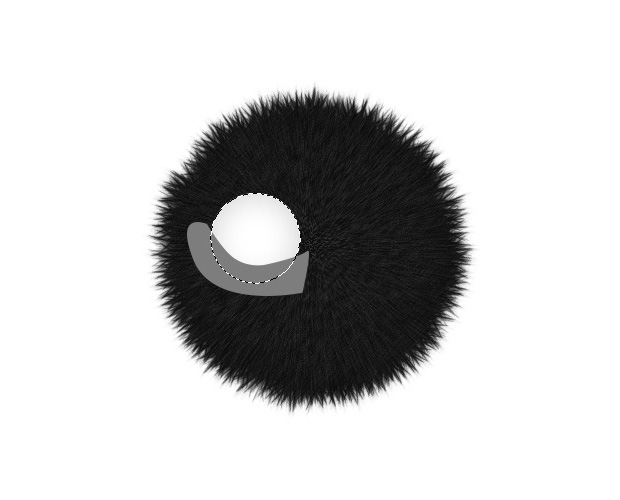

Create a light green small circle in the centre of the eye with Ellipse Tool (U) , create an oval shape with a darker green colour in the centre of this green circle then create a small black circle in the centre of the eye.
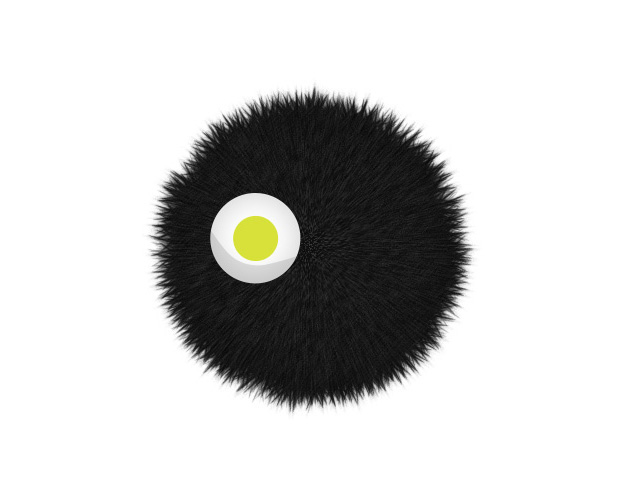


Create two small white circles using the Ellipse Tool , one on the top left and the other on the bottom right of the small black circle.
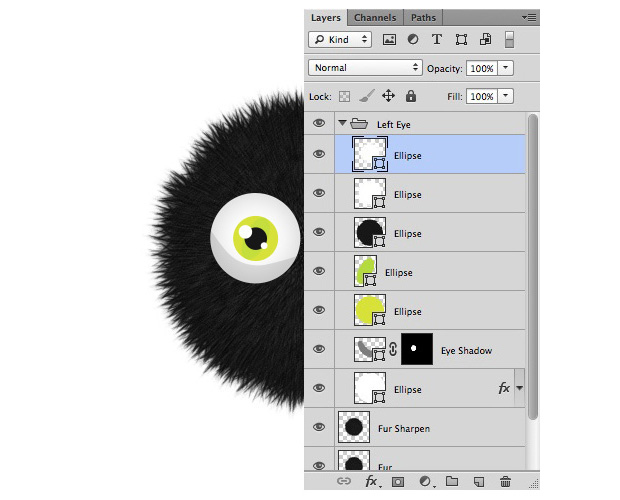
Duplicate the original big white circle we created at the beginning of this step, clear the layer styles for the duplicated layer, place it in front of all the layers, add a Bevel and Emboss layer style to it and change the Fill of this layer to 0% .


Place all the eye layers we created in this step in a new group. rename the group Left Eye, duplicate this group, rename the new one Right Eye and use the Move Tool (V) to place it on the right.

Step 5 – Eyebrows
Select the Pen Tool (P) , create a half circle shape on the top of the left eye, rasterize this shape, Menu > Layer > rasterize > Shape, select the Brush Tool (B) and paint with the Fur brush on the bottom part of the half circle shape with a white colour.

Create a Layer Mask on this layer and with a soft rounded brush erase some parts of the top of the half rounded shape, make sure to paint on the layer mask.

Add a Drop Shadow layer style on this shape with those parameters:
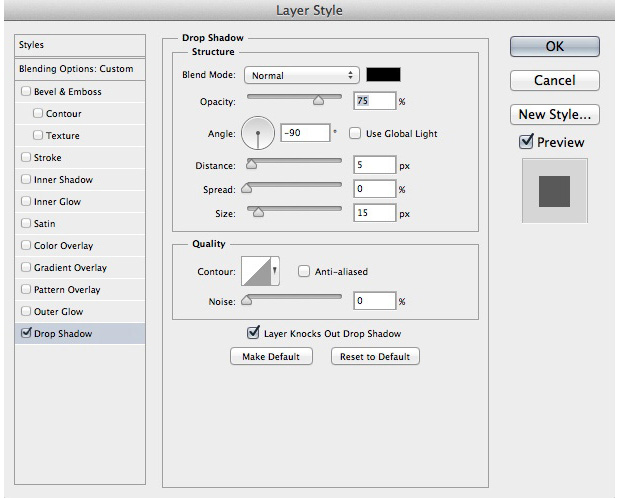

Duplicate the Fur layer, use the Free Transform Tool (Ctrl+T) to resize it has an oval shape, place it in front of the Eyebrow shape, right click on the layer and select Create Clipping Mask . Place all the two layers in a new group named Left Eyebrow
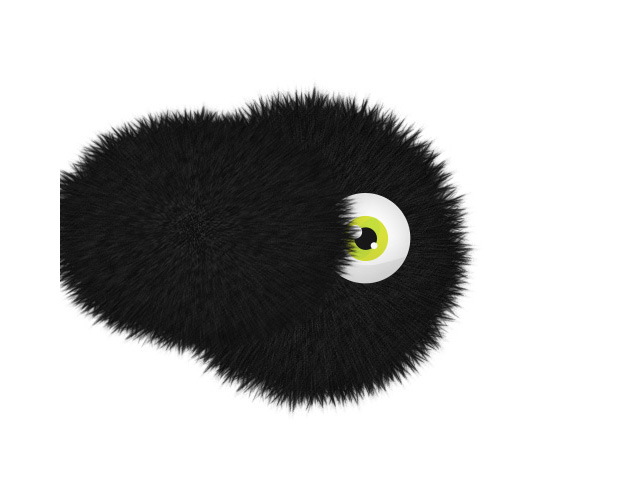

Duplicate the Left Eyebrow group, rename the new group Right Eyebrow, use the Move Tool (V) to place the eyebrow on the right eye.
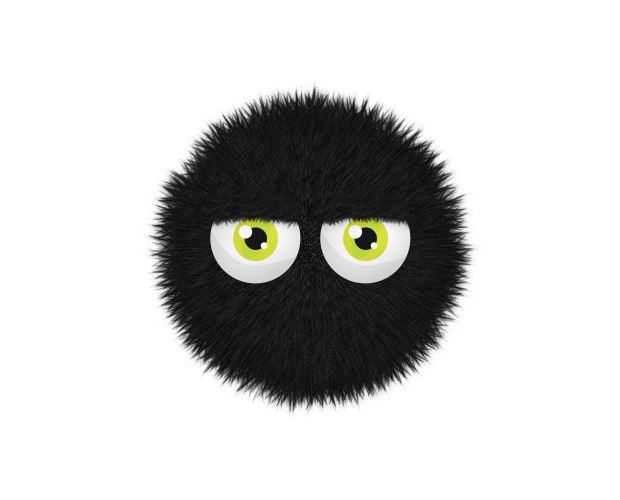

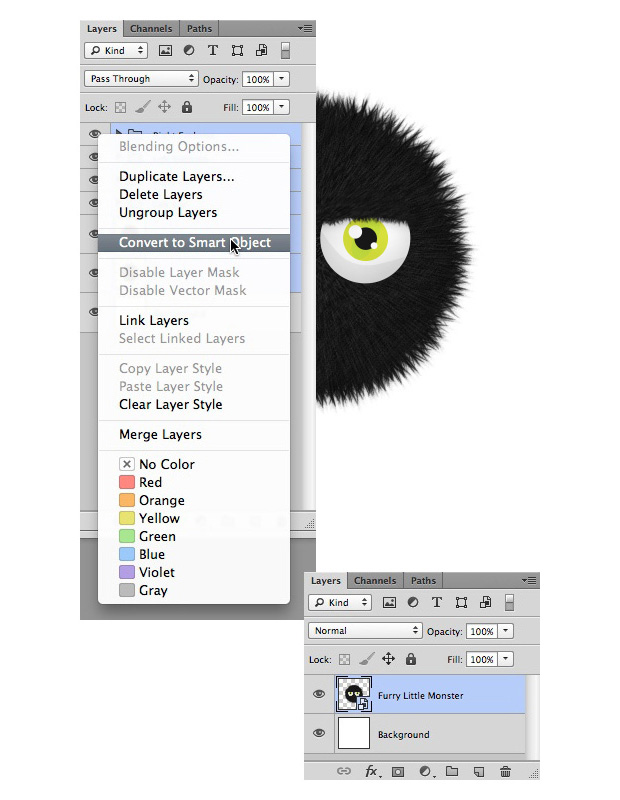
Select all the layers we’ve created from the beginning except the background layer then go to Menu > Layer > Smart Objects > Convert to Smart Object or right click on all the selected layers in the layer panel and select Convert to Smart Object .
Step 6 – Furry Little Monster Wallpaper
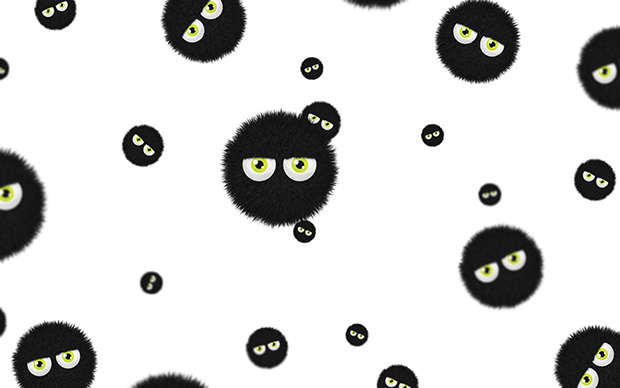
Create a new document document in Photoshop, the size of you screen resolution, mine is 1680x1050px . then drag the Furry Little Monster smart object we just created into the new document and start duplicating, rotating and resizing a few little monsters, place them all over the canvas, place all these in a new group.

Create some more furry little monsters on the whole canvas and place them in an other new group. Place this new group under the first one.
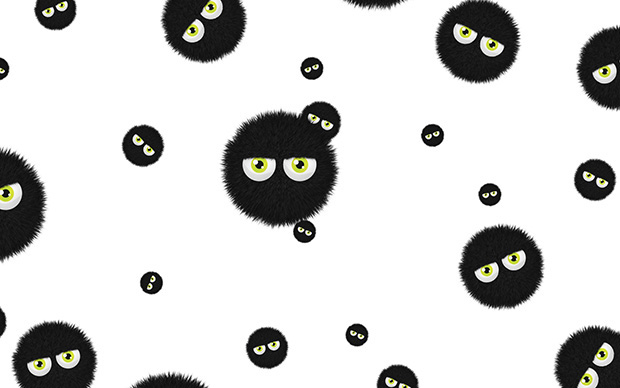
Merge the new group ( right click on the group – Merge Group ) then let’s apply a Blur on those background Furry Little Monsters, go to Menu > Filter > Blur > Iris Blur with a 5px Blur .
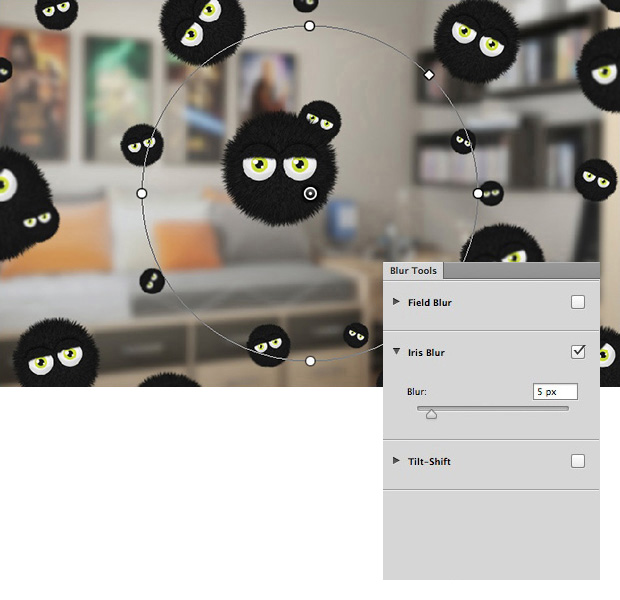
Then add the image you want in the background, I used an image of a bedroom/office. if you want to give the same effect to the background, duplicate your original image, apply a Gaussian Blur Filter to it and change the Blending Mode to Screen . Then duplicate the original image you’ve choose again, place it in front of all the other layers, desaturate it, Menu > Image > Adjustments > Desaturate , add an other Gaussian Blur Filter to it and change the Fill to 15% .

That’s it for this tutorial! I hope you’ve enjoyed and learned a few tricks from this tutorial, you can create different styles of furry little monsters using those brushes and techniques. Feel free to leave a comment if you need help.


