


How to Create a Super Glossy Orb Using Photoshop
In this Awesome Photoshop tutorial, you will learn how to create a super glossy orb. This is a combination of traditional glossy orb technique and new 3D sphere object in Photoshop Extended. Have fun.
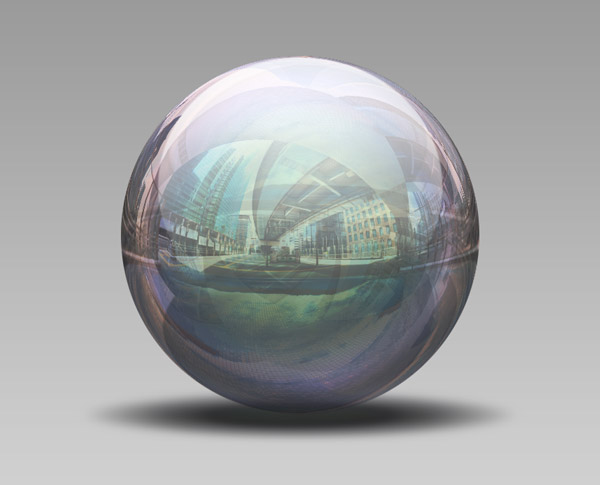
Here’s the Final Image
Before we start lets see the final image we’ll create through out this tutorial.
Create the 3D Sphere
Create a new document which is 900 pixels wide, 900 pixels high and at a resolution of 300 pixels/inch. Fill hte “Background” layer with 50% grey. Create a new layer and name it “Orb”. Fill the layer with 50% grey. Go to 3D > New Shape From Layer > Sphere. .
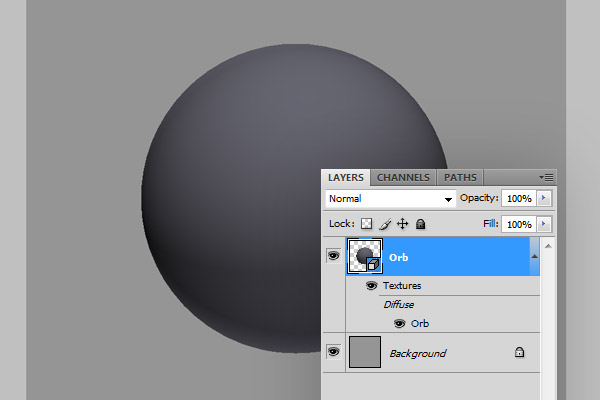
Adjust Material Settings
First you need to download a panoramic environment image. You can download it here. Then go to Window > 3D to bring up the 3D Panel. Select Scene and set Anti-Alias to Best. Then, select Sphere_Material and use these settings Glossiness => 60%, Shininess => 30% and Opacity => 60%. Click the Environment Texture Map Menu Icon and select Load Texture. Choose the file you have just downloaded.

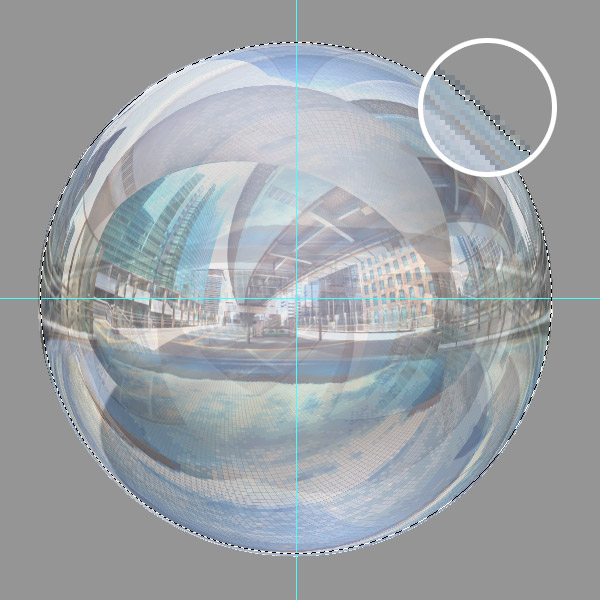
Rasterize 3D
Make sure “Orb” layer is selected in the Layers Palette. Drag one horizontal and one vertcal guide and snap them to the center of the orb. Go to 3D > Rasterize. Now get the Elliptical Marquee Tool. Hold down Alt + Shift and make a circular selection, starting from the center, a few pixels smaller than the orb. Go to Select > Inverse and hit Backspace to clear the selection. Now we have smooth edges.
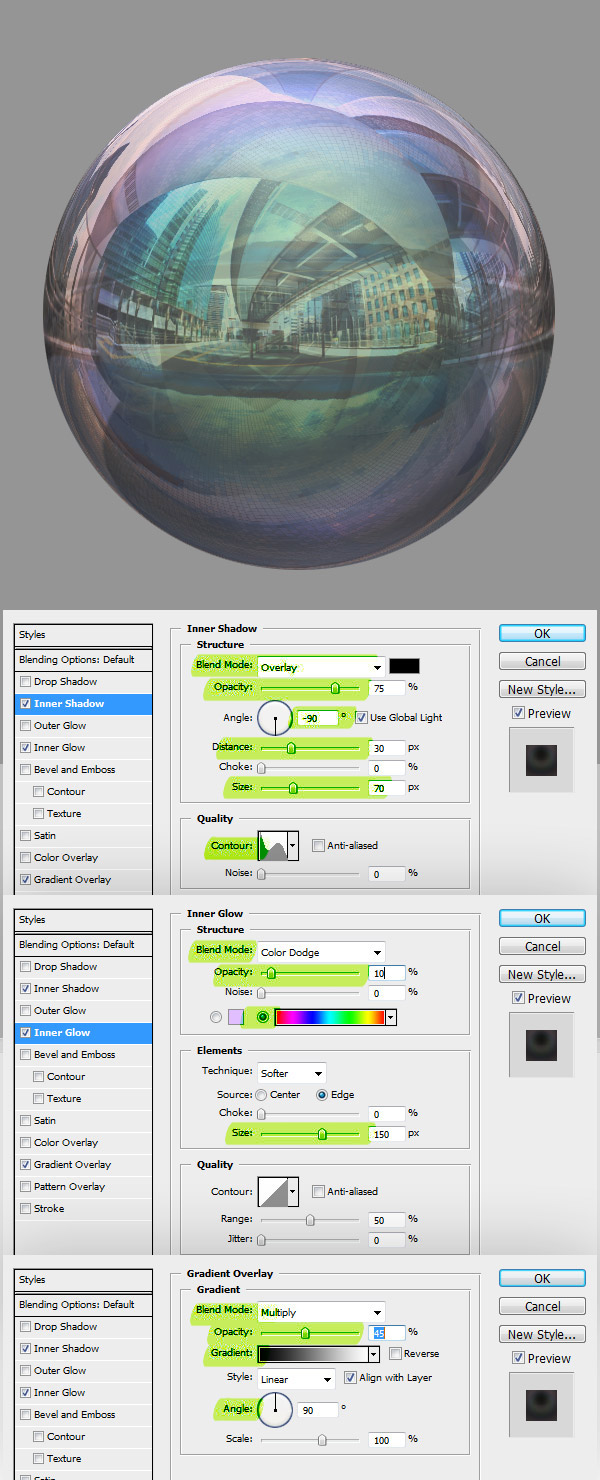
Apply Some Styles
Apply an Inner Shadow to the “Orb” layer and use these settings: Blend Mode => Overlay, Opacity => 75%, Angle => -90, Distance => 30px, Size => 70px, Contour => Rolling Slope – Descending. Now apply an Inner Glow using these settings: Blend Mode => Color Dodge, Opacity => 10%, Color => Rainbow Gradient, Size => 150px. Finally apply a Gradient Overlay and use the following settings: Blend Mode => Multiply, Opacity => 45%, Gradient => Black, White, Angle => 90.
Make the Highlight
Create a new layer on top and name it “Highlight”. Command-click the “Orb” layer thumbnail in the Layers Palette to load the selection, go to Select > Modify > Contract and contract by 2 pixels. Now get the Gradient Tool, set gradient to Foreground to Transparent, make your Foreground Color white. Fill the selection as shown in the below image. Hit Command+D to Deselect.
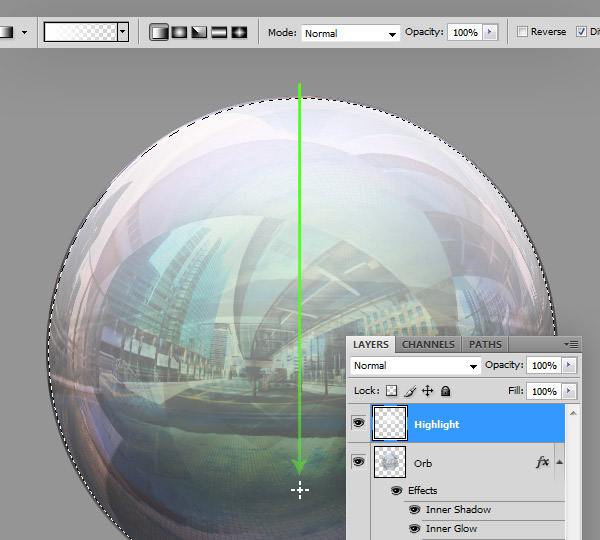
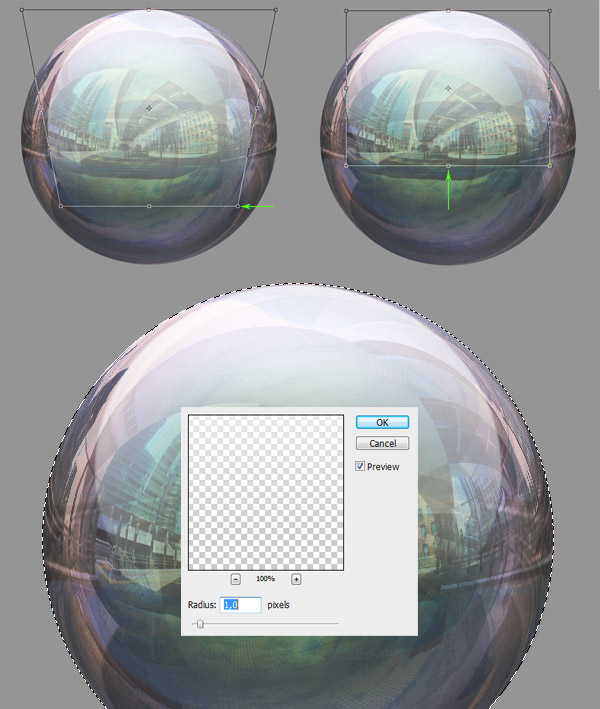
Edit the Highlight
Go to Edit > Transform > Perspective. Move the bottom wright corner to right as in the below image and hit Enter to apply. Then hit Comman+T to enter Free Transform mode, and scale the layer vertically as in the below image. Now Command-click the “Orb” layer thumbnail to load the selection and go to Filter > Blur > Gaussian Blur and apply with a Radius of 1 pixel. Hit Command + D to deselect.
Drop the Shadow
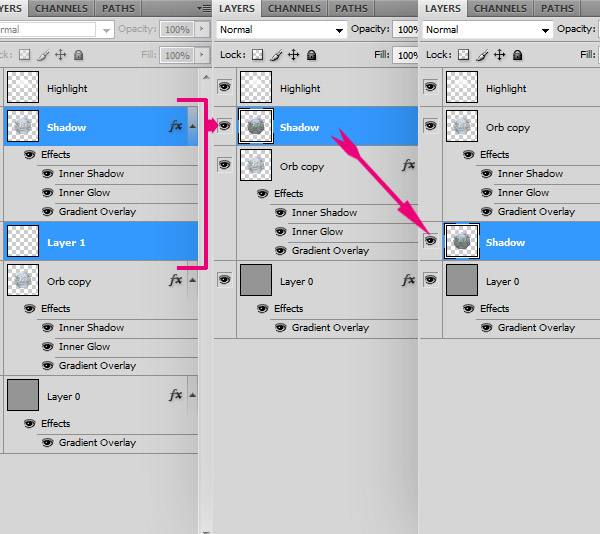
Now we’ll create the shadow. Go to Layers palette and duplicate the “Orb” layer, name the duplicate “Shadow”. Create a new layer below the “Shadow” layer. Select both “Shadow” and “Layer 1” layers and hit Command+E to merge them. Because the “Shadow” layer is above, the merged layer will be names as “Shadow”. Now drag the “Shadow” layer below the “.
Drop the Shadow
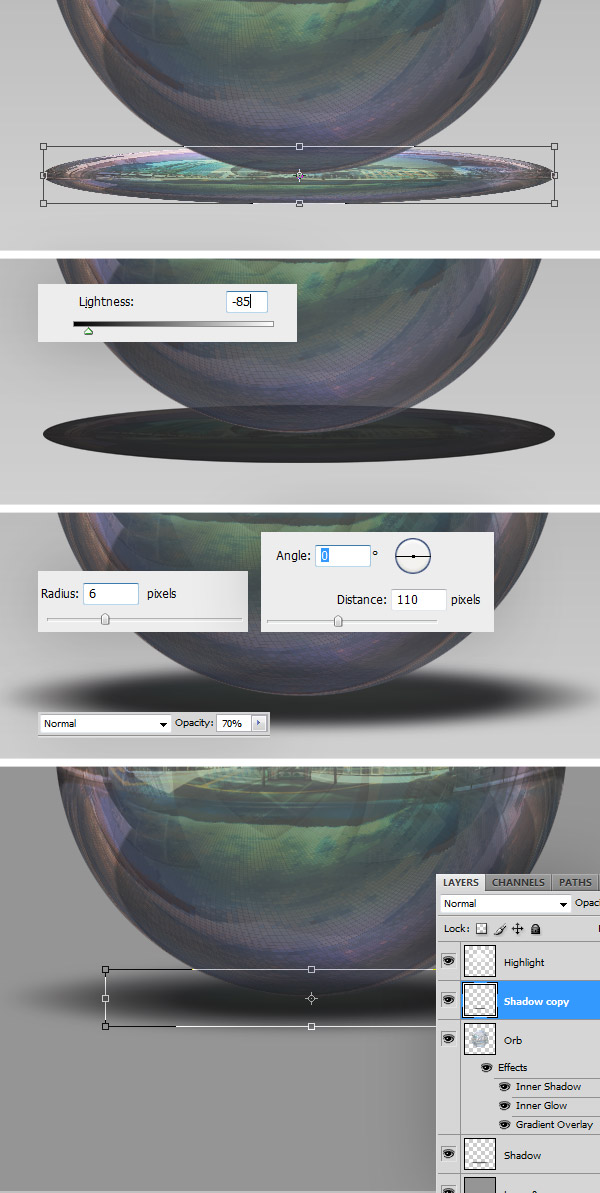
Make sure “Shadow” layer is selected and hit Command+T. Scale it down as in the below image and apply. Hit Command+U ro bring up the Hue/Saturation dialog, set Lightness to -85. Go to Filter > Blur > Gaussian Blur and apply with a Radius of 6 pixels. Go to Filter > Blur > Motion Blur and use these settings: Angle => 0, Distance => 110 pixels . Set the Layer Opacity to 70%. Now duplicate the “Shadow” layer and drag the copy above the “Orb” layer. Hit Command+T and scale it down as in the below image.
Edit the Background
Double click the “Backround” layer and hit OK. No apply a Gradient Overlay and use these settings: Blend Mode => Screen, Opacity => 60%, Gradient => Black, White, Reverse => Checked, Angle => 90.

Congratulations
Well, that’s it. Using different environment maps in step 2 will give you different results. Hope you learned something new and had fun.
That’s A Wrap
That wraps up this tutorial on How to Create a Super Glossy Orb Using Photoshop. Let us know what you think, drop a comment using the form below.


