


Draw a concept car in Illustrator
Today we will show you how to render a car in Illustrator starting with a rough sketch. On a scale of 1 to 5, the level of difficulty of this tutorial is about 2.
1. The Sketch
I used Adobe Illustrator CS3 and it took approximately 4 hours. So be brave and a bit patient and you will have very nice results.
First open your sketch in Illustrator.

2. Wheels
Alwyas start with the wheels, ground and interior of the car.
First draw the wheels, with the elipse tool. Arange them in place, make them bigger if you want,
like I did, to give a more agressive look to this mini car. As you can see I am improvising a bit and I am
not forced to copy exactly my sketch. I kept the position and the angle of the wheels.
Drag the elipse from inside the wheel a bit to the exterior to give the racing look to the wheels.
Do the same with the rear wheel but drag it a little more (perspective reasons).
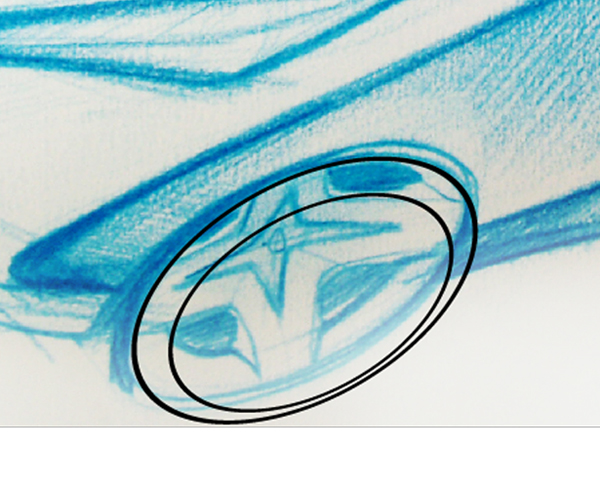
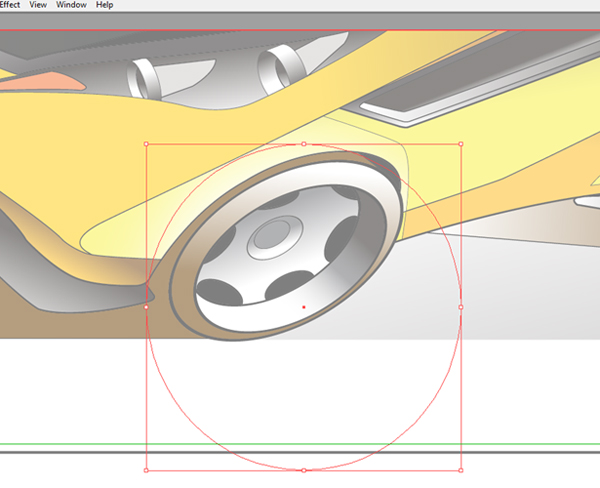
3. The Rims
Now we have to copy and paste the two big elipses and resize them to fit in the center of the wheel.
Position them to look like this and to give depth to the rim. Repeat the process for the rear whell.
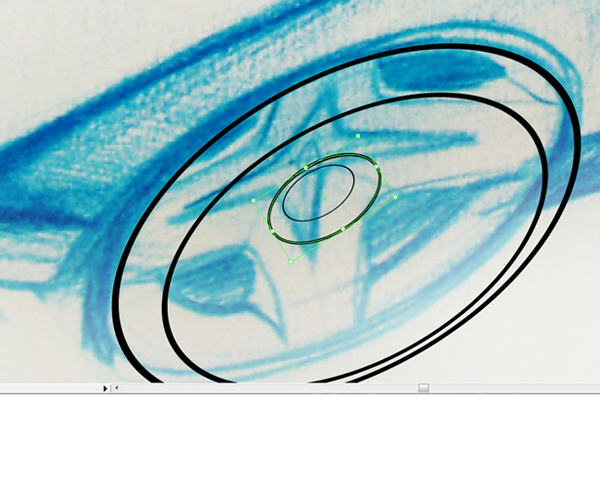
4. Drawing the rest
In this step we have to build the rim. I choose not to stick with the original design.
Duplicate the second ellipse from the tire and push the new ellipse back as shown into the image.
That’s up to you, depending how much depth you want to give to your wheel.
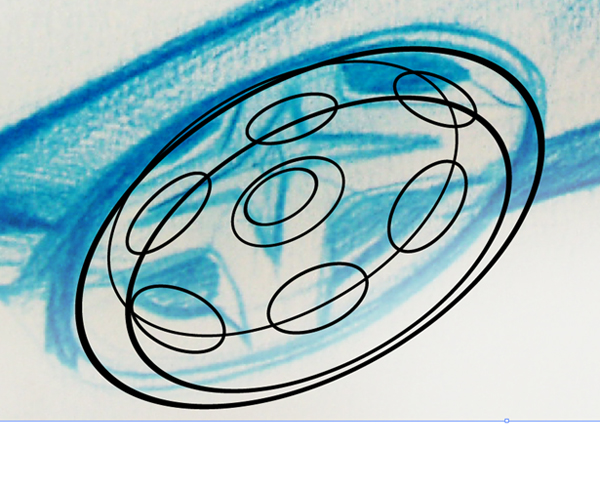
Start making one ellipse, position that ellipse under the center of the rim.
After that, duplicate it keeping ALT key. Move the new ellipse along the rim interior and repeat the process.
Depending of the type of the rime you will resize them and position them.
Now adjust the stroke to all the paths. Let’s say 0,75 pt for the tire and 0,5 pt or less for the rim elements.
After that select all the paths with selection tool and then go to OBJECT/ PATH/ OUTLINE STROKE.
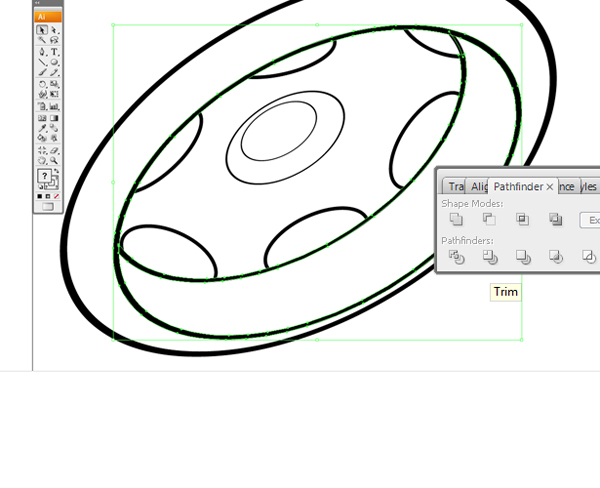
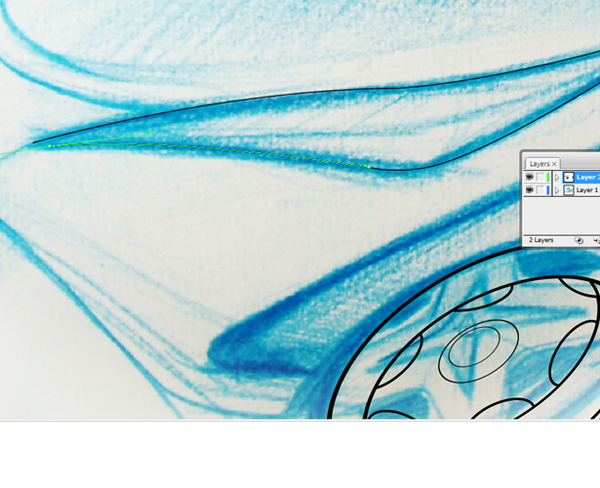
5. Cuting and Triming
It’s about time to turn off the sketch layer, in order to see better what’s going on with your vectors.
Finalize your rim by cutting the unwanted areas: select the small elipse from the tire and the rim elipse
and then go to trim (second option from pathfinders). Right click and then UNGROUP.
Next step is to DELETE the unwanted piece, in our case the one you cannot see.
In the end, after you did the other small elipses, the front wheel will look like this.
Build the rear rim in the same manner. Be sure that after triming,
all your curves and shapes are connected and there is no discontinued paths.
6. Headlights
Turn back on your sketch layer, because now we will start redraw the rest of the car starting with headlights.
Try to use shortcuts, so grab PEN TOOL (P) and start drawing the headlight.
Add only the points you realy need and move them with (A) DIRECT SELECTION TOOL.
Adjust the curves by draging the anchor points pressing ALT key.
Outlining a car in Illustrator it’s a good way to learn how to use PEN TOOL.
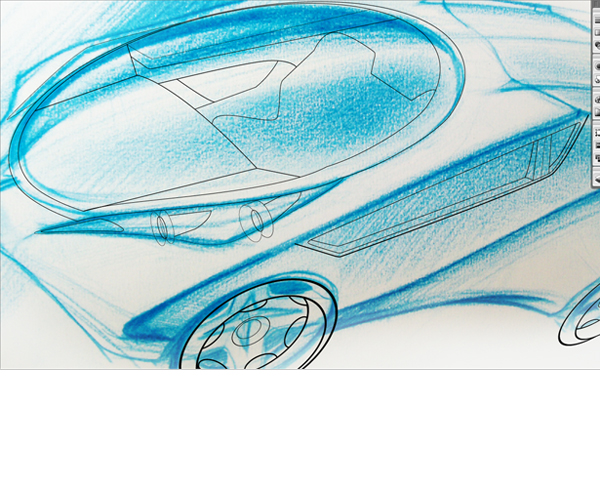
7. Transparent surfaces and interior
Continue with elements inside the headlight and cut the things which you don’t see (use the technique from step 5).
Next step is to draw the windscreen using ellipse tool. Modify the elipse where it merges with the headlight
using PEN TOOL (P) and (A). Then duplicate the modified ellipse and drag it inside. Resize it.
Now build the interior which will be something simple so that in the end we will have just the idea of the interior,
doesn’t have to be some award winning stuff. Do the side window now.
Switch the sketch layer off and on again, from time to time, to have a better look of what you are doing.
Sometimes it could look good with the sketch under but wrong without it.
8. Body
Next is the contour of the car. This will be more visible and powerful.
Set the stroke value to 0,75 pt or 1 pt. This will be the thickest stroke.
Continue with the rest of the lines from the sketch. Try to follow exactly the curves and the lines.
This way you will achieve the sketchy look of the drawing.
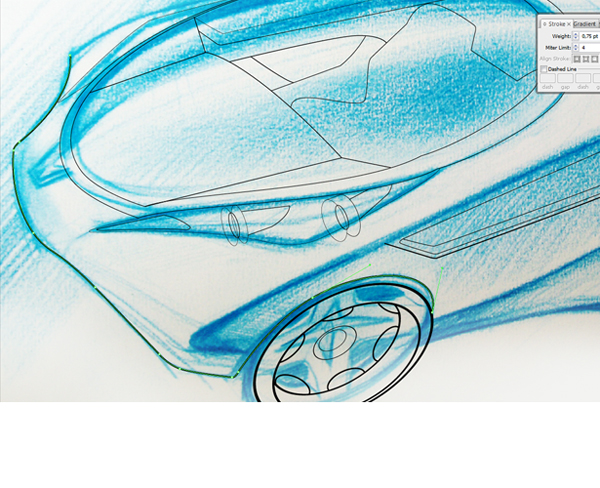
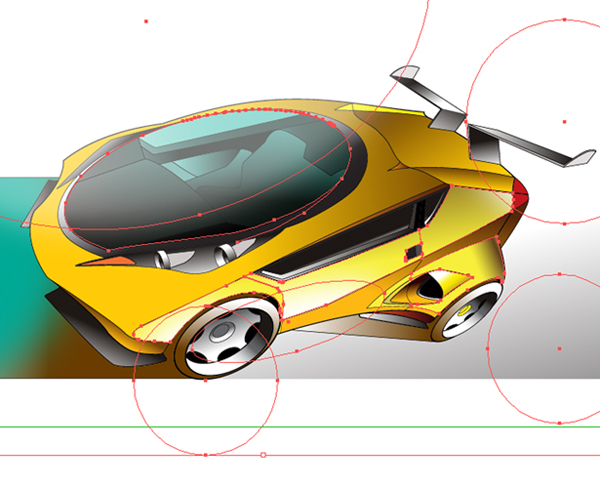
9. Complete the drawing
After you’re done redrawing the sketch you could add some things like the side intake, back eleron or front wings.
At this stage it’s time to do the last adjustments, if any, because once you outline the strokes you will not be able to modify the weight of the stroke. Almost forgot, duplicate your entire artwork like it is before you outline the paths, because you will need some of the shapes later on. Drag it away from your canvas and keep it safe.
So, set the values of the stroke and let’s move on. I also did an outline of a ground shadow.

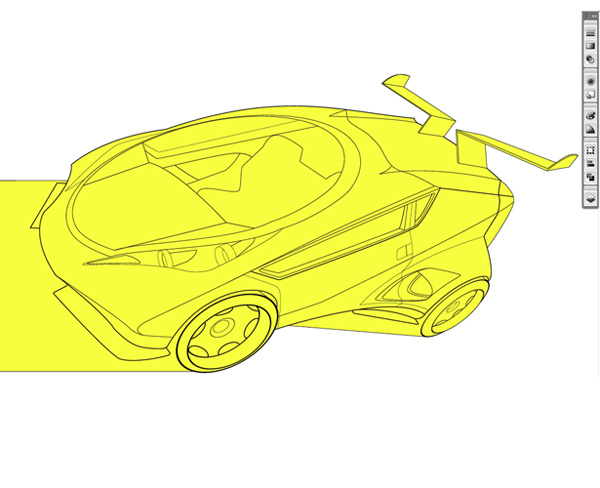
10. Color
Now pick your desired color, in my case yellow.
So start drawing a rectangular around the car, right click on it, choose ARRANGE/ SEND TO BACK.
Now select all you have on your canvas and go to OBJECT/ PATH/ OUTLINE STROKE.
After that right click on the items selected and choose UNGROUP.
Deselect all and just select the outside yellow pieces (you want to keep only the car yellow) and hit DELETE key.
You will end up with this.
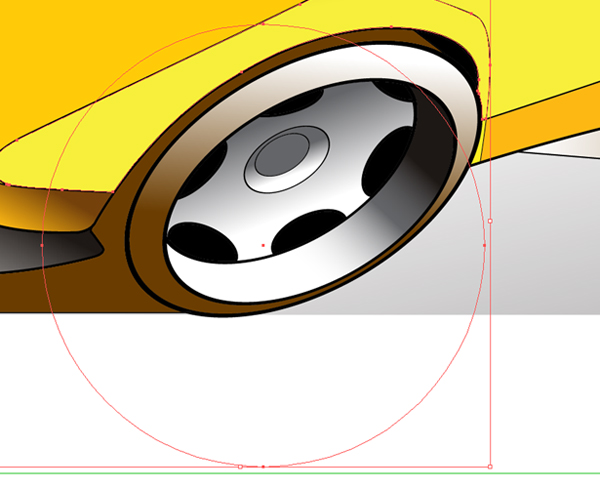
11. Wheels
Again we will start with the wheels. I choose a “pastel brownâ€. You start by going to gradient and set at the right side
of the gradient strip the color you choose. At the left side pick white. Now press G key (that’s for gradient)
and as you see in the image, click and drag the mouse from the left to the right or vice versa, depending what you want to obtain. I choose to have my light source from above, that means I will drag the mouse from left to the right. The gradient will follow and you can play with this in any direction you want until you are satisfied with the result.
For the shadow in the front instead of white I choose a green. To replicate the same gradient to the back wheel
just select the back tire and then choose EYEDROPPER TOOL (i) and click the front tire.
Do the same with the rims, I have chosen middle gray and white.

12. The Small Pieces
We follow the same pattern, first the wheels and the interior, ornaments. One specification on the rims;
be careful drag the gradient in the oppossite direction, the depth of the rim makes the light to fall only down.
Try to be careful to details to achieve maximum result. Use the same grey color for intake, elerons rims,
interior and front wings. Don’t forget about the headlights and door handles.
Always watch out for your light source direction. Add also a ground color in the back of the car.

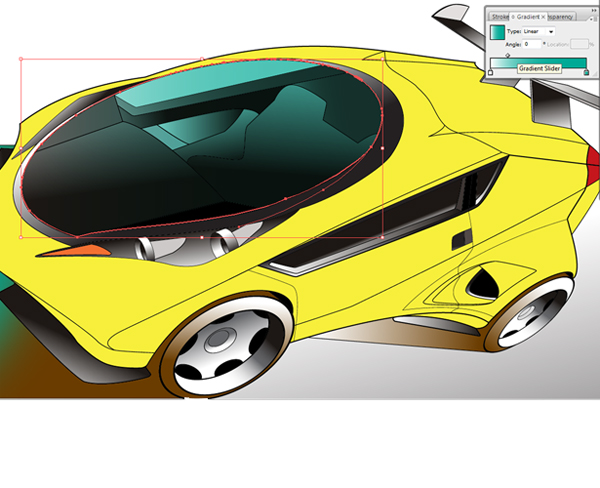
13. Transparent elements
Let’s finalize the windscreen. Remember when I said to copy the entire car and to drag it away from your canvas?
Now it’s time to bring from there the inner elipse from the wind screen, the one selected in the image.
It’s up to you, but I choose green and white like you see in the gradient box. Move the gradient slider from the middle to obtain the desired transition from green to white. Now go to TRANSPARENCY from the gradient box.
Set the transparency to 70 and mode MULTIPLY. Do the same with the side window if you want, I decided to keep it like it is.
14. Gradients on the body
If you picked the yellow color you should know the complementary color it’s violet.
This technique is an easy way to render your car. Start by selecting the shapes as in the image above.
Press CTRL+C keys and then CTRL+F. This will copy and paste in place the selected items.
Apply to these 3 shapes a gradient from violet to white, adjust your gradient.
Go to transparency again and set the mode to MULTIPLY and the opacity to 80 percent.
You will end up with something like this. Do the same with the interior of the vent, front bumber etc.
Again be careful to the vent, it’s the same story like the rims.
Drag your gradient vertical to have the light in the right direction.

15. Surfaces
On this plane the light will drop directly. Notice that I selected and colored all 3 parts at once in order to have
a smooth and continuous gradient. Use the same CTRL+C keys and CTRL+F keys to paste in place the duplicated shapes.
Apply the same gradient as the previous one but drag it from left to the right.
Set the mode to MULTIPLY and the opacity to 50 percent.

16.Shadows
Using the same technique as in the previous steps apply the gradients to the remaining shapes.
Be careful with directions, continue what you started. In addition to white and violet you could add more colors
on the same gradient by dragging the desired color to the gradient box, and place it in the place you want it to be,let’s say between white and black. I did not use more then 2 colors, but just in case you want to try.
At this stage you are pretty ready, (although you could take it further) now you just have to spice it a little bit,
because is looking a bit soft.

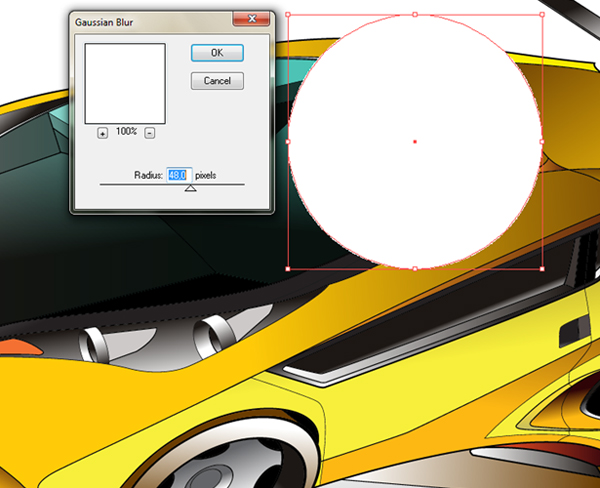
17. Lights
Let’s start by doing circle filled with white.
With the shape selected go to EFFECT/ BLUR/ GAUSSIAN BLUR and set the value to 48 pixels.
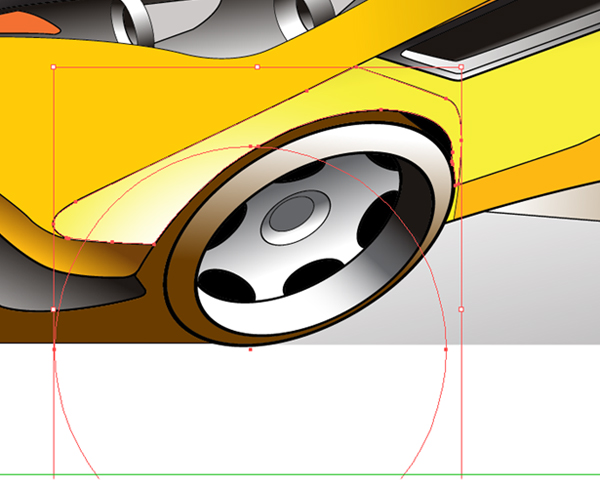
18. Wheels again
What you want to do now is to highlight some areas of the car with white circles with gaussian blur applied.
We start with the rear wing and we want to drop some light on it matching the tire light.
So you place the circle in position, RIGHT CLICK/ ARRANGE/ SEND TO BACK.
If you don’t have a duplicate of the rear wing make it now and paste it in place.
Remember the circle has to be under the wing.
19. Using white
With both shapes selected press CTRL+7 keys. The white will apear only on the wing.
20. Adjustments
If you are not satisfied with the position double click on the circle and the hole image will look like this.
Now you can move, resize and place the circle wherever you want. To get out double click outside the artwork.
Later on after you will apply more of this “lights†you will have difficulties to reach some shapes
because this lights will keep pop up whenever you click.
In order to get rid of them but not the effect press CTRL+2 keys. To bring them back press CTRL+ALT+2 keys.
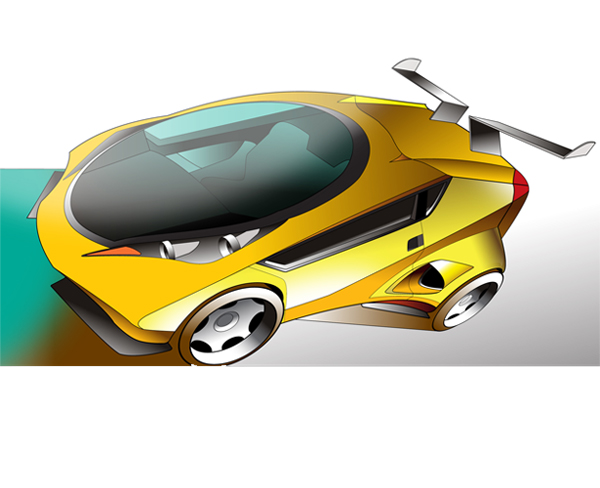
21. Finish
I applied 4 more of these lights with the same steps. It is not necessary to have circles, it could be any shape as long it fits your purpose.
22. Take a step back
Finally this is what you should get after 4-5 hours of work. Of course it could be better, depending how much time you will spend. Hope this is helping and good luck to everyone. Thanks!


