


Stand Alone Photomanipulation
Another photomanipulation tutorial from TutsPs, this time called stand alone. In this tutorial you’ll learn how to create a dark and creepy effect by blending various images together and adjusting several settings with adobe photoshop.
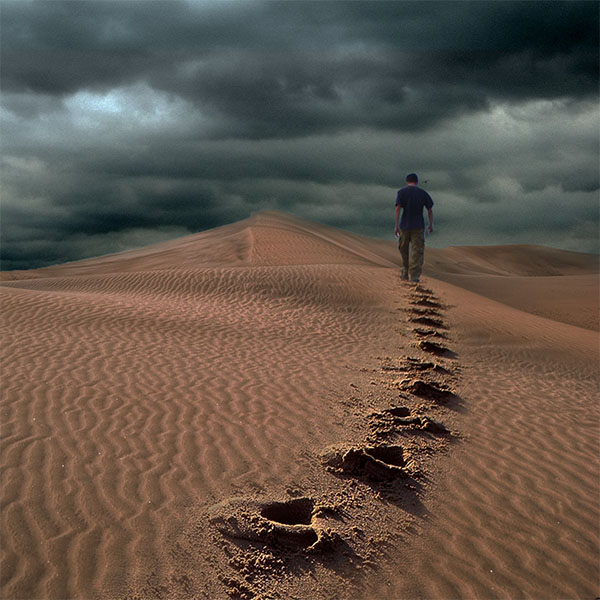
Finished Preview

Stock Used
Desert
Footprints
Man
Cross
Texture
Sky
Step 1 – Preparing background
Open a new document of 1500×2200 pixel

In this step we will try to blend the sky and desert together.
First, open the picture with desert and drag it to your canvas, so we can add some sky.

Now open the photo of sky and drag it into the desert picture.

Good.
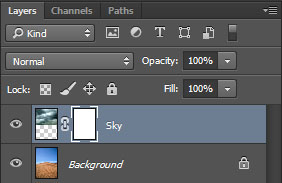
We have to blend them together. Click on the “sky” layer and add vector mask

You can find it on the same palette as you have your layers. If you don´t see the Layers palette just click F7 on your keyboard.
Click on the vector mask like so;
 .
.
Press B on your keyboard (it chooses the brush tool). Choose a soft round brush and pick a solid Grey color. Now start painting on the areas of the sky you want to have hidden.
Don´t worry about changing the brush size and color, just do it as much as you need to.
TIP : If you choose black color it is similar like if you use eraser tool with 100% opacity. White color means 0% opacity. The advantage of using vector mask instead of the eraser tool is that you can reverse every step you don´t like. You just simply start painting with white brush over the areas which you want to have visible again.
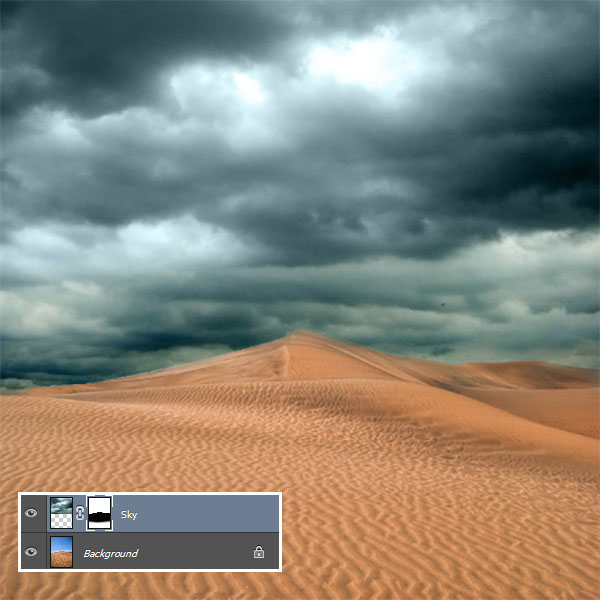
After you finished this step your manipulation should look like this:
Step 2 – Adding footprints
Now It’s time to add footprints. Open the picture with them and drag them into the manipulation.
We have to blend them with the desert. So we will use the vector mask again.

As you can see it is far away from being well blended. We have to do them darker and change color.
First we’ll add an adjustment layer

You can find in on the right side of the Add vector mask button. Choose Brightness and Contrast and set the values in the same way as on the picture below:


We want it to effect only the layer with footprints, not the whole picture. Because of that right click on the adjustment layer and choose Create clipping mask .
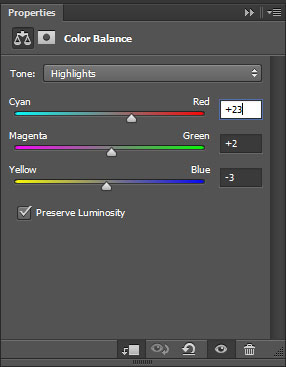
Now we will change the colors of the footprints. Add adjustment layer Color Balance and set it as I did:


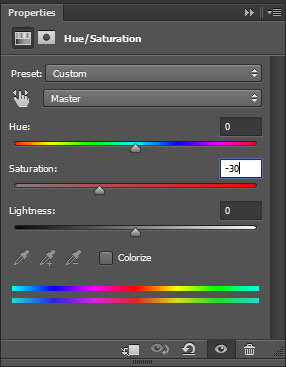
The last think we will change is saturation. Add adjustment layer Hue and Saturation and set it like on the picture bellow.

Step 3 – Adding a man
In this step we will add the silhouette of the man.
Open the photo with man. Zoom on 200% press L (= Lasso Tool) and very carefully select the man. Do it as well as possible. If you crop the image bad the whole manipulation will never look realistic.

Now press V (= Move Tool) and drag the selected man into the manipulation.

Now we will do the silhouette. It is very simple step. We only change the curves. Add adjustment layer Curves and set them similar to the picture bellow:

After this step the manipulation should look like this:
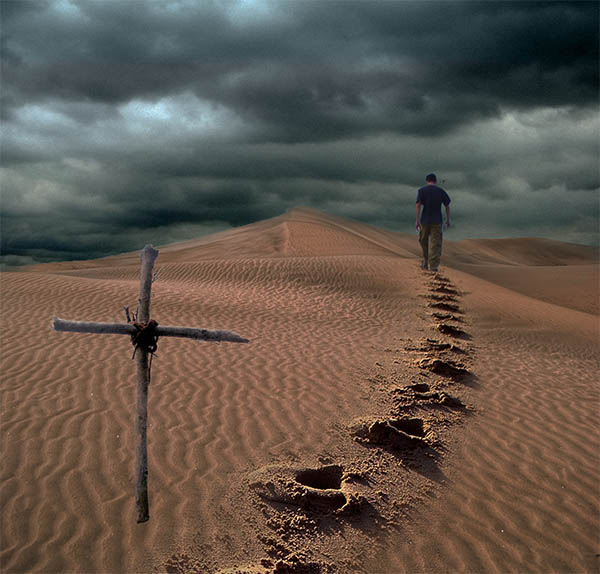
Step 4 – Adding a cross
Cross is the last element we have to add. Open the photo, press L (= Lasso Tool) and select the cross. Be very careful again. we want our manipulation to look realistic. When you´re done drag the cross into the photo manipulation.

Because we want the tutorial to look realistic we will add some sand around the cross. Select some parts of the footprints, copy them and past above the layer with cross. Choose something like these parts:

Now add layer mask and blend them together in the same way how we blended the background. After that you have something like this:

Now we will change colors and brightness of the cross.
Add Adjustment Layer Color Balance and set it on these values:
Midtones: 0, 0, -47
Shadows: 0, 0, +26


Don´t forget to create a Clipping mask. If you do forget it will change the whole manipulation.
Add Adjustment Layer Curves and set it like on the picture bellow:
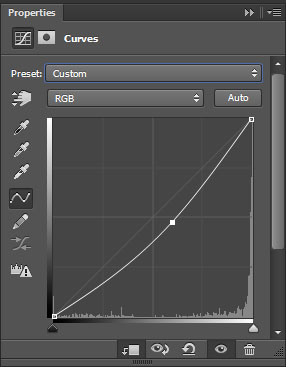

Create Clipping mask too!
TIP: If you don´t know how to create clipping mask read this small tip. Clipping mask is a very useful thing if you want to effect only a certain layer and not the whole manipulation.
Right click on the layer which you want to have like clipping mask. Now select the option Create Clipping Mask .
Be sure that the layer from which you want to do clipping mask is above the layer which you want to affect.
Great! We are almost done. One last and probably the best step left.
Now add a drop shadow to the cross, to do that, add a new layer, take the brush tools and paint a lines like that

Step 5 – Final Touch
In this step we will set the final mood of the manipulation.
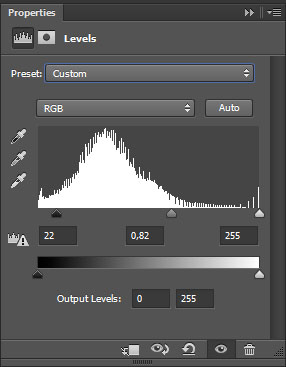
At first add Adjustment Layer Levels on the top of your layers and set it like this:

Add adjustment layer Color lookup


Now add some grunge texture

and set the blending option on Overlay and opacity on 62%.

Very well. Now we change two last things.
Add adjustment layer Brightness and Contrast and increase contrast on the value +10 . Press OK. And now add adjustment layer Hue/Saturation and lower the saturation on -30.


That’s all. Now you can add some small details if you wish. I added some flying bird on the background, some fog and also some grass on the cross.
Final Preview


