Create a Surreal Apocalypse Photomanipulation
One of the most popular subjects for photomanipulation is creating apocalyptic, destructive scenes. The narrative for such scenes is often easier to create using images, and the themes for apocalyptic art have been well established, while still retaining the freedom to explore and expand the style.
In this Photoshop tutorial , you’ll learn how to create a surreal photomanipulation , and then add a touch of apocalyptic destruction to it. You’ll see how to balance colors, integrate stock images, and also how to create realistic looking smoke trails.
Enjoy!
Tools used :
- Adobe photoshop
- Various stock images
- Wacom Tablet
Final Image Preview:

Step one: Background setup
To start off we need the background, a nice cloud scene is preferred but you can use whatever you like. An example is the below image.
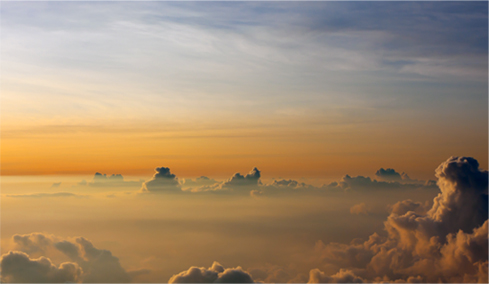
Once you have your stock image its time to identify the light source. My light source comes from the left side of the screen. So to enhance this I created a black to white gradient and set it to overlay at 35%. Yours might not come from the left thought, so take a peak at your scene and decided which direction your gradient should be emerging from and then create!
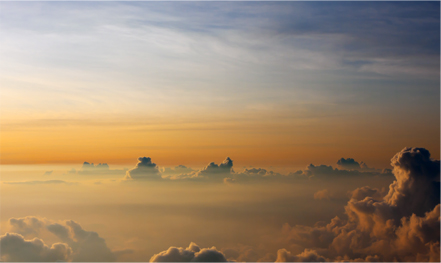
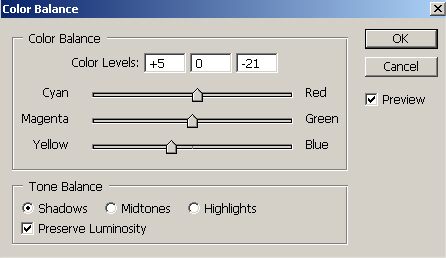
Now we need to adjust the colors for our scene. To do this we will create a color balance layer, I prefer using color balance layers like this because of their ease to adjust. You will find the color balance layer style under Layers > new> Adjustment layers> Color Balance. Once you have created the layer you will get the same old color balance dialog you are so used to seeing. So, set yours up as mine is in the next few screen shots or adjust it to better fit your scene.


My clouds now look like the below screen shot.
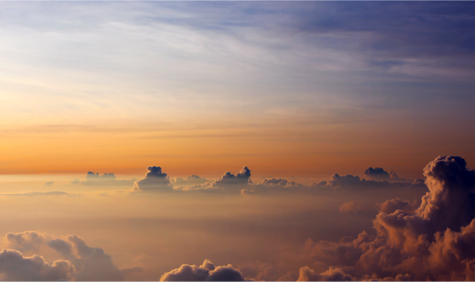
Now we need to add even more color! So create a new layer and fill it with a light purple. Set this new layer up as an overlay at 50%. Keep in mind that these are the percentages and color balance adjustments for my background, if you are using another one you may need to play around with the colors a bit!

Now continuing on with the theme lets make another color balance layer, this time however we will just adjust the shadows. Once that is done we can create a photo filter layer, which like the color balance layers, are hidden away in the adjustment layers drop down. Set both of these up as mine are in the below screen shot.
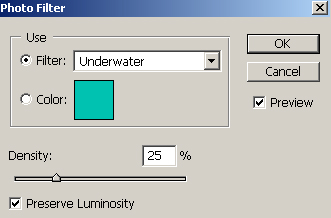
My scene now looks like the below screenshot.

Now lets make another photo filter layer! This time set the layer up as an color layer at 45% opacity.


Step 2: Making Orbs
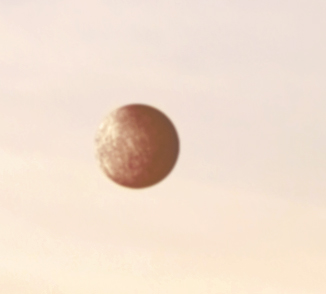
Now its time to get started on the creation of our orbs, for those of you who are fimilar with past tutorials this will be very simple. To create the orbs you will need a base texture, any old stone or concrete texture will do. I got mine from CGtextures and suggest you start your search there as well. Once you have your texture making a perfect circle using your elliptical marquee and erase everything outside of the circle. Once that is done just burn one side up nice so it appears as If its shadowed.


Next make a selection around your orb and apply a sphererize filter, which can be found under filters > distort. Leave it at 100% both vertical and horizontal. Next just drop it into your scene directly above the background layer, so it is under all the color adjustment layers.

Now using a soft eraser (300px soft edged) with an opacity of about 35% erase the bottom of your orb slightly so it appears as if its in the clouds. You could also apply a layer mask and do this if you like.

Now just repeat the process and create a few more orbs. Place them all over the place, be sure to blur the distant orbs and reduce their opacity so it appears as if they are in the horizon amongst the clouds.

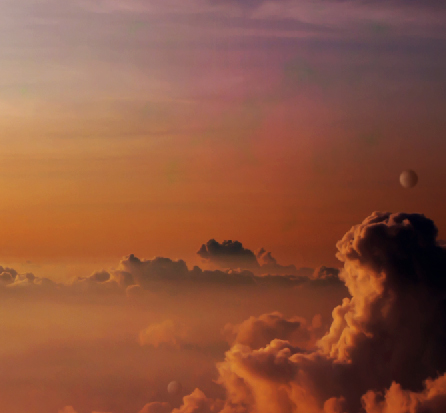
Step 3: People
Now lets add in some people, to do this is very simple but it might take a few tweaks to get them to look right.
So to start off with find yourself a nice picture of someone sitting, I went with one from shutter stock but you can get them from Deviantart and Sxc alike.
Now you want to isolate out your figure, and drop it in to your scene right on top of the orb. You may need to burn/dodge the sides of your figure to match the lighting of your scene, if you do, remember to make a backup of the isolated stock! You don’t want to have to go isolating all over again!
Once you have dropped them in you may also need to apply some quick color corrections as I did, if you do remember to create a color balance layer and mask out everything but the figure! Also keep in mind that the below color balances are for my figures and my scene, yours more than likely will need to be tweaked slightly but don’t worry experimentation is key to success!
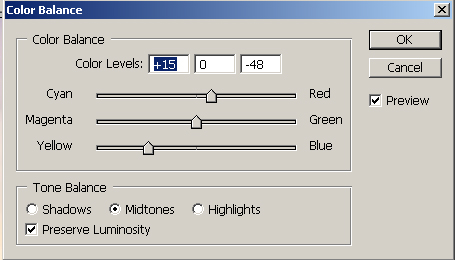


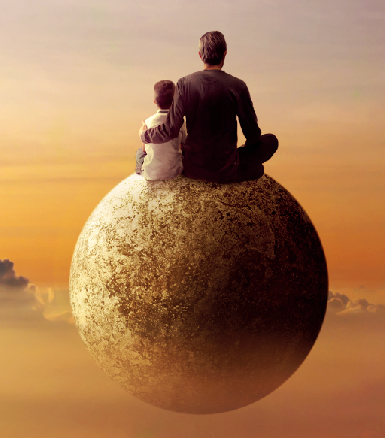
Now we will stop working on the figures for a slight second, the scene whilst being wonderful, slightly bothers me. To correct this I created a new layer and drew some big lines of color. Blue for the highest point, pink for the middle section and yellow for the bottom. Once this was done I applied a Gaussian blur with a radius of 250px twice and set the layer up as overlay at %. This is not required but it was bothering me and why not just give it a try, you might like the end result!


Now back on to our figures, they look great but there is something wrong with them as they are… They need a shadow! So create a new layer under the figures but over the orb and draw some shadows on with your feathered brush of choice. My brush setup was : 25px, 0% hardness and opacity of 40%.

Now its time to add in some more figures for our distant orbs, so keep doing the above process with new stock images from sites like sxc and deviantart. Keep in mind when doing this, if the orb is at 40% opacity and blurred, then the figure needs to be as well! You could also just paint these since they will be blurred and have a reduced opacity, I painted about half of mine.

My scene now looks like the below screen shot.

Step 4: God’s Wrath?
Now its time to create the next focal point for our piece, that is of course the meteors. To start off we will need a base rock, I got mine from shutter stock and it looks like the below screen shot, however you can find rocks ALL OVER the net and if you don’t find one you like you can always whip one up in 3ds, vue, Bryce etc…

Next we need a base smoke trail, something that as is, looks like a smoke trail. What’s better than an actual smoke trail? So if you cant find yourself a smoke trail like the below image from shutter stock, you can use the cloud brush we used in our previous tutorials to paint one or you can use a combination of clouds and smoke stock images.
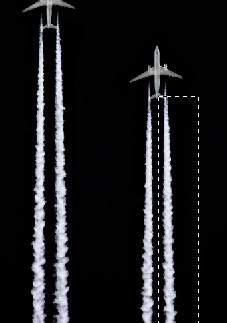

In the case of my base, I inverted it and placed it into the scene along with my rock.

Now its time to get to the nitty gritty part. So lets start off by grabbing a nice soft brush on a new layer, leave your brush’s opacity low, something like 40/50% should work great.

Now paint some highlight clouds and darker clouds as I have done in the below screenshot, keep in mind that you want them to flow and wave as if they are real clouds. If you are having trouble with this step a cloud stock image or the cloud brush we created previously should work just fine.
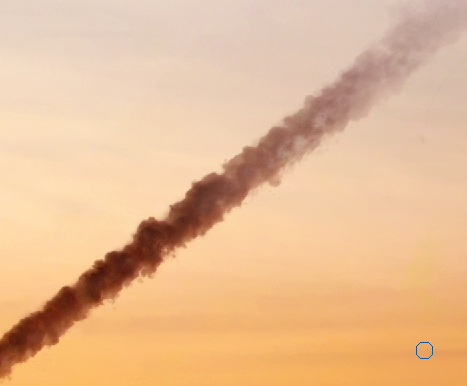
Next with our brush still transparent we can switch to a grungy brush, something that can help aid in the creation of particles flying about.

Now drop a few of these brush strokes down in random spots so it seems as if they are breaking away from the meteor. You can also blur these (or smudge them as I did) for a more dramatic result.

Now using the same brush you can swap between white and black and part debris over the previously created clouds. Once you have done that use your smudge brush (200px 0% hardness pressure of 15%) and smudge these along the cloud/smoke trail.

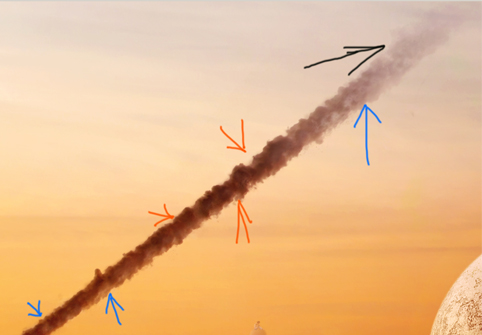
Now for final touches. This is where you can blend everything together, add in more depth (shadows and highlights) and make the entire thing seem to flow in to one cohesive segment. Sadly there is no rhyme or reason to this step, it depends upon your skill level and your meteor. Just keep playing with it until you achieve something you like. The below image shows my approach to it, the orange being the darkened areas, blue being highlights and black being where I blurred to achieve a feathered result.
Now this is where we take our meteors to the next level! So we start off by grabbing a stock image of an explosion, like the below image from shutter stock. And then dropping it into our scene, masking out the section we want (the part covering the asteroid and about 15% of our tail) and then setting the blending mode to screen.


Now lets repeat the entire process but this time lets make it something closer to the screen, the piece needs some depth anyway. So start off with the smoke trail, be sure to blur it! I blurred my close trail using the Gaussian blur filter with a radius of about 9px.
Now we drop in our explosion, mask it out and set it up.
Be sure to blur this with the same blur you used for the trail!

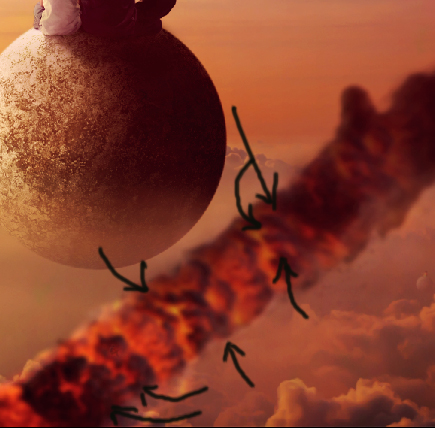
Now taking a closer look I felt like the closer meteor needed some umph, so to help this I created a new layer above the screen layer and painted with a dull red/black combination using the soft brush we used previously. All I really did here was darken up certain sections and adding in slight contrast. You don’t have to do this step but I would suggest it if you are not satisfied with the way the piece looks as of now.
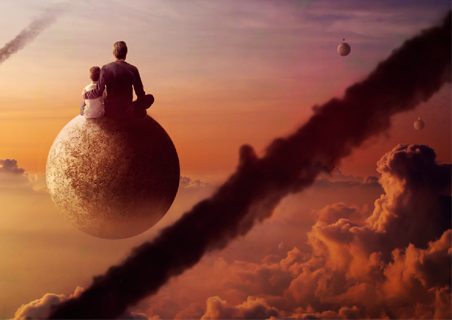
Now we can do this a few more times and put these out in the distance, which means, like our orbs they need to have a low opacity. Keep in mind when doing this that if your smoke/asteroid combo has an opacity of 40% then your screen layer should be the same!


And now we are done! My scene now looks like the below screenshot, I finished the piece off by creating a few layers above everything and painting over certain aspects to get them the way I really wanted them to look. You could do the same, leave it as is or even add in more dynamic elements like a aircraft exploding!
I hope you enjoyed reading my tutorial and learned a thing or two! Don’t hesitate to drop a question or comment below!


