Create a Typography Wallpaper with 9 Different Text Effects Styles in Photoshop
In this new Tutorial part of the Text effect Tutorials, we’ll learn how to create a Typography Wallpaper with 9 Different Text Effects Styles in Photoshop . we’ll use a lot of different Layer Styles, Layer Masks, Textures and a few Filters.
Resources Needed for this Tutorial:
– Metal Texture 4 by wojtar-stock
– Big Textures 08 by Ransie3
– Paper Texture by For-Certain
– Free Dots on Canvas Cartoon Photoshop Patterns
Final Image Preview
Step 1 – Background and Textures
Open up Photoshop and create a new document, mine is 2560x1440px (my screen resolution). In this step we’ll add 3 cool textures to create the background, before that fill the background layer with black, Edit – Fill – Black .
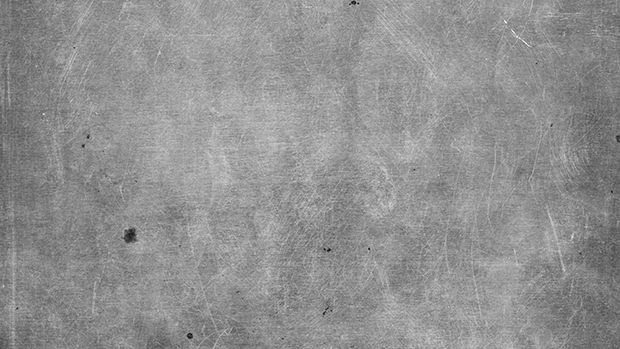
Next download the 3 textures, you can find the links to download them in the Resources Needed section at the top of the tutorial, we’ll start with the Metal Texture 4 by wojtar-stock . Open it in photoshop and drag it into our document, use the Free Transform Tool (Cmd+T) to resize it. Change the Fill of this texture layer to 25% .
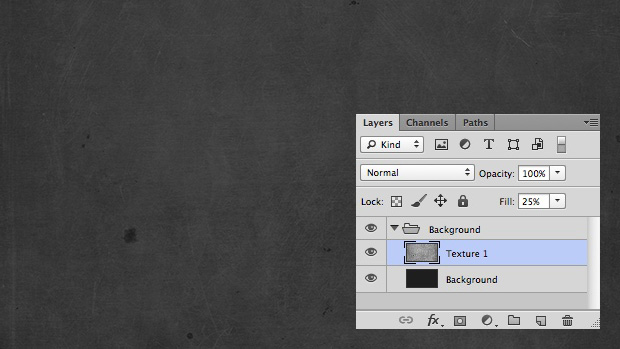
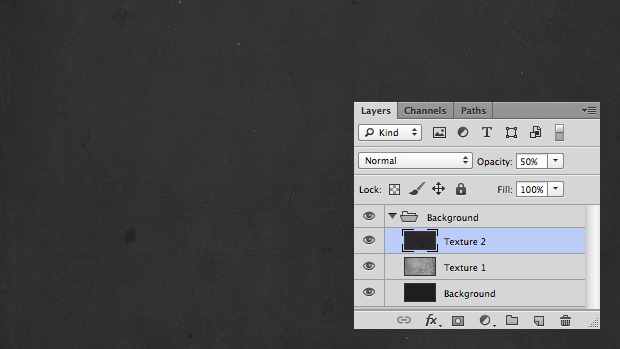
Next we’ll use the Textures by Ransie3 , Open it in photoshop and drag it into our document, use the Free Transform Tool (Cmd+T) to resize it. Change the Opacity of this texture layer to 50% .

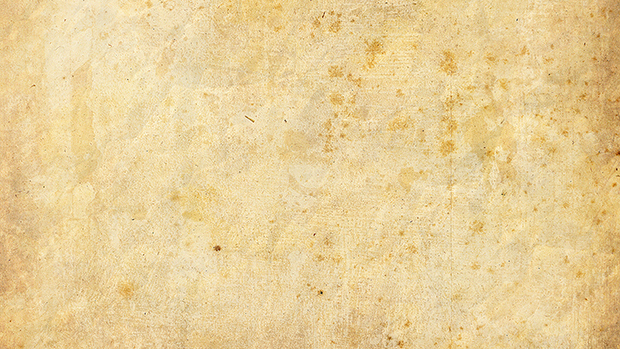
To finish the background, we’ll use the Paper Texture by For-Certain , Open it in photoshop and drag it into our document, use the Free Transform Tool (Cmd+T) to resize it. Change the Fill of this texture layer to 25% and Blending Mode to Multiply .

Step 2 – Text and Shapes
Now we have a nice textured background, let’s create the letters before adding some text effects. for the typo, I used a font called “ Code Pro ” and wrote “TYPOGRAPHY”, select the Text Tool (T) and create the letters, make sure to create one letter per layer, it will be easier to work on each letter. Place those text layers in a new group.

We’ll now Vectorize those text layers, so it can be easy to modify the shapes of the letters if you want. Select all the Text layers in the Layers Panel and go to Type – Convert to Shape .
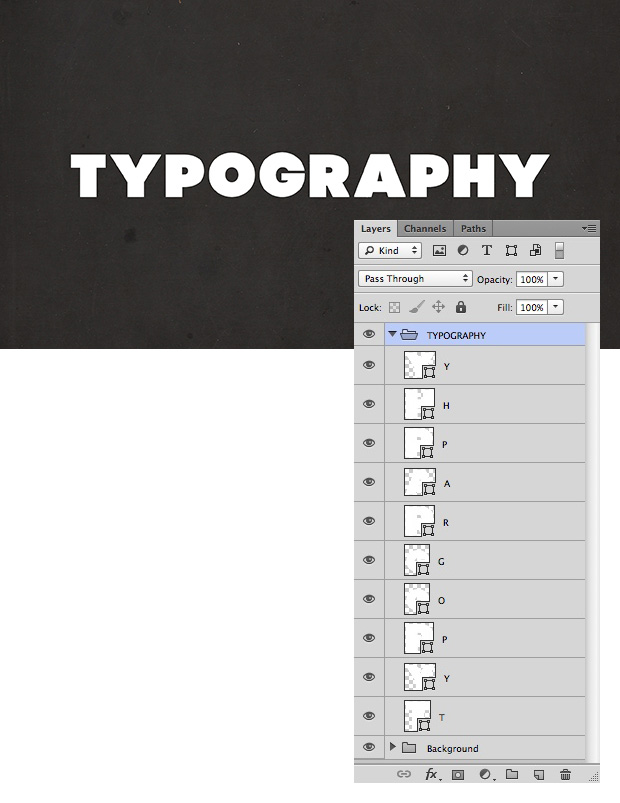
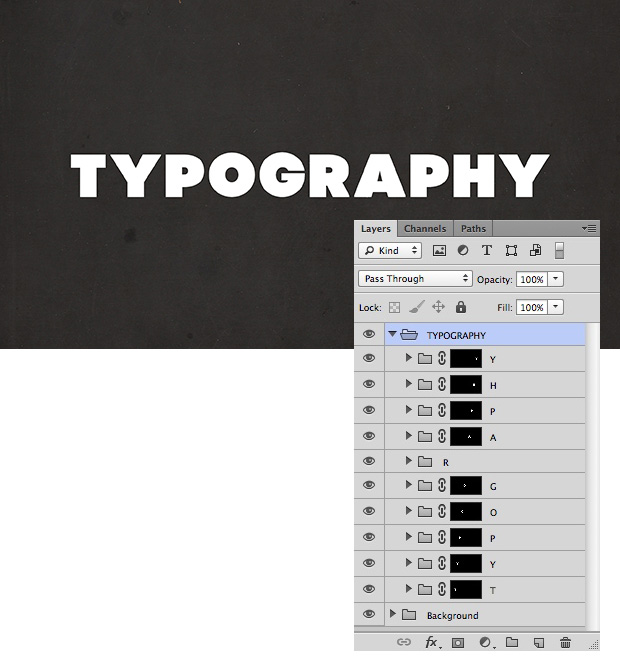
Place each letters in a new group, one letter per group.

Let’s create a Layer Mask on each of those groups with the selection of the letters. For the “ T “, select the shape layer, Cmd+left click on the thumbnail in the layer panel then select the “ T ” group, go to Layer – Layer Mask – Reveal Selection . Repeat the same process for the other groups except on the “ R ” group.
Step 3 – T – Bevel Effect
Now we have the background and the letters let’s add some cool text effects on each letters. let’s start with the “ T “.

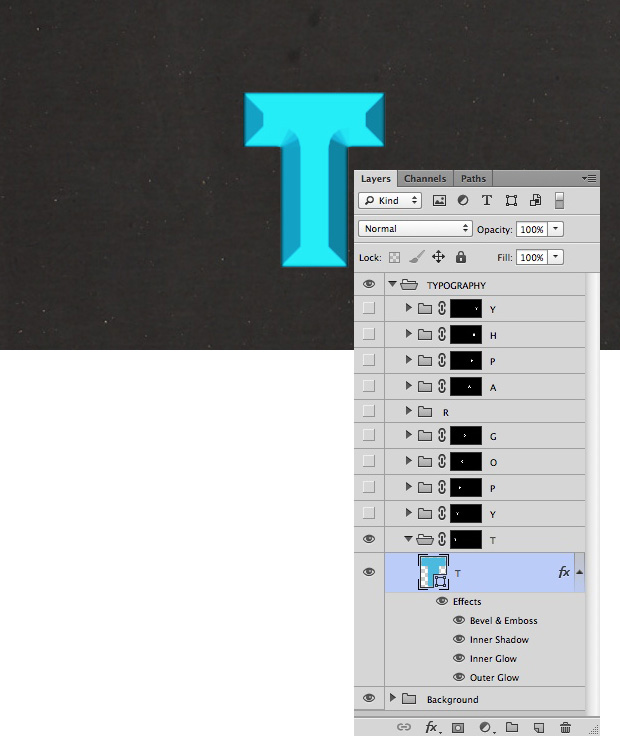
Change the color of the T to a blue color, #15b8e0 , to do this double click on the thumbnail of the T shape layer in the layers panel.

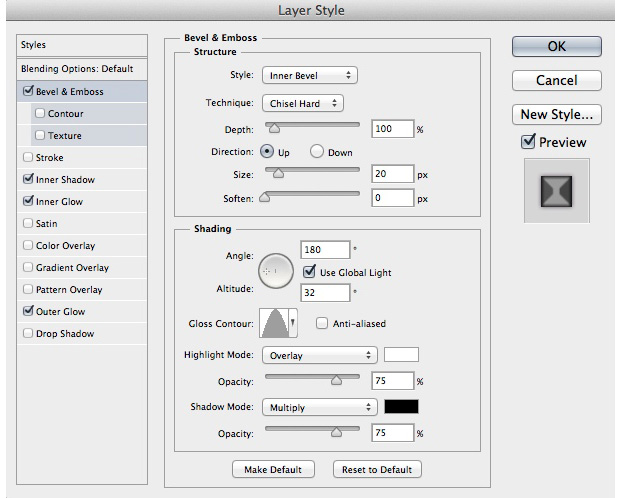
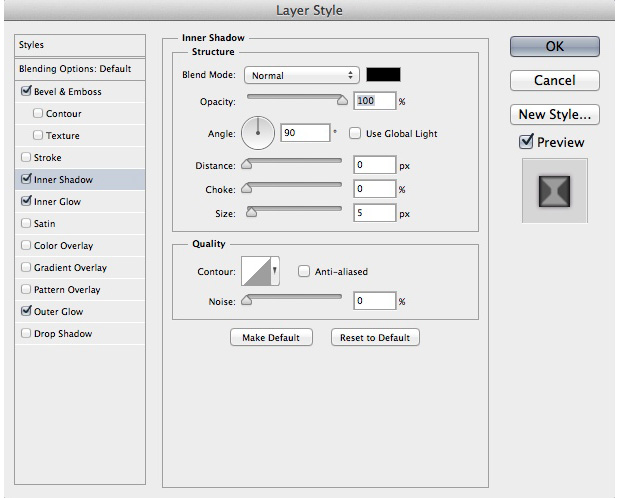
Add those Layer Styles on this shape layer to complete the effect.


Step 4 – Y – Pink Candy Effect
For the first Y we’ll create a nice pink candy effect, select the Y shape layer and add those Layer Styles on it.


Step 5 – P – Stripes and Strokes
For the first P we’ll create a nice stripes and strokes effect, I changed the color of the letter to a dark blue, #40bfb4 .


Next we’ll have to create the stripes pattern using basic shapes, create a new 100x100px document.

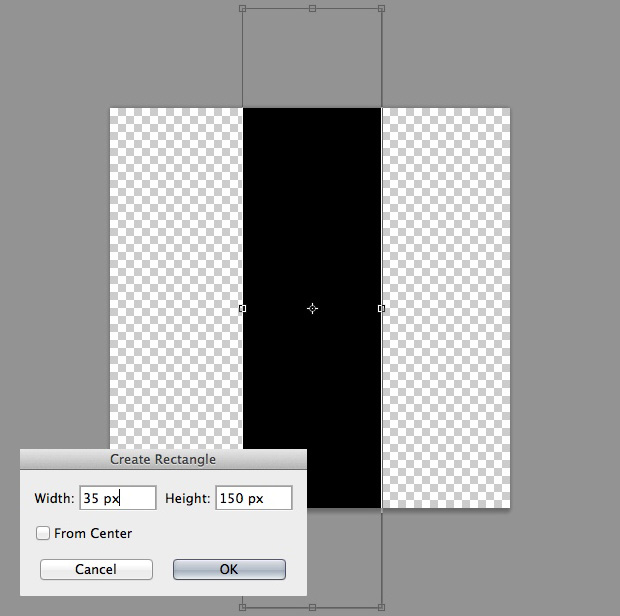
Select the Rectangle Tool (U) and create a 35x150px rectangle like below (the rectangle is bigger than the canvas because we’re going to rotate it.)
Use the Free Transform Tool (Cmd+T) to rotate this rectangle shape 45° .

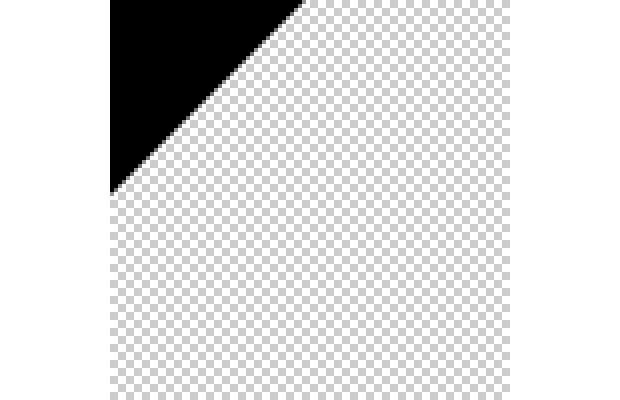
Place this shape of the top left corner of the canvas like below:
Duplicate the shape and place the duplicated shape like below:

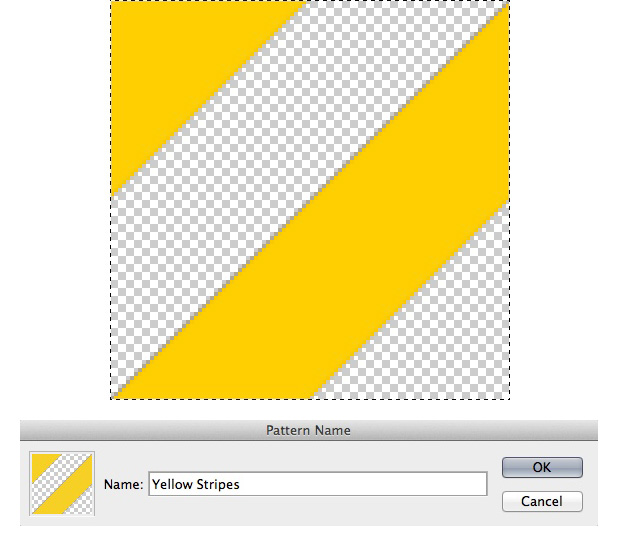
I change the colors of the two stripes to yellow, #F7D026 , let’s now save this pattern so we can use it on the letters, select the whole canvas, Select – All then go to Edit – Define Pattern , rename it and click ok (make sure to delete or hide the background layer before saving the pattern).
Deselect the canvas, duplicate the two shapes, hide the original ones, rotate the two duplicated shapes 90° using the Free Transform Tool (Cmd +T) , place them like below and repeat the same process to save this pattern. You can download those two pattern in the Source Files.

Save this file and go back to the wallpaper file.
Create a new layer on top of the P shape layer, fill it with white, Edit – Fill – White and change its Fill to 0% . Add a Pattern Overlay Layer Style with the first pattern we created and those parameters:


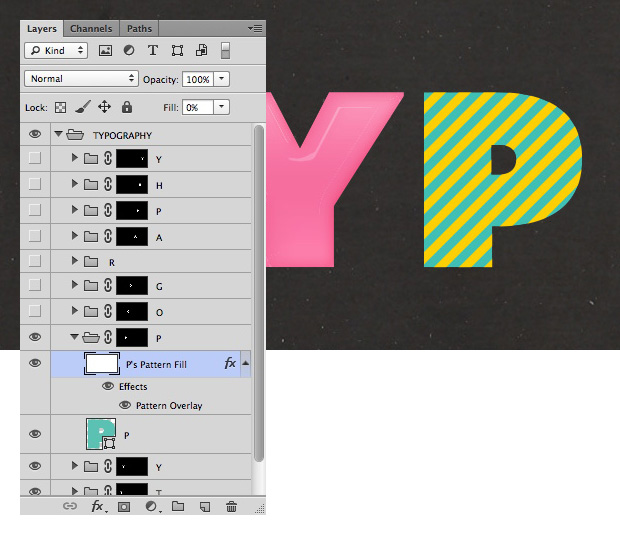
Duplicate the P shape layer, place the duplicate layer on top of the others, change it’s Fill to 0% and add those Layer Styles on it.


Step 6 – O – Metallic Effect
For the O we’ll create a metallic effect with a few layer styles and filters. Duplicate the O shape layer twice, hide the duplicated layers we’ll use them layer in this step. Add a Gradient Overlay Layer Style of the original O shape layer with grey and white colors:
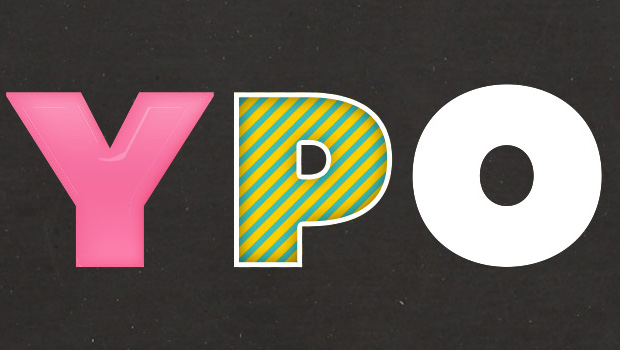


Unhide the first duplicate O layer, use the Free Transform Tool (Cmd+T) to downsize it to 80% and change its Fill to 0% .

Add those Layer Styles on this duplicated downsized O shape.
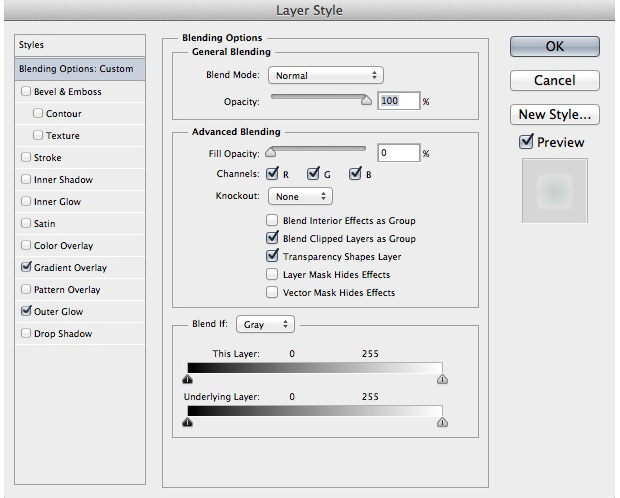
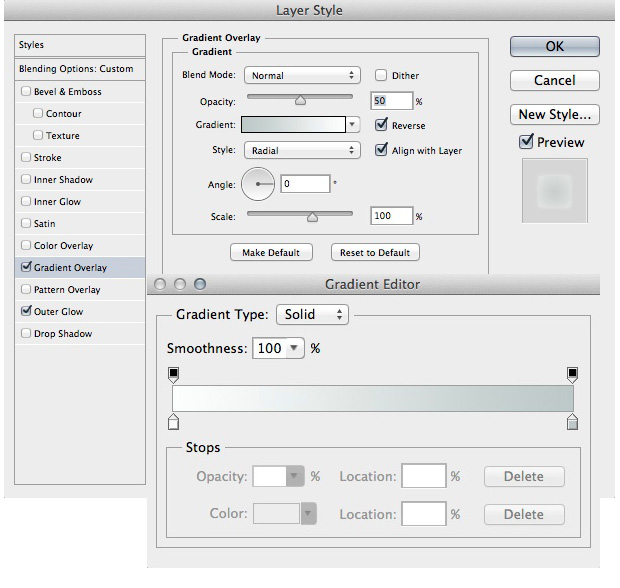

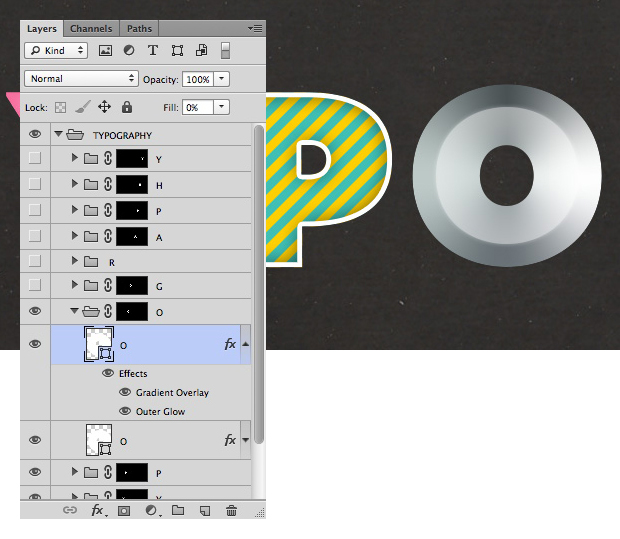
Unhide the second duplicated O layer, use the Free Transform Tool (Cmd+T) to also downsize it to 80% . Add those Layer Styles on it:


Select the three O shapes layers, duplicate them and merge the 3 duplicated layers. Apply a Motion Blur filter on this merged layer, Filter – Blur – Motion Blur with a 60° Angle and 500px Distance .

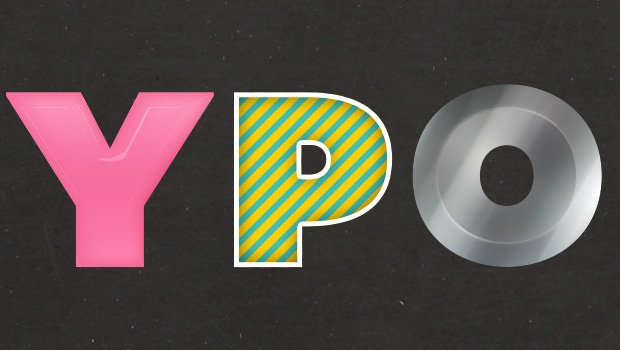
Change the Blending Mode of this merged layer to Soft Light .

Duplicate the merged layer, change the Blending Mode of this duplicated layer to Normal , place it in a new group, change the Blending Mode of this group to Color Dodge and its Fill to 25% .
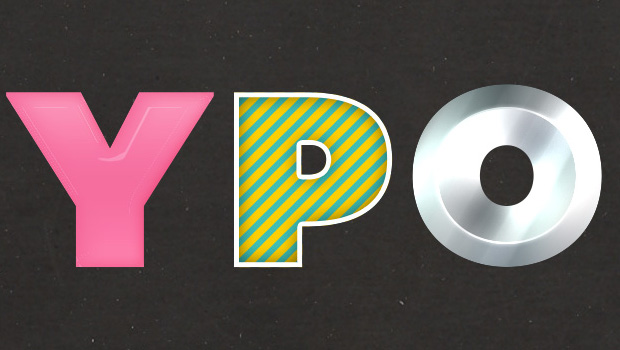

Create a new layer, Fill it with white, Edit – Fill – White , Add some Noise on this layer, Filter – Noise – Add Noise with an Amount of 25% .


Change the Fill of this layer to 15% and its Blending Mode to Color Dodge .

Step 7 – G – Liquid Glowing Effect
For the G we’ll create a cool liquid glowing effect with a few layer styles and shapes.
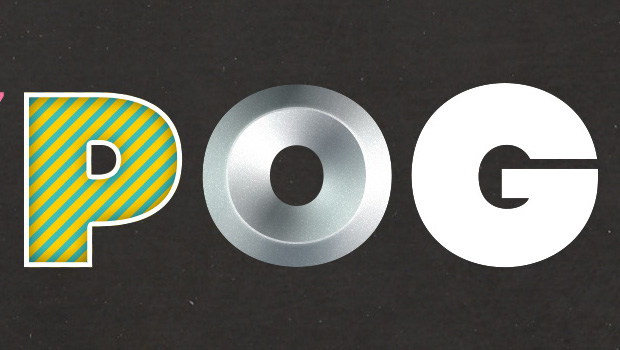
Duplicate the G shape layer twice, hide the duplicated G shapes layers we’ll use them after, go back on the original G shape layer, change its Fill to 0% and add those Layer Styles on it:

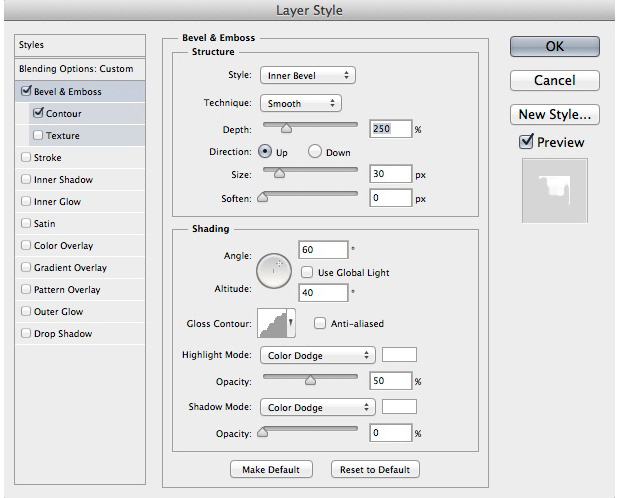
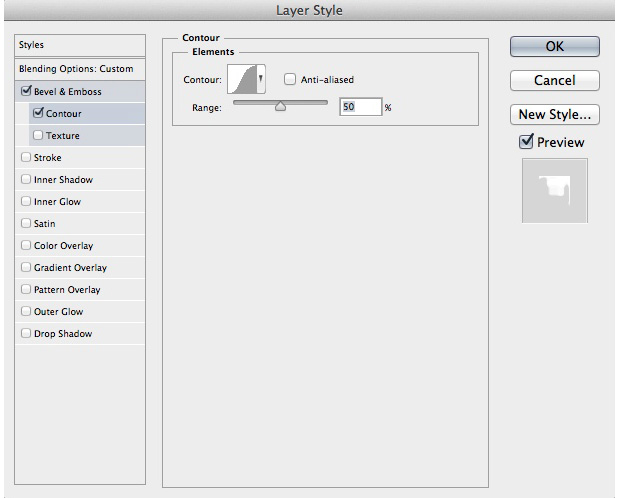

Unhide the first duplicated G shape layer, change its Fill to 0% and Opacity to 20% then add those Layer Styles on it.


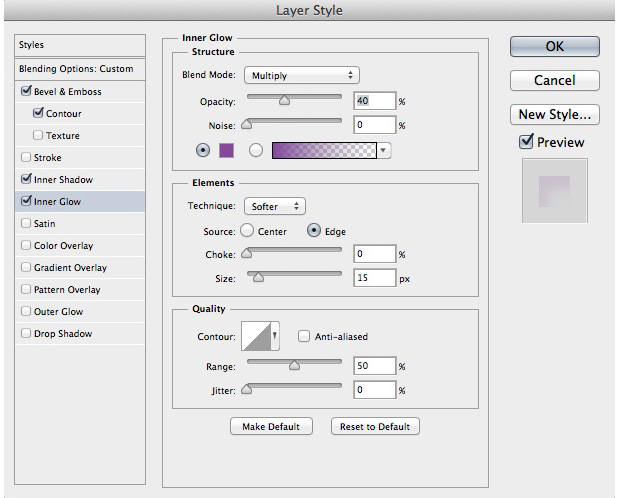
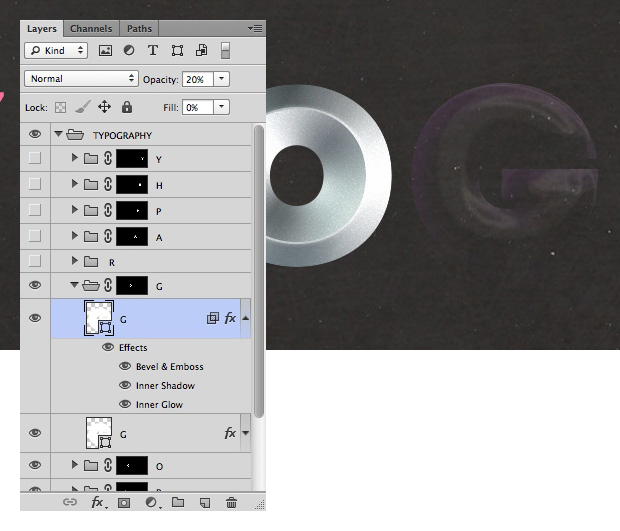
Create a new layer, select the Brush Tool (B) with a soft rounded brush, a purple color and a paint on the G letter with the edge of the brush.

Create an other layer, paint with the same brush with a blue color with the edge of the brush. Change the Blending Mode of this layer to Color Dodge .
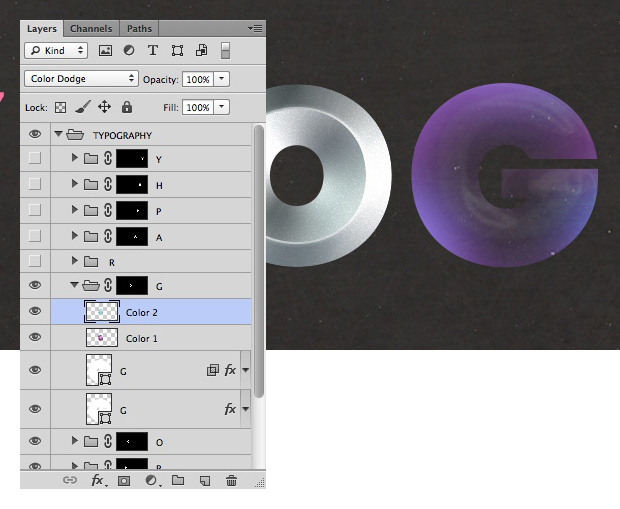
Now let’s add a few details inside the G , use the Ellipse Tool (U) to create small circles inside the letter (hold the shift to create all those circles on the same layer).
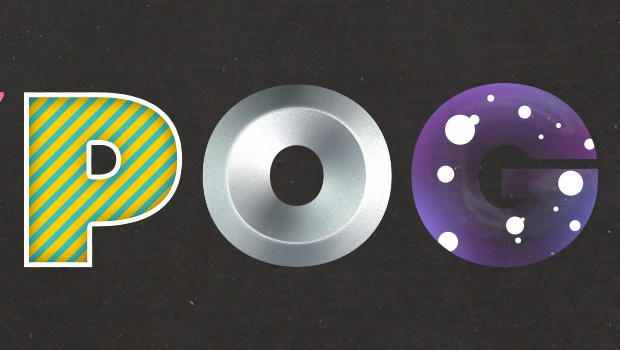
Change the Fill of those circles to 0% and add those Layer Styles on the circles.
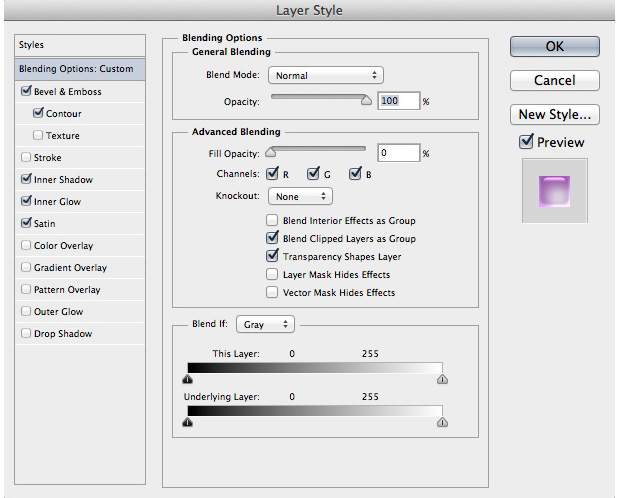
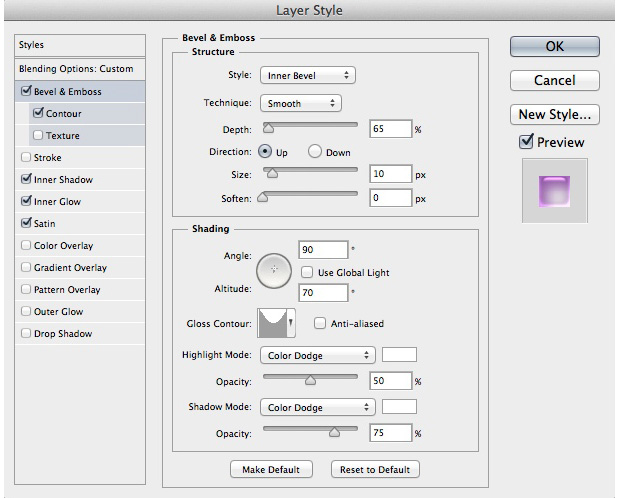


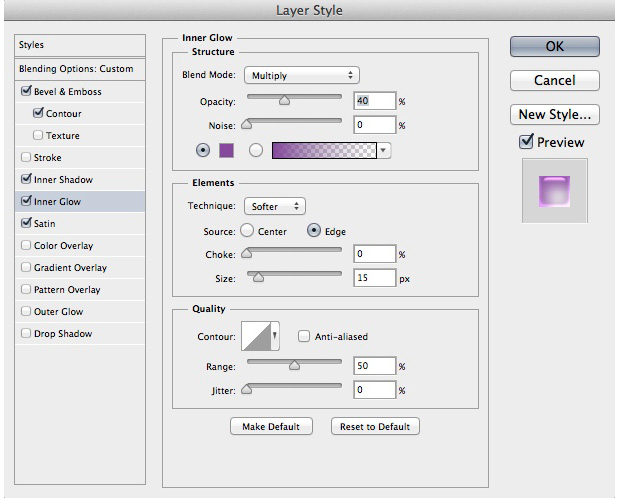


Duplicate the circles layer to highlight the effects.

Unhide the second duplicated G shape layer we created before, place it on top of the other layers, change its Fill to 0% and add those Layer Styles on it.


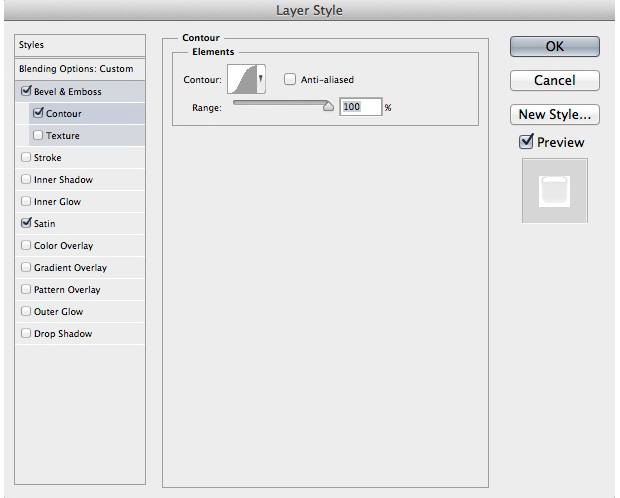
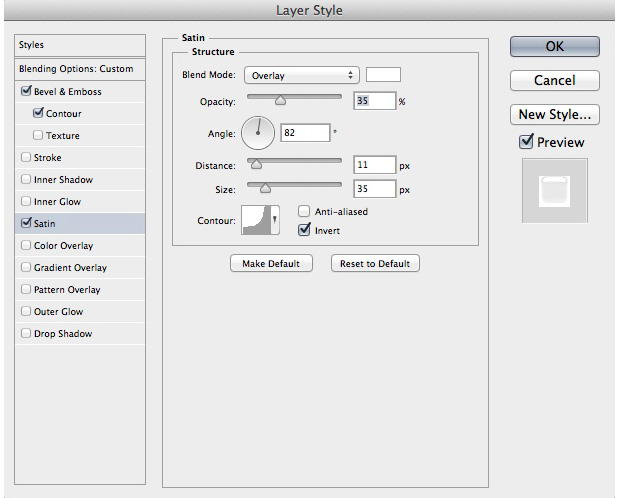

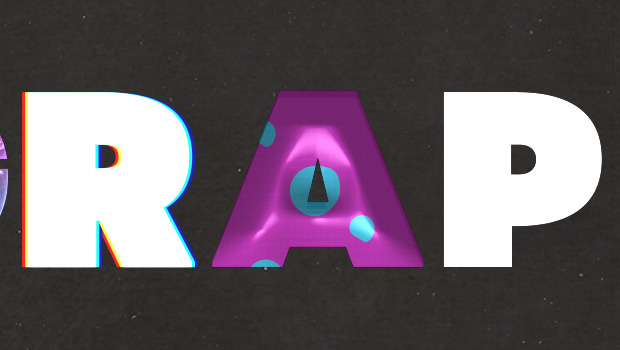
Step 8 – R – Fake 3D Effect
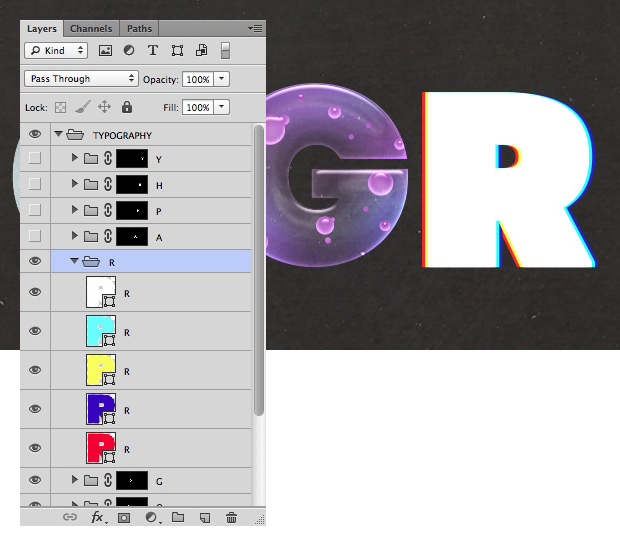
For the R we’ll create a simple Fake 3D Effect, duplicate the R shape layer four times and place the duplicated layers under the original one.

Change the color of the first duplicated layer to a light blue color, #2affff and move it 3px on the right .
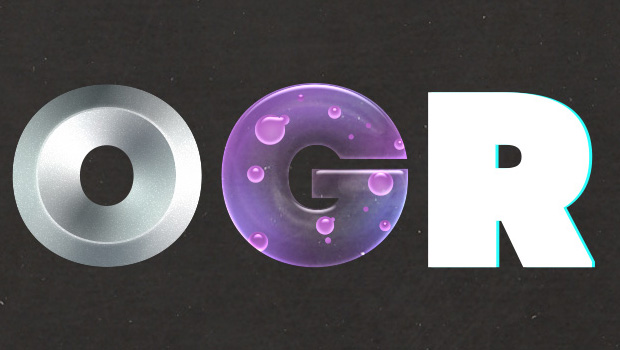
Change the color of the second duplicated layer to a yellow color, #fcfc55 and move it 3px on the left .

Change the color of the third duplicated layer to a dark blue color, #2222c2 and move it 6px on the right .

Change the color of the fourth and last duplicated layer to a red color, #ff2727 and move it 6px on the left .
Step 9 – A – Plastic Effect
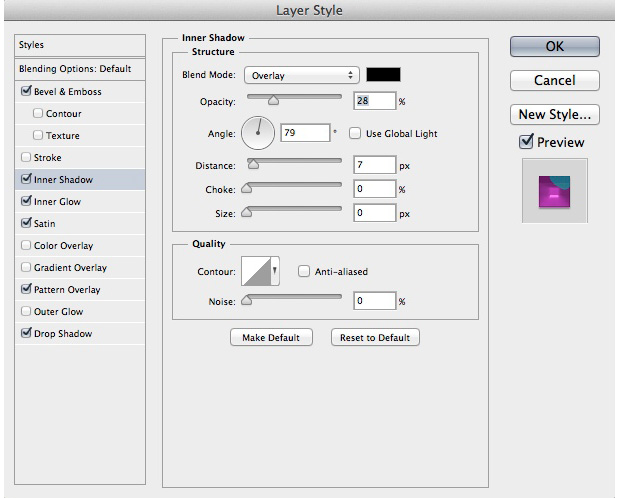
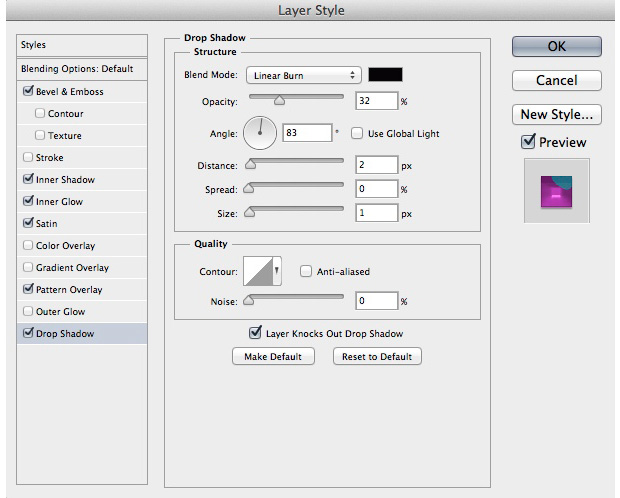
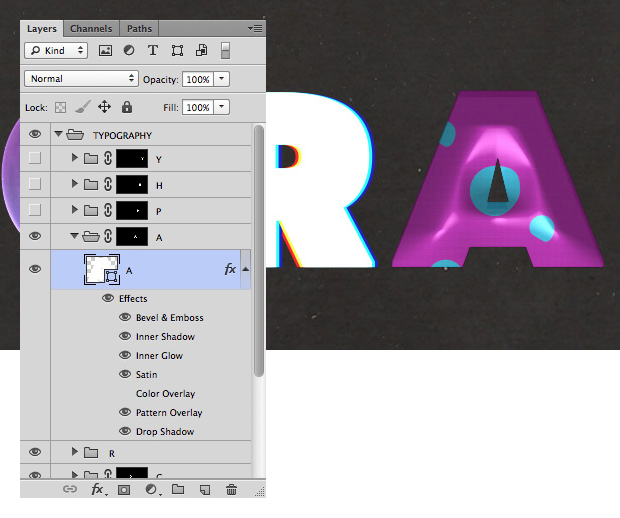
For the A we’ll create a cool Plastic Effect with color dots. Before adding some Layer Styles, download the Free Dots on Canvas Cartoon Photoshop Patterns , we’ll use one of those patterns on the A , load those patterns in Photoshop, when it’s done add those Layer Styles on the A shape layer.




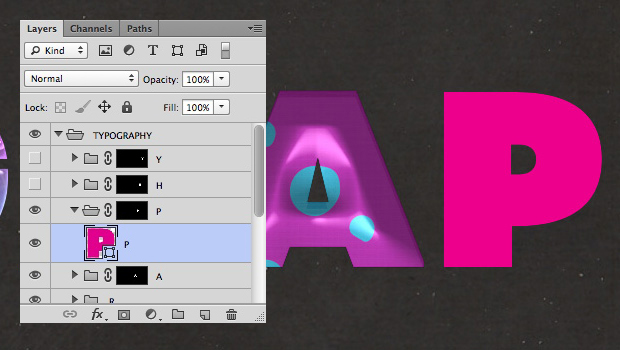
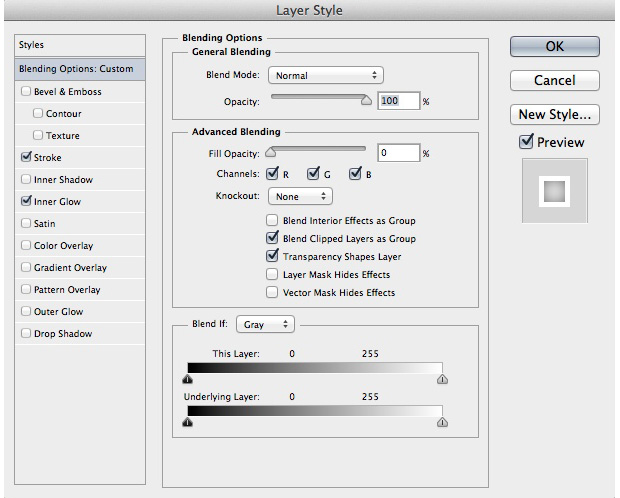
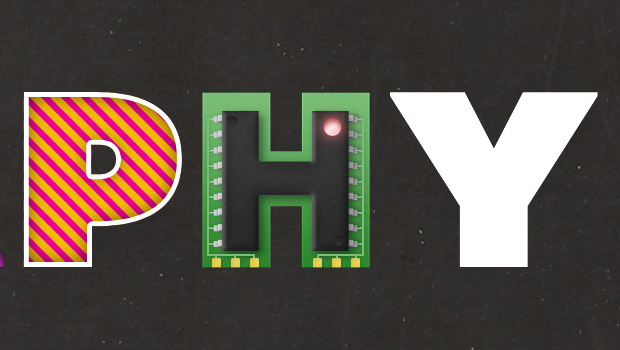
Step 10 – P – Stripes and Strokes
For the second P repeat the same process than in step 5, just change the color of the main P shape layer (pink for me) and use the second stripes pattern we created.




Step 11 – H – Computer Chip Effect
For the H , I reproduced a computer chip text effect, you can learn how to create this effect on a previous tutorial I’ve written, Create a Computer Chip Text Effect in Photoshop .


Step 12 – Y – Chocolat Effect
For the second Y and last effect, we’ll create a cool chocolate effect using a few Layer Styles . Add those Layer Styles on the Y shape layer.

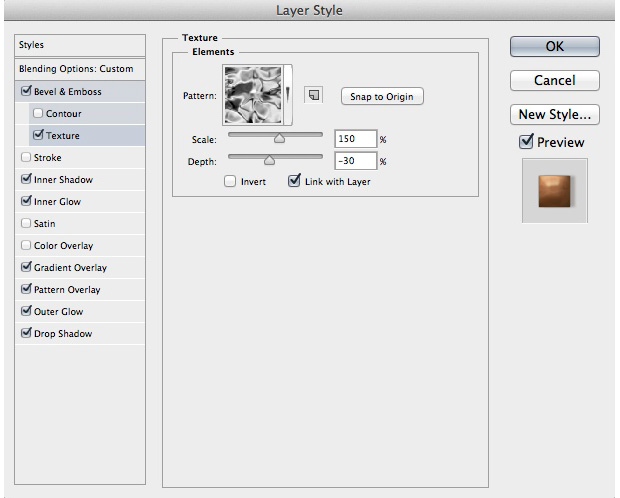

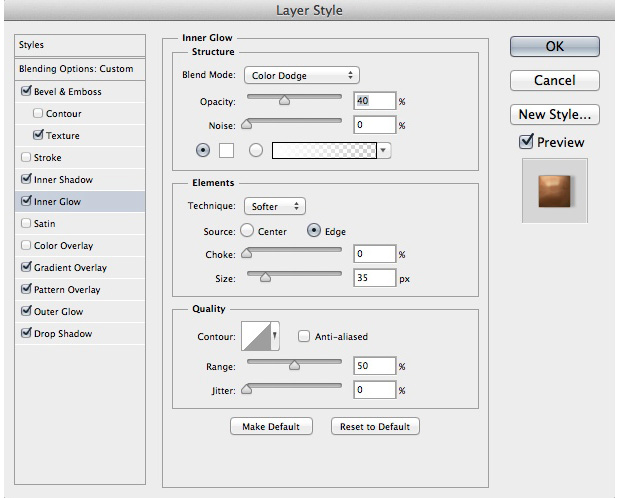


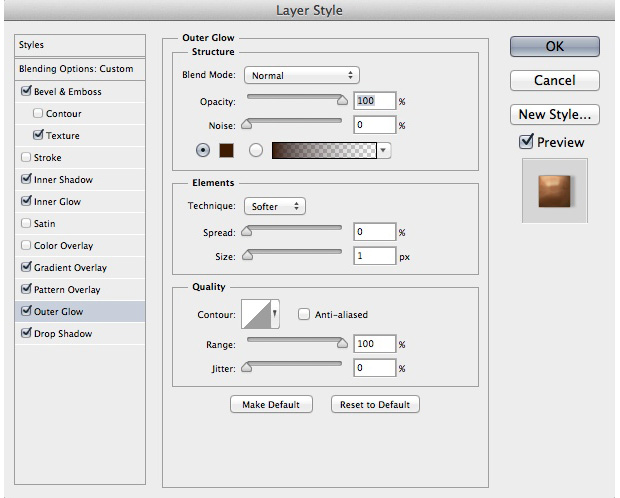

Step 13 – Shadow
To add more details on this text effects we’ll add a shadow on those letters. Select the group where you have all you letters in and press the Cmd+Alt+E keys to merge all the layers into a new one. Place this layer under the “ TYPOGRAPHY ” group and move those merged letters 10px down and 10px right .

Add a Color Overlay Layer Style on those merged letters with a black color.


To finish, Load the selection from the original letters shape layers ( Cmd+Shift+click on the thumbnail on letters shape layers.
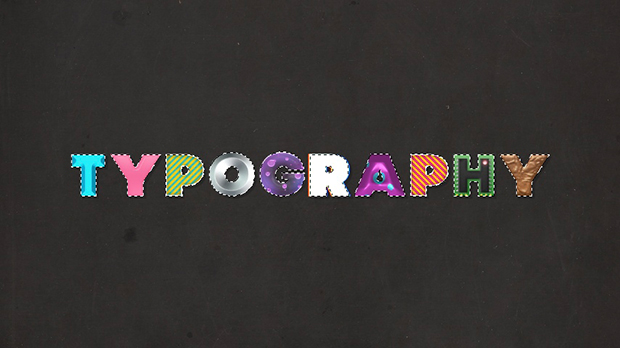
Create a Layer Mask with this selection on the shadow layer, Layer – Layer Mask – Hide Selection .


Save your wallpaper as a .jpg file, load it on your screen and enjoy!
That’s it for this Tutorial , I hope you enjoyed creating all those cool text effect and learn a few tips and techniques. Feel free to read the other articles of TutsPs if you want to learn more about Typography. leave a comment if you need help.




Thank you