BLOOD TYPE PHOTOSHOP TUTORIAL
In this walkthrough, we’ll create a haggard looking ‘blood’ type effect, which looks great as a standalone piece, or as a title for your Horror / Macabre works. If you’re not already using Layer Groups, this will be a great place to start – as they’re essential in the execution. Natural media brushes, layer masks and layer modes are used to create a wet, grungy and grisly aesthetic!! So buckle down for part three of this years ‘Terror Season’, and let’s get that type bloodied and battered
BLOOD TYPE
I discovered this look when I was putting together a type-driven piece for a horror cover. The process is relatively straightforward, however take your time with refining the results. Using and installing Photoshop Brushes is a big part of the walkthrough, so do a search and make sure you’re up to scratch on that side of things.

Daniel Cotton’s ‘Life Among the Dead’ – Permuted Press .
GETTING STARTED
Create a new document, and pull in a light-toned background. You can use anything you like, as long as it is relatively clear, and fairly bright. For the example piece, I used the background I created for the book cover I was working on. This background was created using elements from the DeviantArt Stock Browser and fabric blood-stains from CGTextures ( registration required, but it’s free!! ).

CREATE LAYER GROUP
We’ll be doing all our ‘type work’ inside a layer group, so create a new layer group using the shortcut ( Ctrl / Cmd + G ), or by clicking the folder icon at the bottom of the layers palette. Working within a layer group allows us to use a mask and add ‘weathering’ effects to all layers simultaneously, toward the end of the project.

ADD TYPE
Ensure black is set as the foreground colour ( hit ‘D’ on the keyboard to set default foreground colour to black ), and use the Type Tool (T) to create your type. For the example I used Trajan Pro, a timeless classic – but do experiment with other typefaces to add your own spin:

Your new type layer(s) should be inside your layer group, if not, simply drag and drop them so they’re nested within:

GRAB SOME BRUSHES
The bulk of the effect can be achieved really well with dark-dragon-stock ‘s ‘ Blood Brushes ‘ pack which can be found on DeviantArt. Head on over and grab this pack ( add a favourite too! ), and install the brushes. There’s also a helpful tutorial in the description, explaining how to install and use the brushes.
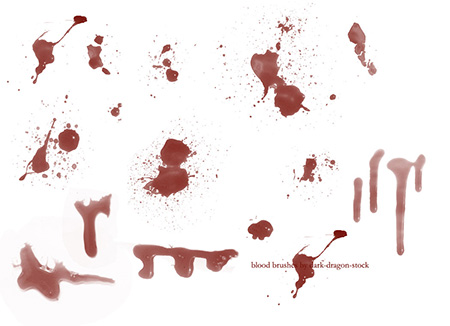
Aside from these blood brushes, you can also use ink splatters, brush strokes, watercolour and spray paint brushes for even more unique ways to implement this effect. You can check out a huge range of brushes for download HERE .
GET PAINTIN’
Create a new layer inside the group, and set it’s mode to ‘Multiply’ via the dropdown at the top-right of the layer stack. Make a selection based on your type layer. The example uses two lines of type, I have created a selection based on just one of the type layers by holding down Ctrl / Cmd + clicking the type layer icon:

Hide both type layers by clicking the ‘eye’ icons on the layer stack. Select a blood brush from the brush palette ( hit ‘B’ for brush ), and set a dark red tone as the foreground colour. On the new layer that you set to multiply, start to click around inside the selection to lay down the initial tones:
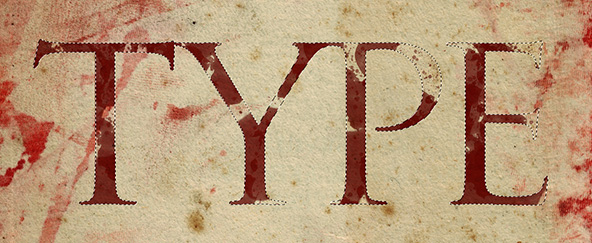
As you continue to ‘click’ splotches onto the type, the effect will build up as the tones overlay each other. You can use different blood brushes or brighter / darker red tones to add additional variation. Don’t be afraid to leave imperfections or ‘gaps’, sometimes this adds to the overall look.

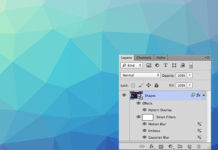
How your layer stack should look, with the additional ‘blood’ layer, set to Multiply:

ADDITIONAL ROWS
If you have two rows of type, like the example, you can achieve a nice effect by ‘overlapping’ the layers. For the example piece, I’ll be repeating the steps above for the second row – creating a new ‘Mulitply’ layer, to paint in the splotches within the selection:

You can ‘deselect’ ( Ctrl / Cmd + D ), to paint splotches outside of the type for further effect. Use the Smudge Tool to tweak some of the straight lines, to give a more viscuous look!
ADD SEEPAGE
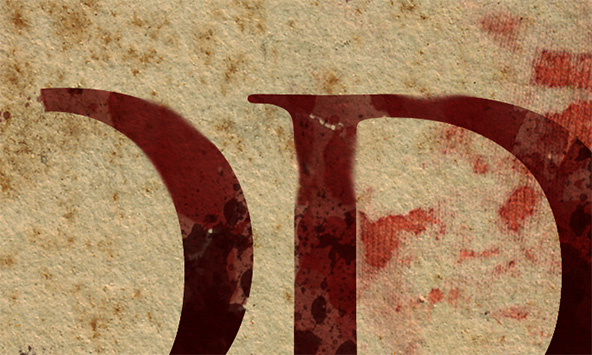
Create a new layer on the stack, and set it to Overlay. Using your chosen brush, and dark red tones, paint in ‘seepage’ at the edges of the letters. Because of the overlay mode, this will give a more of a weeping wound appearance, as opposed to the main dark tones we laid down for the type:

Keep building up on all layers, until you have achieved your desired effect:

GLOBAL MASKING
Once happy with your Blood Type, add a layer mask to the group that contains all the layers:

Using the blood brushes or even watercolour / spraypaint brushes ( set to black ), you can use the layer mask to add spots or splotches to all of the layers, in one go:

And here’s a look at the overall piece, all done and dusted:

REVIEW
One more installment, and this years ‘Terror Season’ is done!! Watch this space for more horror inspired Photoshop Tutorials


