CORE SKILLS: PHOTOSHOP LAYERS (PART 1)
Much of the versatility and power behind Photoshop lies in the layers system used for editing. In a nutshell layers are simply a vertical stack of elements, the benefit of working like this means you can tweak a certain part of your composition without affecting the rest of the image. There are hundreds of shortcuts and methods for working with layers – the intention of this article however is to provide a solid introduction and explain some of the more important layer controls. With these points, you will have a very decent foundation from which to use layers in your workflow.
LAYERS
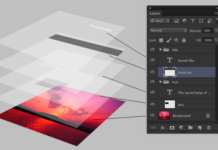
The best analogy that I use to explain layers and have seen elsewhere online, is that of clear acetate sheets (like those used on old school projectors!). Starting with the bottom sheet (the background layer), you can stack new transparencies on top of that, and arrange them in any order you like. When you work with one of these sheets (layers), you can do so without affecting the other elements, allowing you more creative control and the option to go back and change things later down the line. Elements on the lower layers will be hidden if there are elements above, covering them. Sound pretty abstract? Maybe an illustration will help
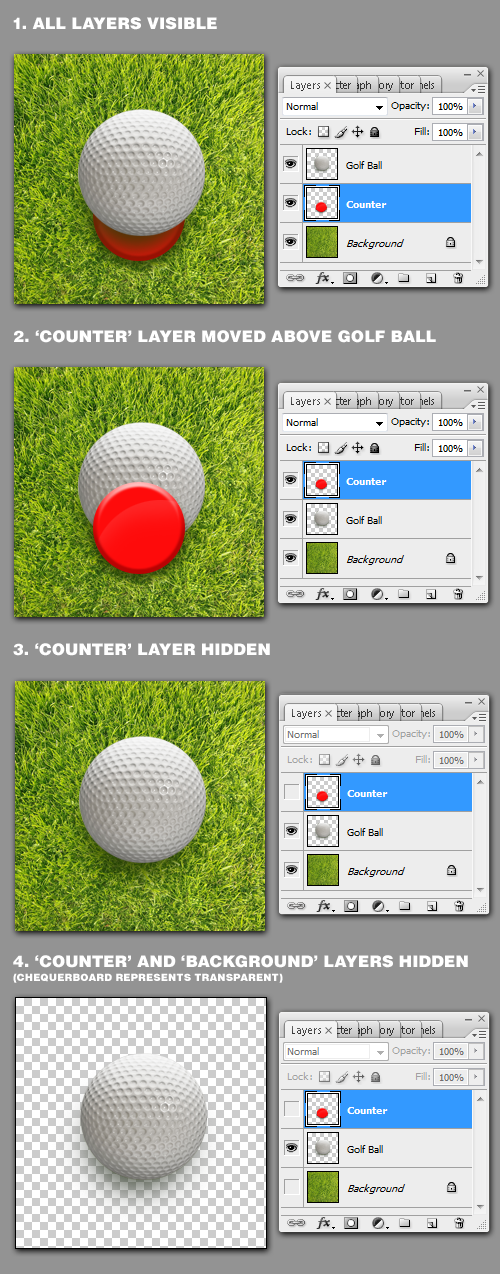
The above is a simplified demonstration of stacked elements and the ‘vertical’ hierarchy Photoshop uses to organise layers. Real understanding however comes from experimentation and use, but everybody has to start somewhere!
LAYERS PALETTE EXPLAINED
The Layers dialog box is where the action happens, here is a basic breakdown of it’s layout and functions. The labels indicate the most fequently used layer items and controls:

BACKGROUND LAYER:
Serves as the ‘background’ to your layer stack, always remains at the bottom. Has limitations as it cannot be deleted, re-arranged in the layer order or be transparent.
DELETE LAYER:
Does exactly what it says, deletes layer.
NEW LAYER:
Creates a new layer, or alternatively you can use the shortcut Ctrl Shift + N (Mac: Cmd Shift + N) .
SHOW / HIDE LAYER:
Clicking the eye icon will hide or show the layer.
LAYER BLEND MODE:
A huge topic in it’s own right, changes the way layers react with each other.
OPACITY:
This feature pops up everywhere, basically determines the transparency of a layer or adjustment (100% = solid, 0% = completely transparent). Handy for blending elements and lessening the intensity of certain effects.
ACTIVE LAYER:
Shows the layer you are currently controlling / working on.
REVIEW
The use and control of Layers constitutes the bulk of the work done in Photoshop, learning these functions from the offset is an essential aspect of photo manipulation work. In part 2 we will be examining more advanced layer controls including multiple layer selection and layer groups. Go to: Photoshop Layers (Part 2)


