Create a Dynamic Scene With Light Elements and Circles
In this tutorial I will teach you how to create a colorful composition using Photoshop. and how to create a dynamic scene with light elements and circles You will learn how to use different brushes settings to fill out your canvas with nice random circle shapes. We will also go over on how to make 3D looking spheres without the need of 3D software and using only Photoshop in-built tools.
You May Be Interested In The Following Posts
If you like this article, you might be interested in some of our older articles about
Creating a Fantasy Photomanipulation
Photoshop CC Tutorial – Fantasy Looks Photo Effect Editing
How to make a planet with Photoshop
Final Image Preview
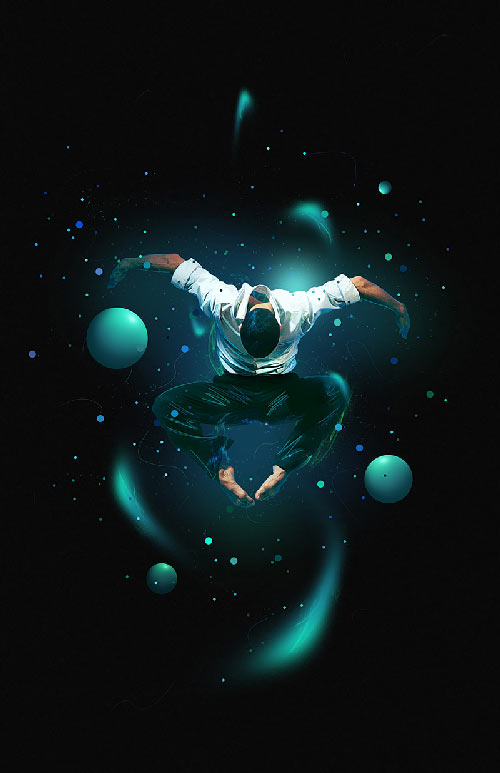
Stocks Used:
1.Step – Document Setup
Open a new document on Photoshop 3300 pixels width 5100 pixels high and 300dpi. (With a file size of this dimensions you can get nice prints out of your works)
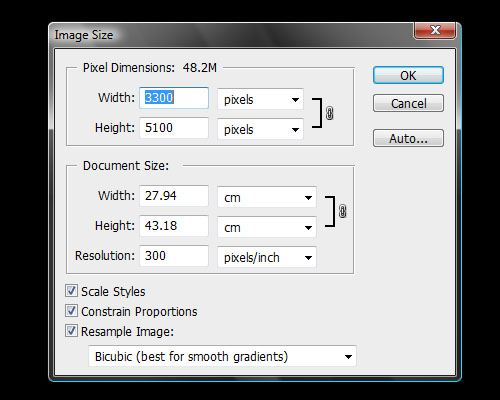
Take the paint bucket tool and fill the background layer with black. Create a new layer and fill it with black again.Then go to Filter -> Noise -> Add noise and use the next settings:
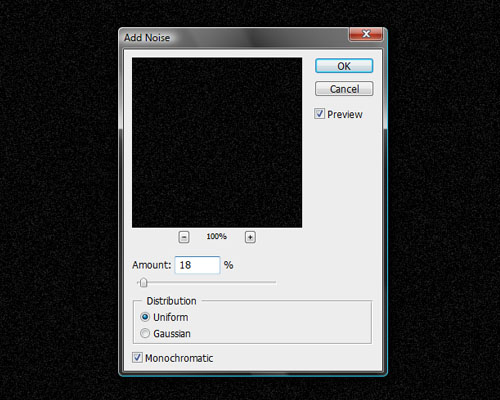
Set the layer blend mode to “Screen” and reduce the opacity of the layer to 70%. What this layer is gonna do, is provide a “bed” in which the color is going to bleed on the canvas. Without this base of noise, color does not spread very well against plain black backgrounds. It doesn’t matter if the noise is visible at 100% zoom of the image, the noise will not be visible in the final result.
2.Step – Subject Placement
Take the stock that is going to be functioning as the main focus of the composition (I used this image of a man jumping), but it can also be anything you want, like some kind of object or maybe even a typographic element) and extract it from its background. Use the Pen tool (P) and draw a path round the edges of the subject. Once you close the path convert it into a selection and then invert it (CTRL+SHIFT+I) after that hit delete.

Then drag your image into the center of your canvas.
3.Step – Color Balancing
The image I used has some magenta coloring on it,and we are going to to change that because the most predominant colors on the composition will be blue and green and we need them to match. To make those changes, go to Image -> Adjustments -> Color Balance . This are the settings I used for this specific image (Note that the settings may change according to the stock your used and the coloring it has).
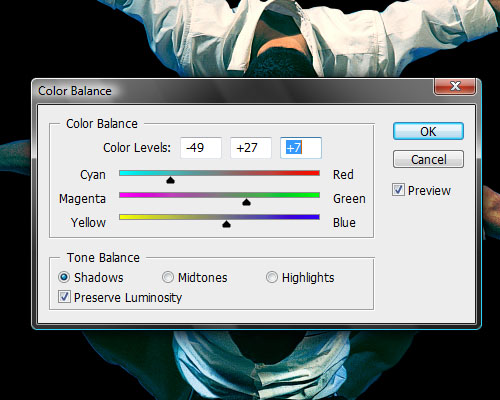
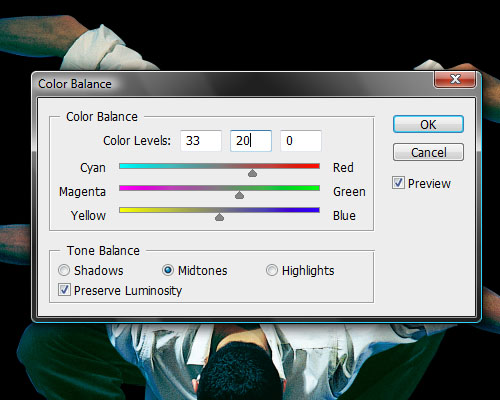
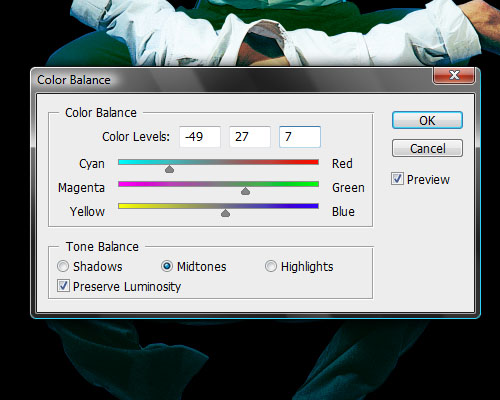
After these adjustments are made, your stock should now have a blue-green tone into it.
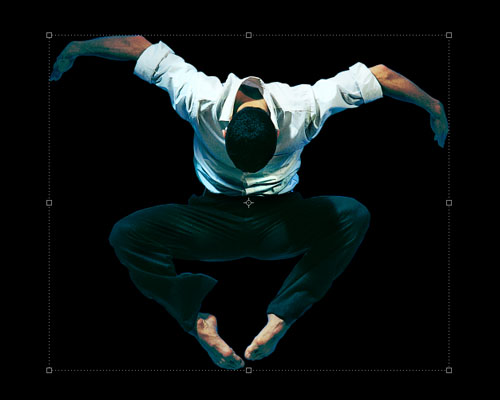
4.Step – Background color
Create a new layer above the noise layer. We are going to paint in this layer the colors that will be on our background.
Grab the Brush tool (B) and select a soft round brush 0% hardness of about 600 pixels wide and set the brush opacity to about 20%.
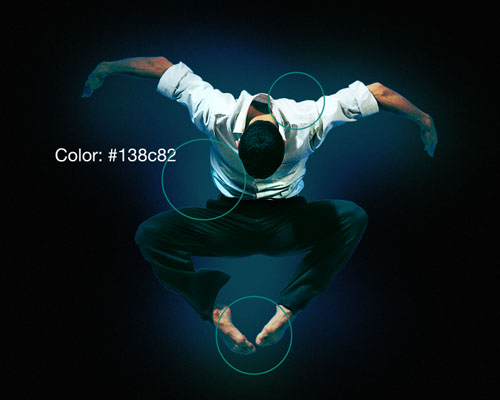
Use a dark blue color #07356f and paint in the middle of the subject. You will need to stroke many times to put more color towards the center of the main focus and stroke less to make the color fade away. Using a brush with low opacity will help achieve that effect.
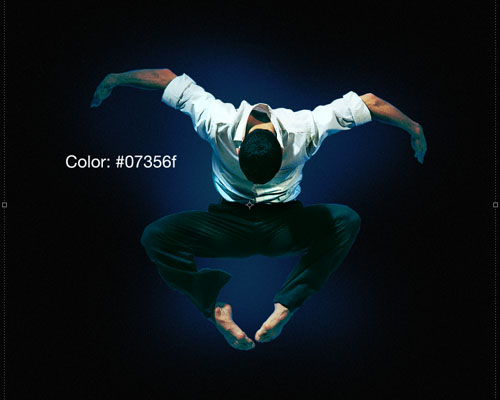
Now use a lighter complementary color. I used a light blue #138c82 and stroke over the parts where you want to add a second color. It will give the image more variety and depth.
5.Step – Spheres
Now we are going to create some 3d looking spheres to add on our composition. Create a new layer, select the Elliptical Marquee tool (M) and while holding SHIFT make a circle of about 400 pixels wide.
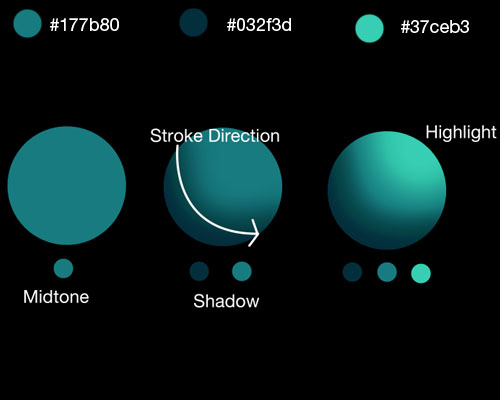
Now select a color that will be working as out mid tone and fill the circle with it. I used the color #177b80.
Without deselecting the circle, Use a soft 100% opacity brush of 300 pixels wide and select a darker shade of the same color. I used color #032f3d. Now paint on the lower side of the circle to create the shadow.
Select then a lighter shade of the mid tone that will be the highlight #37ceb3 and paint on the top side of the sphere.
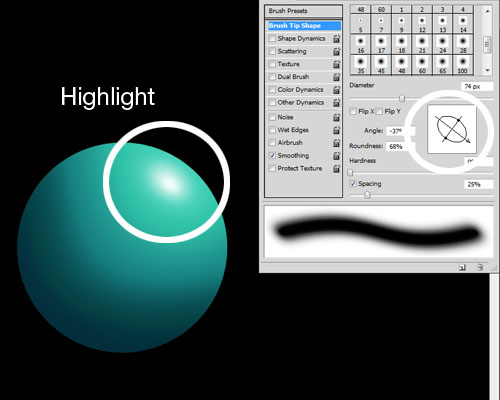
With the sphere still selected we need now to paint the brighter parts of the highlights. for this change your foreground color to white and reduce the brush opacity tip about 150 pixels wide and the opacity to 40%. Open the brush option tools, squeeze the brush on the brush tip options and then title to match the perspective of the highlight. Then paint where the strongest part of the highlight should be.
Now duplicate the layer several times and resize the spheres. Rotate them to match the light source of you main focus image and place them around your composition.

6.Step – Light Effects
Create a new layer and select a soft round brush of about 400 pixels wide. Select a blue color (I selected the ones I used from the spheres) and just stroke a line.
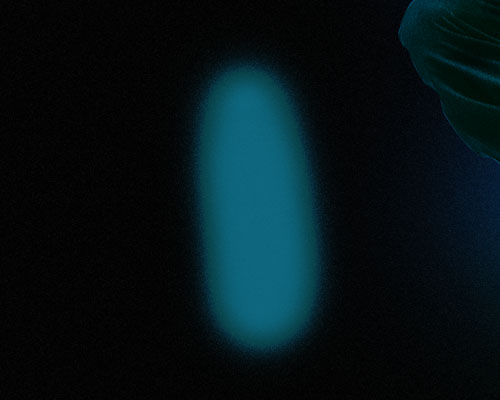
Select a lighter color and stroke over the same line.
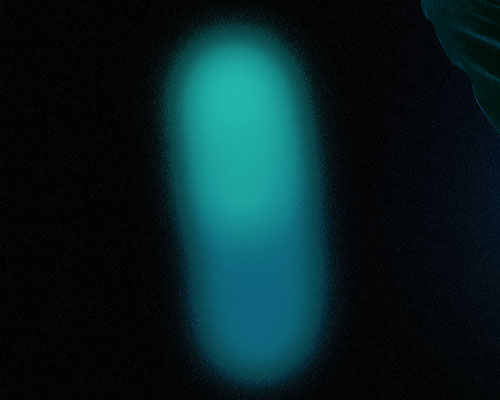
Using the transformation option “Warp” change its shape into an abstract light form.

Duplicate and resize this layer just like you did with the spheres and place them around your main subject. Try not to over do it, you don’t wanna mess your composition.
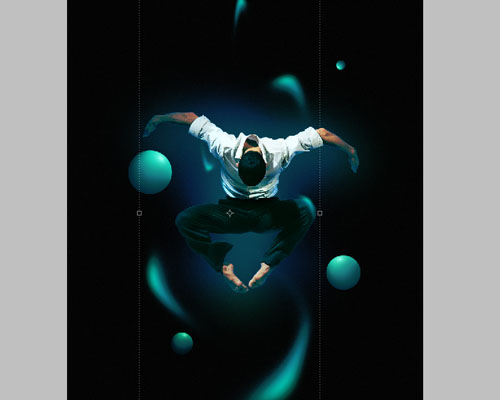
7.Step – Fractals
Open the fractal stock and drag it into your document. Select the Eraser tool (E) and delete the edges of the image. Then go to Image -> Adjustments -> Hue and Saturation and use the next settings to change the color of the stock to a light green:
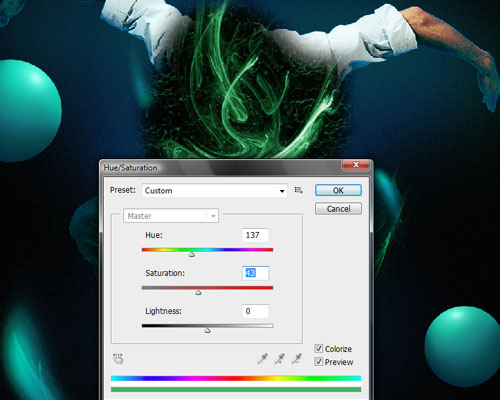
Set the blending mode of the layer to “Screen” duplicate it and place the layers behind your main stock to add further detail.
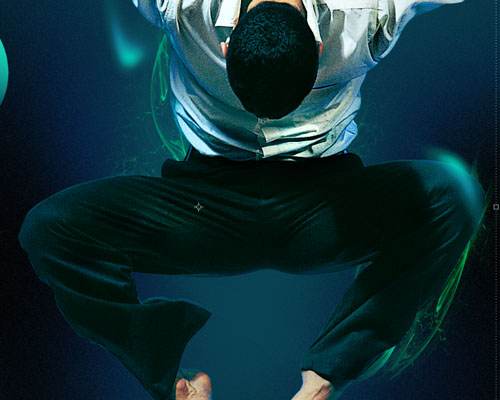
Cut parts of the fractal and place them on top of the light effects to make them more abstract and detailed.

8.Step -Circles
Create a new layer above all the layers. Grab a hard brush of about 6 pixels and 100% opacity and a blue color #12aff2.
Open the brushes options and use the next settings:
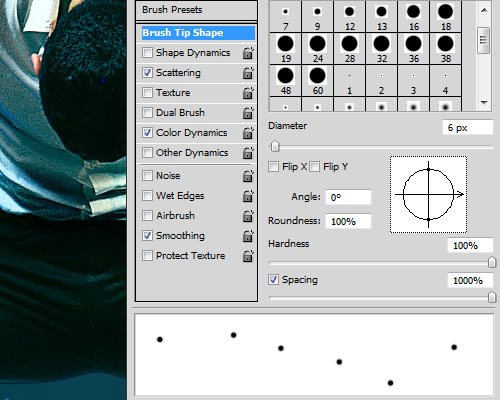
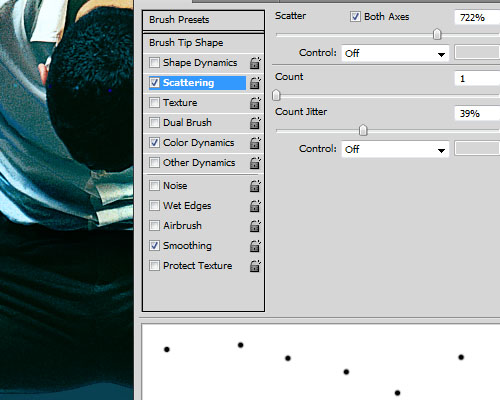
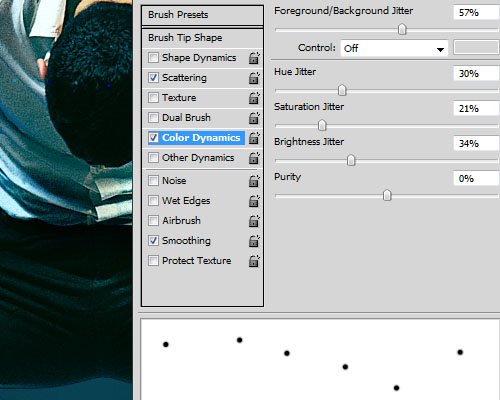
Brush along the center part of the main focus of the image until you get something like this:
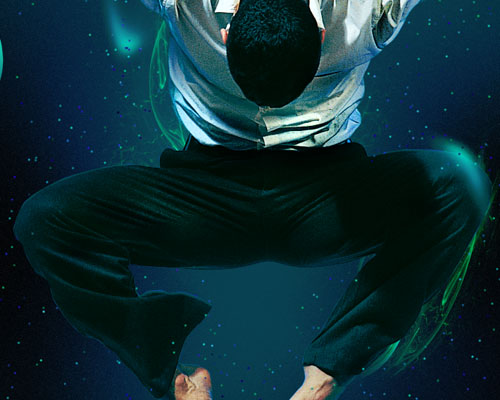
Create another layer. Change the brush size to 18 pixels and paint the circles now a bit on the outer part of the image:
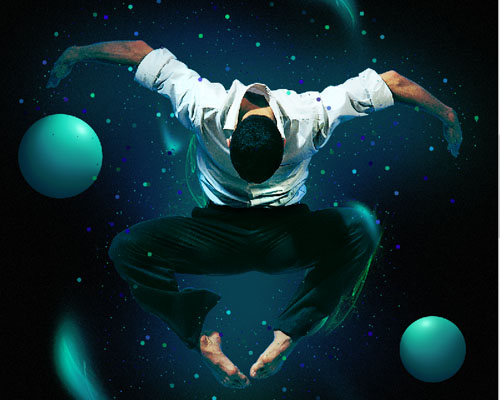
Create another layer and now change the size of the brush to 45 pixels. This will be the biggest circles and will take much attention so try to keep the distribution of this circles to a low number.
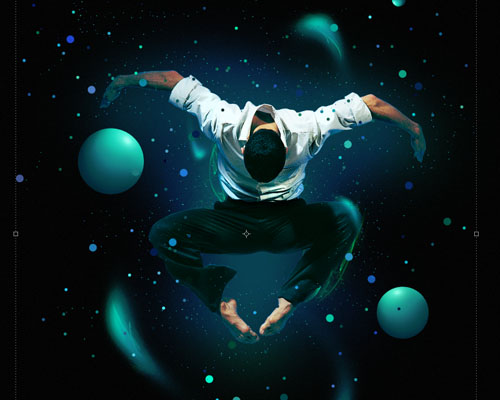
9.Step – Details
Change your foreground color to a light blue and select a hard brush of about 3 pixels wide. Switch to the Pen tool and draw paths along the lines of the clothes and the body. Then stroke the path:
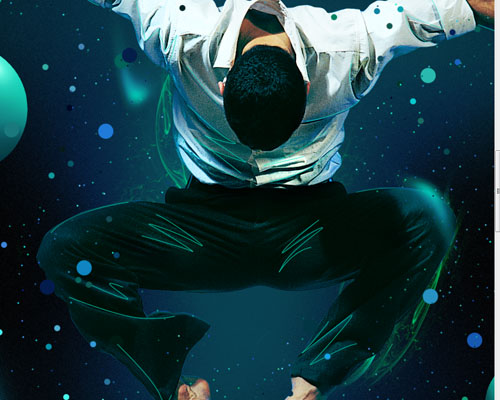
Once again change the shade of the color and draw some other details across the body:
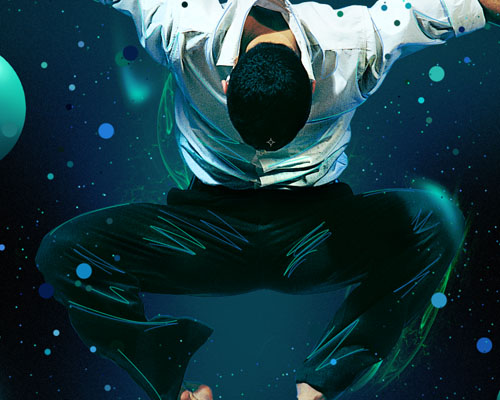
Create a new layer and place it above the main stock, change the layer blending mode to “Screen”. Select a blue-greenish color and a soft round brush of about 500 pixels wide. Stroke over the source of the light to give it more detail:
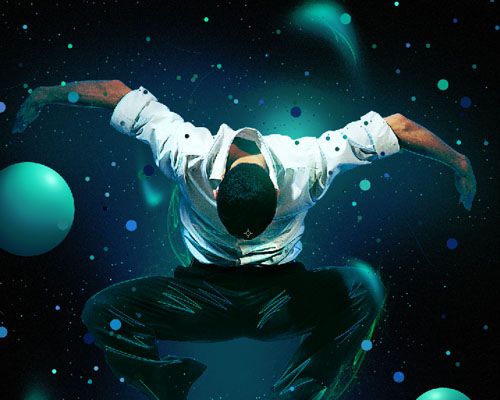
10.Step – Closing
Save your image as a .jpeg with the highest quality and open it again on Photoshop. Go to Image -> Image size and resize it to this next setting, this will make your image very sharp and high quality:
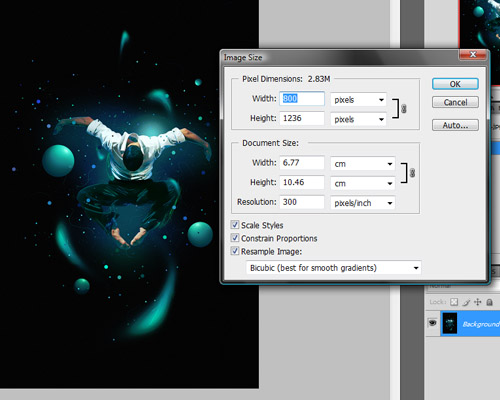
And you are done I hope you like this tutorial and learned some new techniques to Incorporate into your manipulations. Remember to try and experiment with different shapes and colors, as well as different compositions and element placement.
Final Result: Dynamic Scene with Light Elements and Circles

Let us know what you think, drop a comment using the form below.


