


Creating a Fantasy Photomanipulation
Tutorial : Creating a fantasy photo-manipulation is always a fun to work on. We put all our crazy and inventory thoughts in it. In this tutorial we are going to create a fantasy scene where a Priestess will be standing on a rock during the night holding a lantern in one hand and a golden lotus in other hand which creates a smoke ball, and there will be bunch of small rocks flying around the Priestess. The scene will be covered slightly with with fog, and few temple shrines stand tall above the fog in the background among the small hills.
With this fantasy photomanipulation tutorial we will be covering few important techniques of matte painting , using Adjustment Layers and Understanding the nature of elements in the scene to apply appropriate element effects to make the scene more natural.
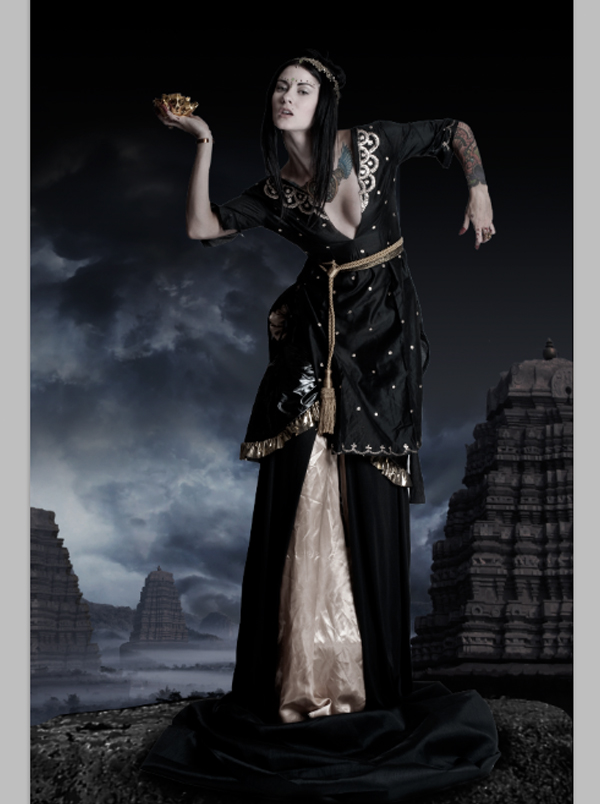
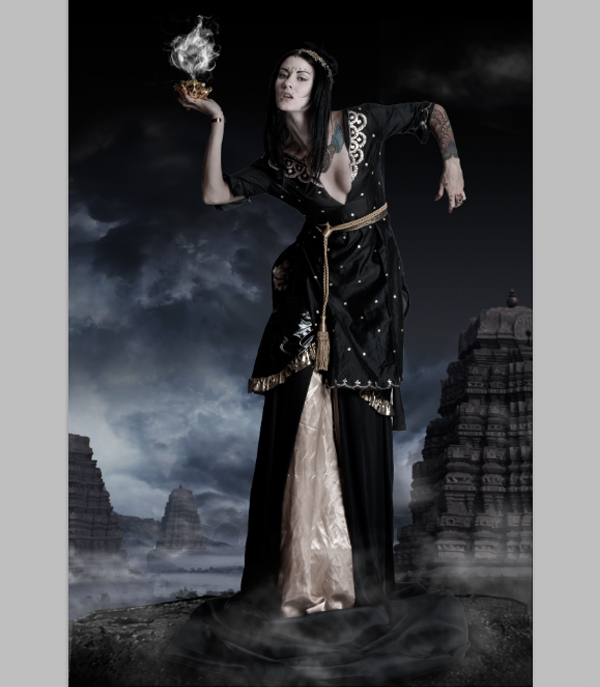
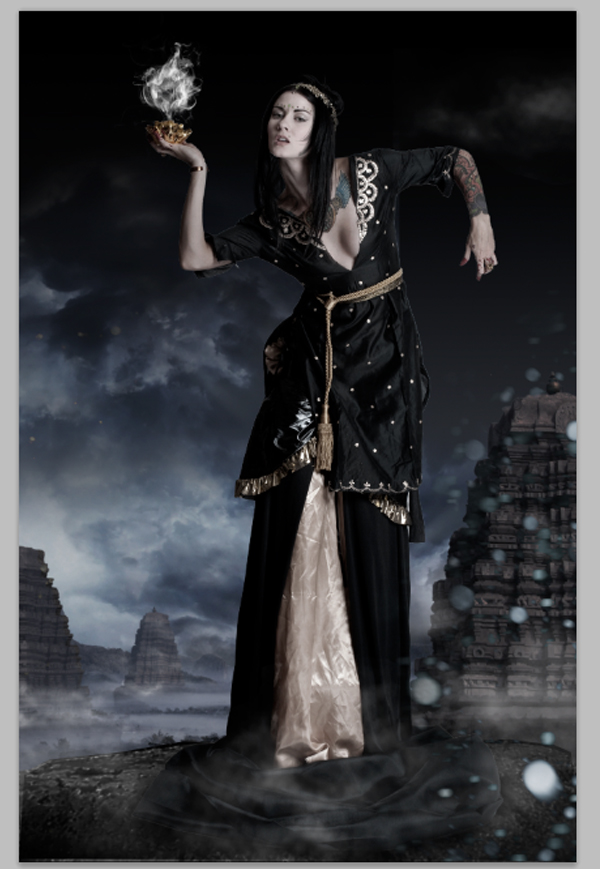
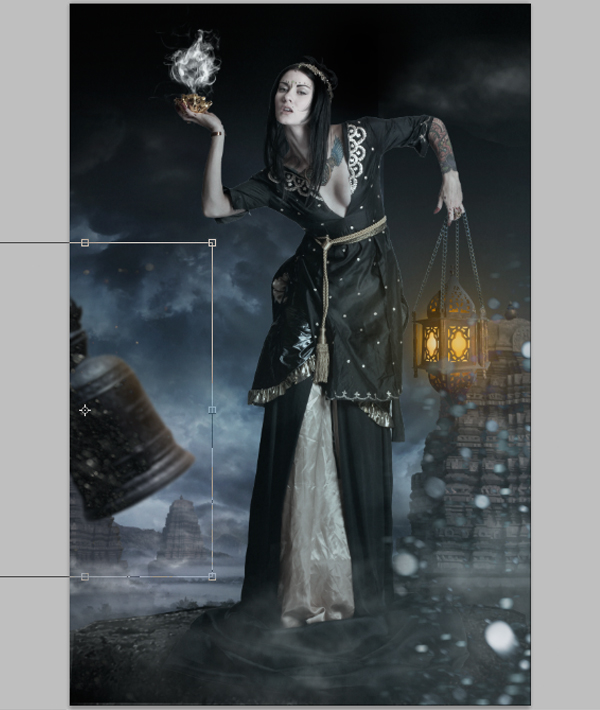
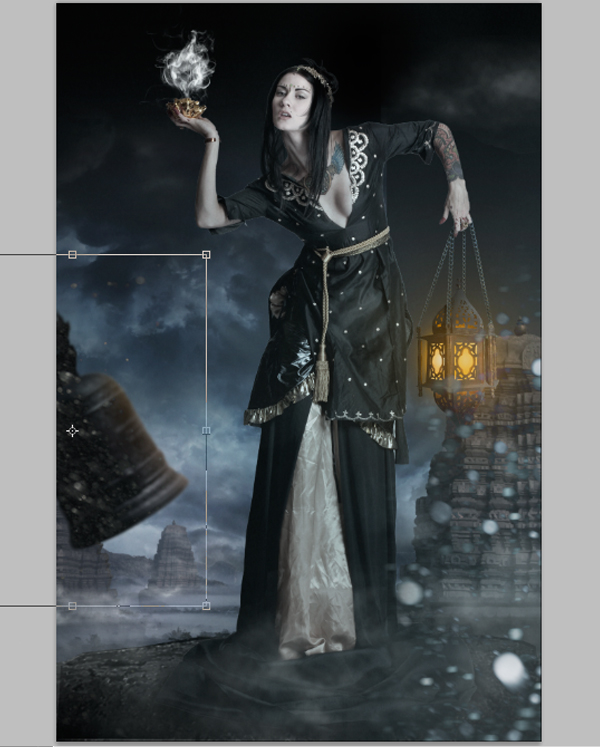
Preview of Final Result:

Details of this Fantasy Photomanipulation Tutorial
Program: Adobe Photoshop CS5
Difficulty: Beginners, Intermediate.
Estimated Completion Time: 1 hour
Resources used :
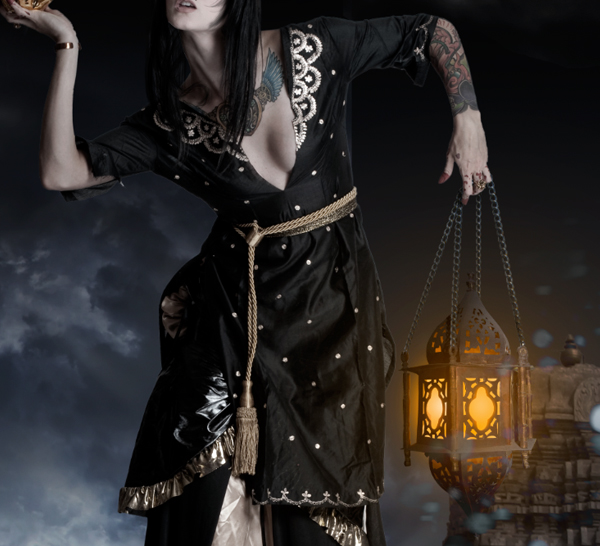
- Priestess
- Rock
- Night Sky
- Temple
- Distant Landscape
- Bell
- Ribbon
- Asteroid field
- Smoke Brush
- Fog Brush
- Hair Brush
- Snow Texture
- Lantern
- Rusty Chain
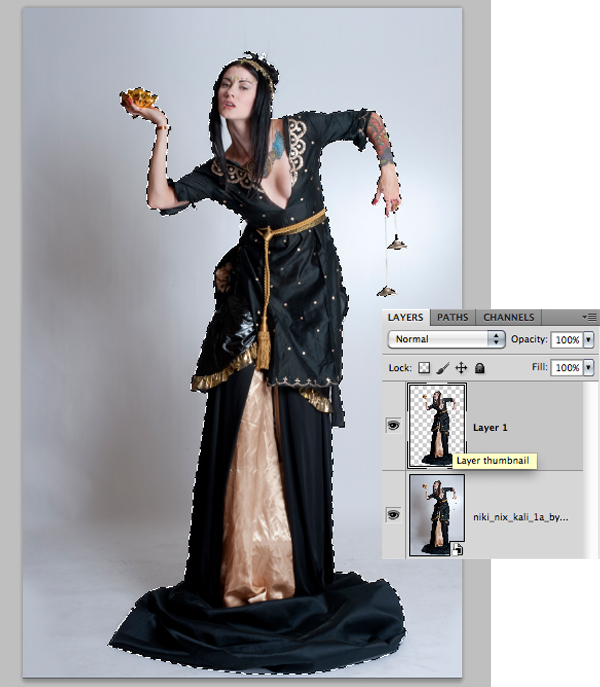
Step 1 – Mask-out the Model
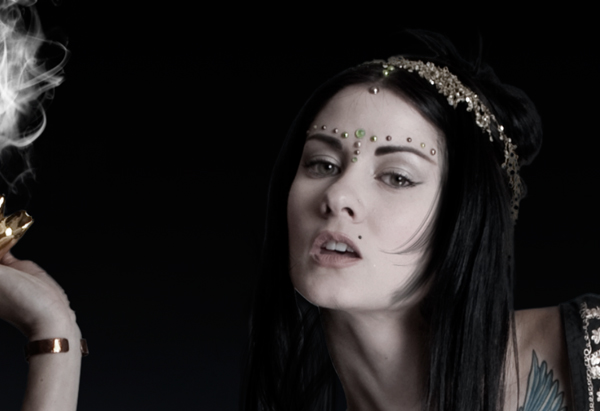
Open the image of the Model in Photoshop and separate then mask-out the model from its background into a new layer using the Magic Wand Tool(W).
Step 2 – Create a Gradient
Now create a Gradient with Black and Grey combination which serves as primary reference in further step for color correction purpose.

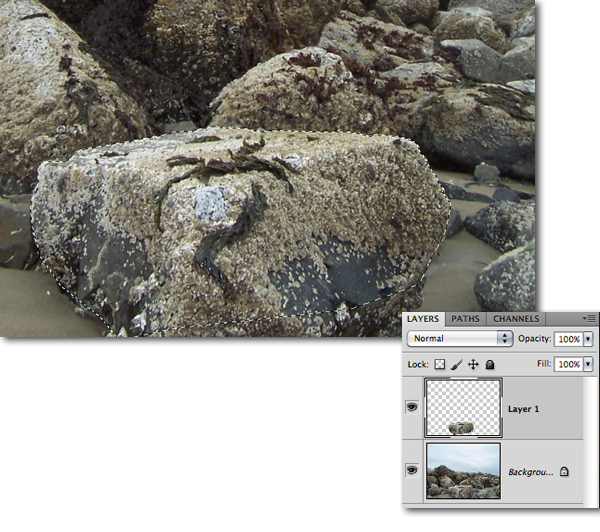
Step 3 – Create a Rock Base for Priestess
In this step we will be creating a Rock base to illustrate that the Priestess is standing on it.
3.1) Import the image of the rock into Photoshop and create a mask around the rock using the Pen Tool (P) and separate it into a new layer.
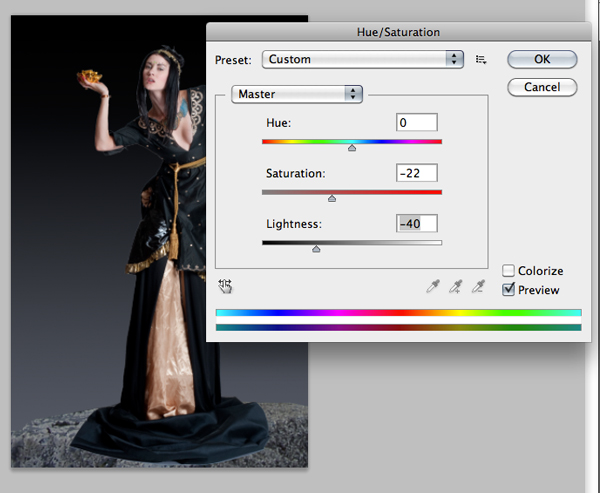
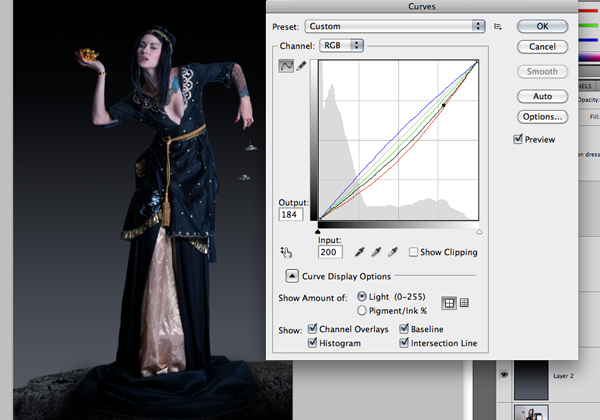
3.2) Now import the rock on to the working canvas and place it under the priestess as shown. Since we are creating a night scene, we need to color correct the rock in-order to blend with the scene.
-With the rock layer selected go to Image>Adjustments>Curves and set the curves as shown.

3.3) Now De-saturate the rock using Hue/Saturation, Set the Saturation=-22 and Lightness=-40.
3.4) Darken the rock using the Exposure (Menu > Image > Adjustments > Exposure). Set Exposure=-0.57 and Gamma Correction=0.66.

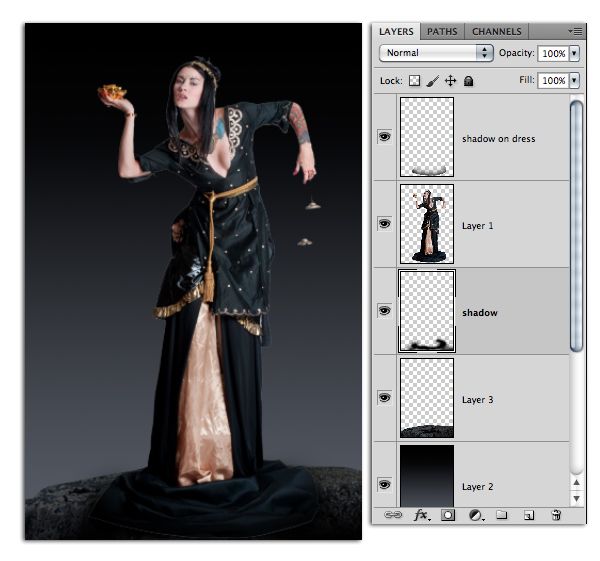
Step 4 – Paint Shadows at Her Feet
Using the Soft Brush (B) paint a shadow at the feet of the priestess as shown.
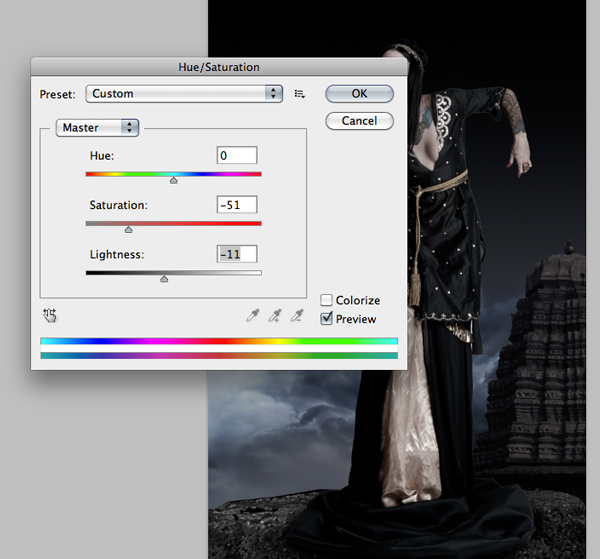
Step 5 – Color Correct the Priestess
Now color correct the priestess as shown using the Curves and Hue/Saturation.

Step 6 – Dark Clouds to Background
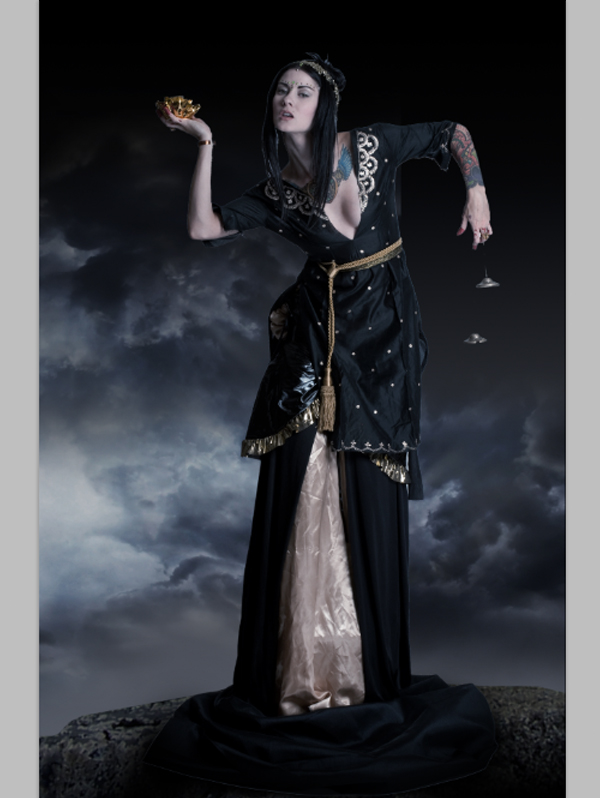
Now create dark clouds behind the priestess as shown using the clouds stock provided.
Step 7 – Color Correct Her Skin Tone
In this step we will be color correcting the skin tone using Adjustment Layers.
7.1) Mask the part of the skin as shown using the Pen Tool(P) and select the Brightness/Contrast Adjustment layer from the bottom of the layers pallet. Then set the Brightness=-35 and Contrast=21.

7.2) Similarly repeat the previous step in color correcting the skin tone of hands.

Step 8 – Temple into the Background
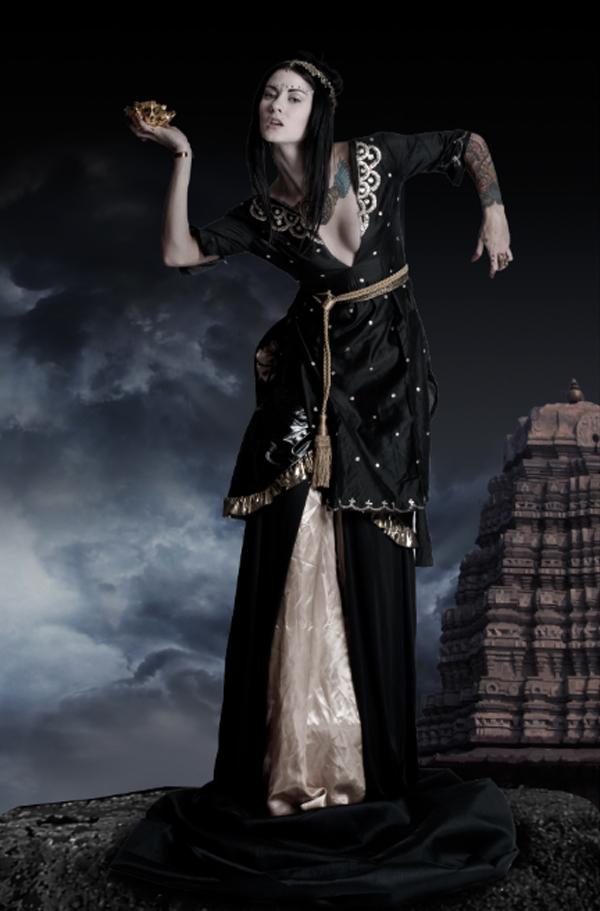
In this step we are going to create a temple in the background.
8.1) Mask-out the temple from the original image and place it as shown.


8.2) Put your creative skill to test in color correcting the temple to match the environment.
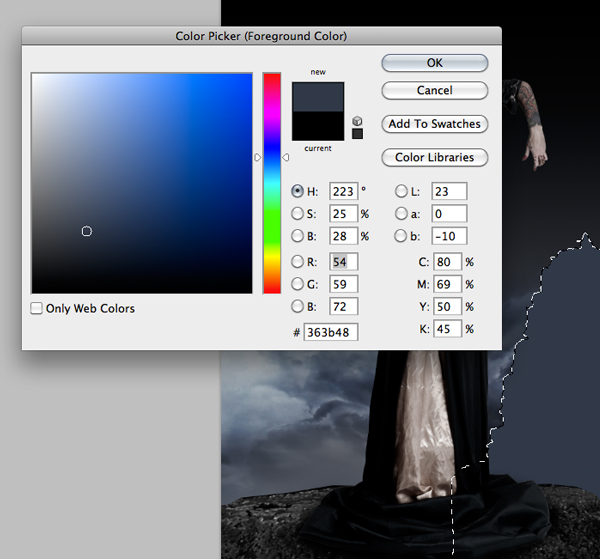
8.3) Now select the mask in shape of the temple and fill in the selection with the color #363b48. Then change the Blending Mode of the layer to ‘Overlay‘ and reduce the Opacity to 64%.
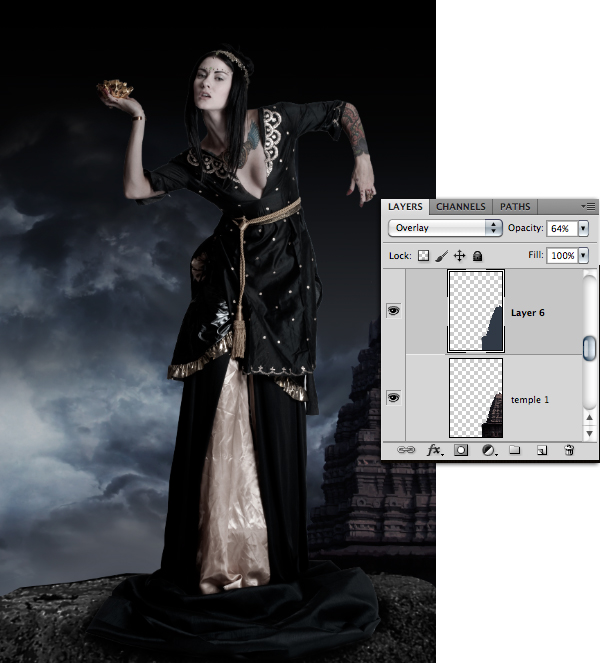
8.4) Merge all the layers related to temple into a single layer and reduce the Saturation=-51 and Lightness=-11 using Hue/Saturation (Mac=Command+U , Windows=Ctrl+U).
Step 9 – Adding Background Landscape
In this step we will be creating the background landscape in the scene.
9.1) Separate the landscape from its original image and import it onto the working canvas and place it as shown.


9.2) Now color correct the landscape to blend with the scene perfectly.

Step 10 – Distant Temples to Background
In this step we will create some distantly located temples.
10.1) Follow the step 8 in creating a new temple. Then by using the Move Tool(V) re-size the temple as shown to make it look far.
10.2) Again we will be following the step8 here in coloring the temple. Fill the color #363b48 in a new layer with the mask selected in the shape of the second temple. But since this temple is located at a distance we want it to look dull hence we wont be using Layer Blending Mode. With the temple color layer selected reduce the Opacity to 70%.

10.3) Similarly create another temple located in-between the first temple and the second temple as shown.
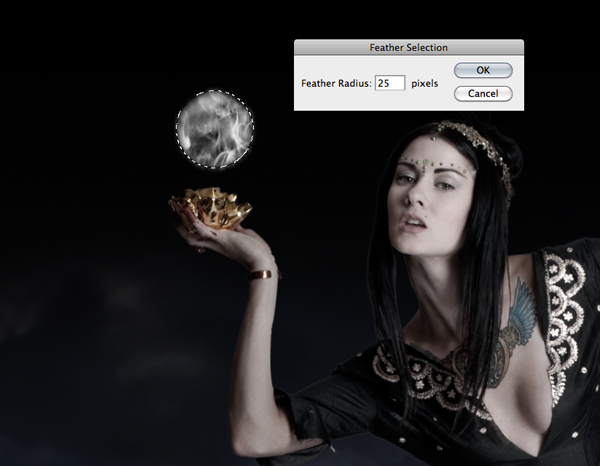
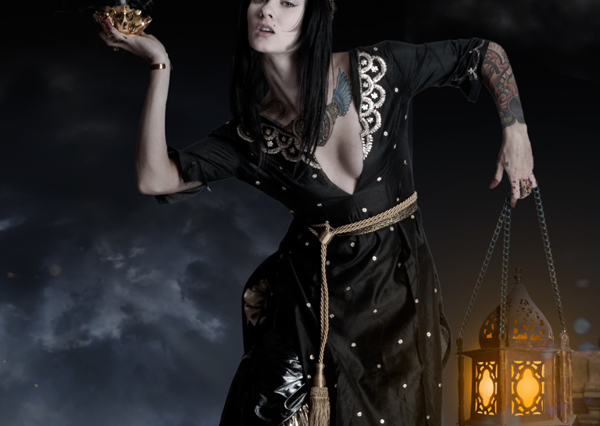
Step 11 – Create the Smoke Ball
In this step we will be creating the smoke ball formed from the smoke coming out of the golden lotus in the right hand of the priestess.
11.1) Create a round mask as shown using the Mask Tool(M) and set its edge Feather Radius=25px and then paint the inner diameter of the mask with smoke using the Smoke Brush with white color.
11.2) Again by using the smoke brush paint some smoke as shown to illustrate that the smoke is releasing from the Golden lotus.
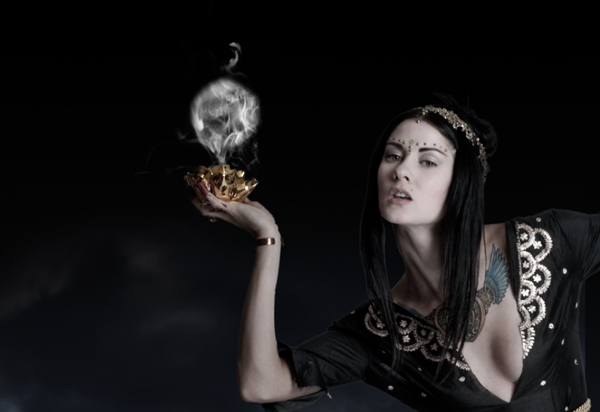
11.3) As we know that the smoke travels in a random directions, paint some smoke around the smoke ball we previously created to get the following effect.
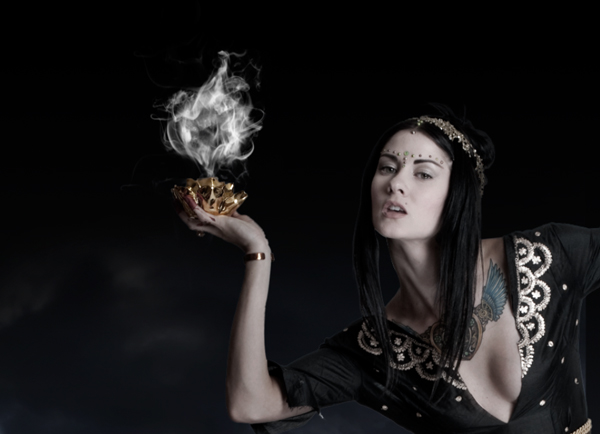
Step 12 – Makeup Treatment
In this step we will be giving some makeup retouches to the priestess.
12.1) Using the hair brush paint some hair near the left cheek of the priestess as shown using the black color.
12.2) Now by using the soft brush paint the eye lashes and darken the mole on the upper lip as shown using the black color.
Step 13 – Make it Foggy
Now paint some fog as shown using the fog brushes with the white color selected.
Step 14 – Maintain Depth of Field by Blurring
As we know the objects far from the focused area appears blurred with the increase in the distance. Since the second and third temples are located by some distance they must blurred to maintain the Depth Of Field (DOF).
14.1) With the second temple layer selected go to Filter>Blur>Gaussian Blur and add a Gaussian Blur of Radius=0.8px.

14.2) Similarly add a Gaussian Blur of Radius=0.5px to the third temple.

Step 15 – Snow is Flying
In this step we will be creating snow flying around in the scene.
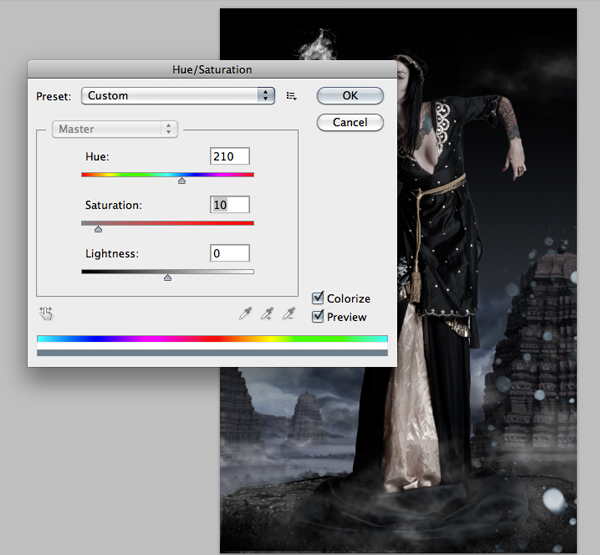
15.1) Import the snow texture onto the working canvas and place it on the right side bottom corner of the scene as shown.

15.2) Now change the Blending mode of the Snow Texture to Lighten.

15.3) Now by using the Hue/Saturation change the color of the texture to blend with the environment we are creating. Set the Hue=210 and Saturation-10 to get the desired output.
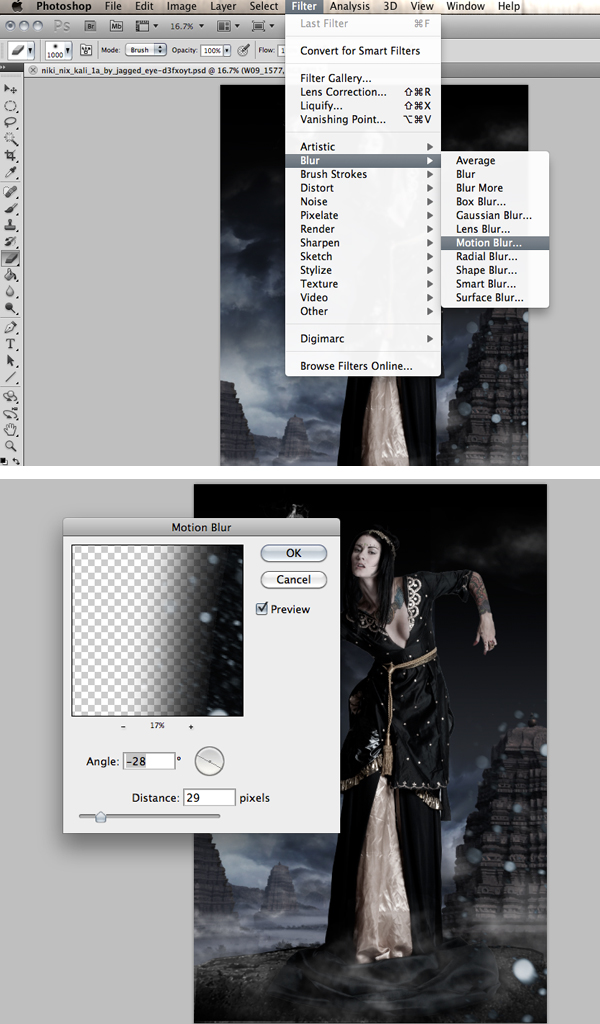
15.4) To illustrate that the light particles are moving by some speed we need to add Motion Blur to them. With the texture layer selected go to Filter>Blur>Motion Blur and set the Angle=-28 and Distance=29px.
Step 16 – Dazzling Light Particles
Similarly add few more magical light particles in the scene.
Step 17 – She Will Carry a Lantern
From this step we will be creating a lantern hanging from the left hand of the priestess.
17.1) Import the image of the lantern onto the working canvas and place it as shown.
17.2) Using the Soft Brush paint shadow on the lantern as shown with black color.
Step 18 – Light Up the Lantern
In this step we will be creating the light illuminating from inside the lantern.
18.1) Select the mask of the lantern by holding “Command and clicking on Lantern Layer Thumbnail” (Mac), Hold “Ctrl and click on Layer Thumbnail” (Windows). With the mask selected create a new layer under the lantern layer and paint the color #fca000 as shown.

18.2) Now reduce the size of the brush and paint white color at the center.
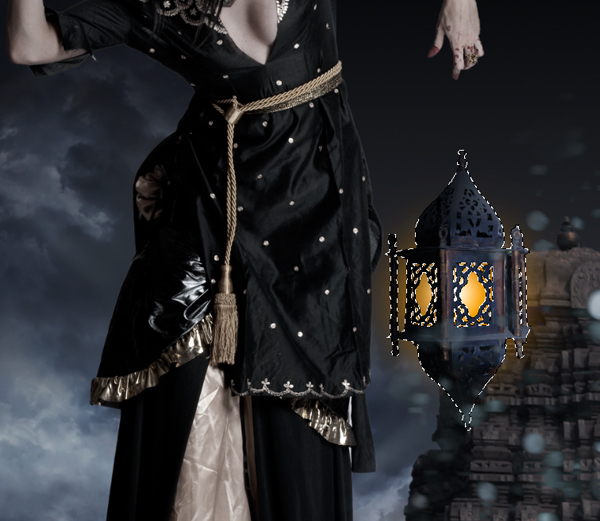
18.3) Create a glow effect to the edges of the lantern’s designer frame as shown to represent the intensity of light illuminating from the lantern.
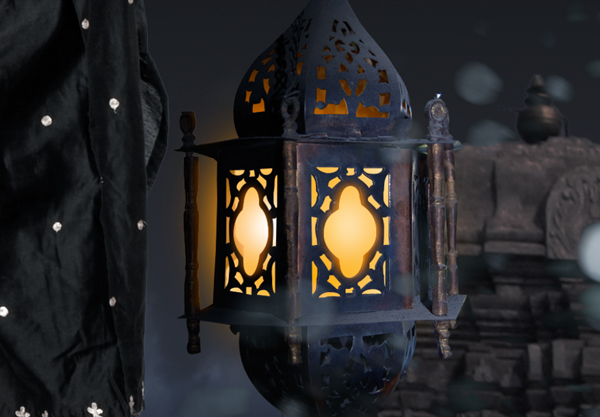
18.4) Since the main light source is at the middle of the lantern the upper end and the lower end of the lantern receives only partial light. Hence paint some partial light in the top and bottom ends as shown using the previous technique.

Step 19 – Lantern is Glowing
In-order to create the glow effect around the lantern, paint #fca000 color around the lantern as shown and reduce its Opacity to 15%.

Step 20 – Chains for Lantern
Now we are going to create the chains by which the lantern is hanging from.
20.1) Import the image of the chain onto the canvas and place it in all three corners as shown.
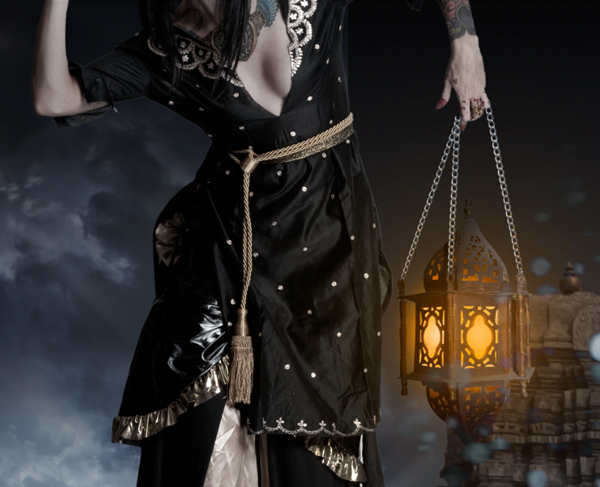
20.2) Duplicate the chain and then warp it using the Move Tool(V) in such a way that it is in the grip of the hands.

Step 21 – Shadows for Chain
Since the hand is covering some part of the chain we need to create a shadow to the chain as shown near the hand.
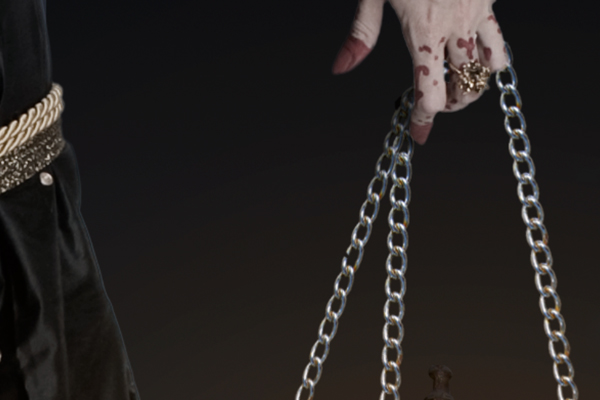
21.1) Create a black shadow on the chains as shown.
21.2) Using the previous steps create the fourth chain for the fourth corner of the lantern.
Step 22
Now by using the Gradient Tool(G) paint the gradient in a new layer with a combination of Black and #8492a7 colors. Then change the Blending Mode of the Gradient layer to Multiply and reduce its Opacity to 43%.

Step 23 – Add a Bell
In this step we will be creating a Bell close to the scene flying with the wind.
23.1) Mask-out the image of the bell from its original image using the Magic Wand Tool(W).

23.2) Import the image of the bell onto the working canvas and place it as shown. Then by using the Curves [Ctrl+M (Windows), Command+M (Mac)] color correct the bell to blend with the environment.

23.3) Since during the night the colors appear desaturated, we need to create the same effect to the bell. With the bell layer selected go to Image>Adjustments>Hue/Saturation and set the Saturation=-75.

23.4) As we already said that the bell is closer to the scene, it must appear blurred since it is out of focus as the main focus is on the priestess. Hence add a Gaussian Blur of Radius=6.6px to the bell.
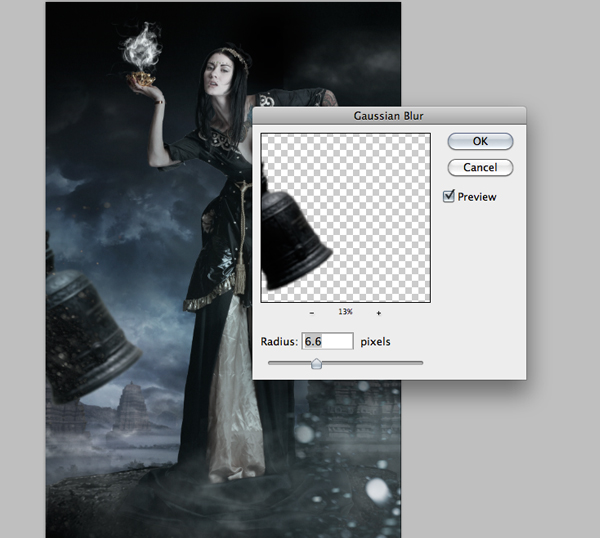
23.5) Now create the light shade on the bell caused by the light from the lantern. Set the Opacity of the layer to 20% after painting the light shade.
23.6) Paint a black shade on the left side of the bell as shown, since the light is focused from the right side.
Step 24 – Red Ribbon to Bell
In this step we will create a red ribbon to the bell. To achieve a quality cut of the ribbon from its background we are going to use an advanced cutting technique.
24.1) Import the image of the ribbon into Photoshop and select the Blue layer from the Channels Pallet.

24.2) Then go to Image>Calculations and select Blue from the Channels drop-down list.

24.3) With the Alpha 1 layer selected make sure that the ribbon is made completely black and the background into white.
Note: If the black and white contrast is not achieved by Levels, then use the Brush Tool to achieve the prefect silhouette.

24.4) Now go to Select>Load Selection and select Alpha 1 from the Channel drop down list to generate the mask around the ribbon. Then separate the selection into a new layer.

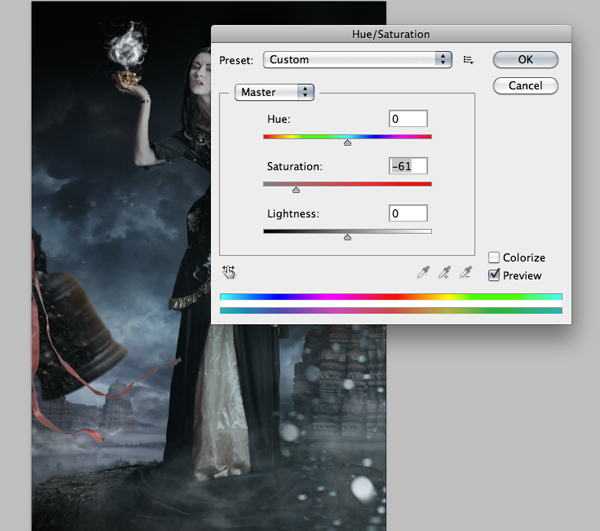
24.5) Import the ribbon onto the working canvas and place it as shown near the bell. Then De-saturate the ribbon to -61 using Hue/Saturation.


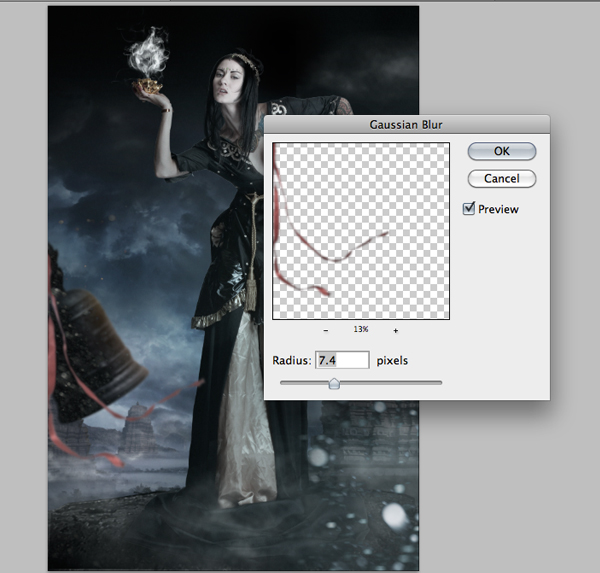
24.6) Since the ribbon is placed out of focus and moving with the wind we need to add some blur to it. Hence select the ribbon and add a Gaussian Blur of Radius=7.4px.
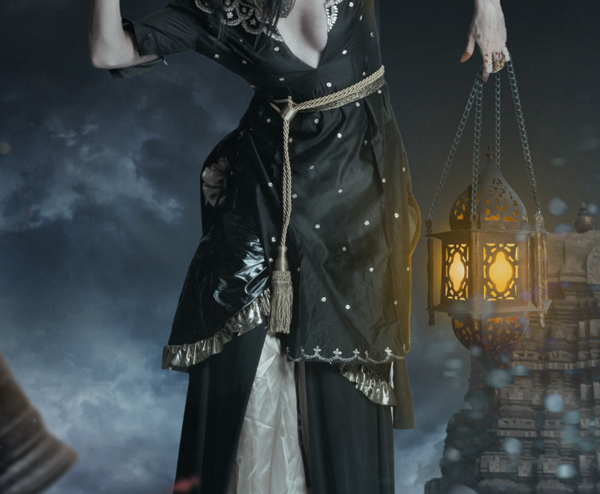
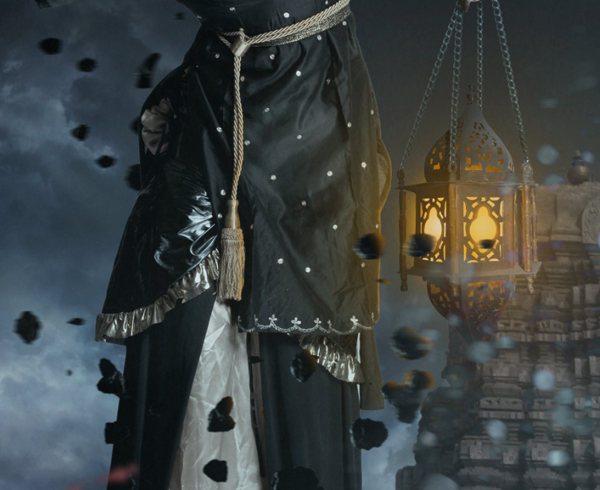
Step 25 – Light Shades on Her Dress
Since the lantern is very close to the priestess we need to create the light shade on the dress of the priestess.
Using the Brush Tool paint the light shade on the dress of the priestess as shown with the color #fca000.
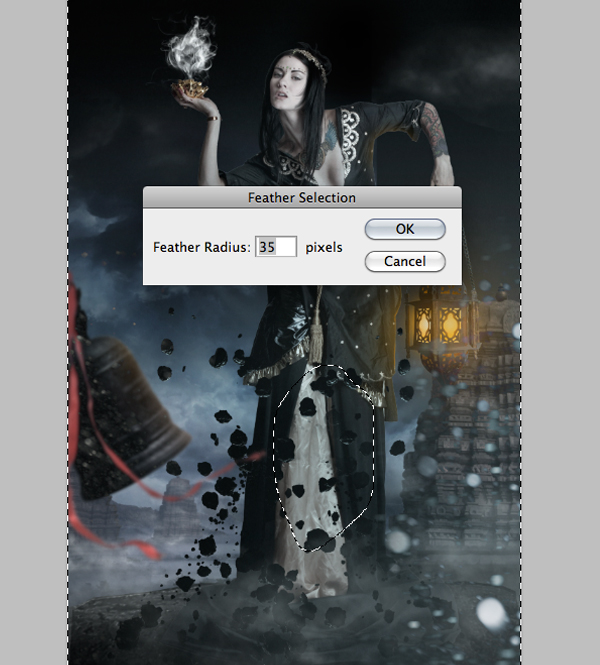
Step 26 – Rocks Flying Around
In this step we will be creating rocks flying around in the scene.
26.1) Import the image of the rocks onto the working canvas and place it as shown using the Move Tool(V).
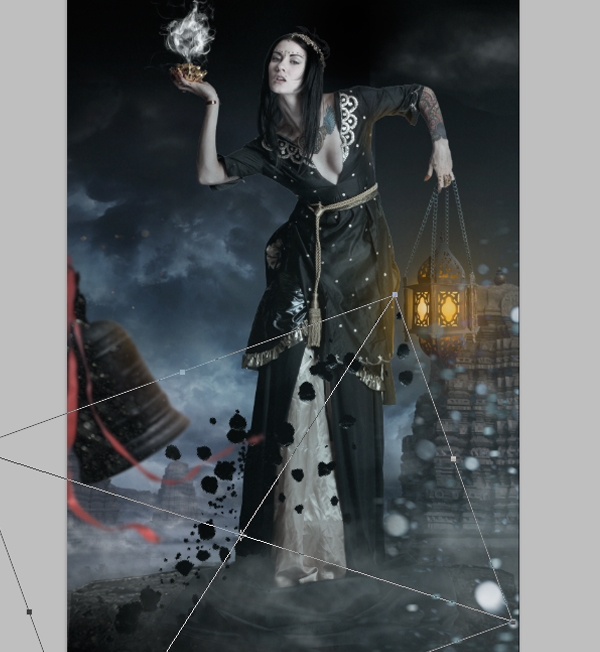
26.2) Now duplicate the rocks layer multiple times and place them as shown in such a way as if they are flying due some kind of cosmic power from the priestess.
26.3) Since the rocks are moving by some speed we need to add some Motion Blur to create a natural depth. But before adding the Motion Blur we must also consider DOF, since we already said that we are focusing the scene on the priestess, the rocks in focus near the priestess will appear clear and get blurred as they move away from the focus.
Merge all the rock layers and create a mask as shown and add a Feather of Radius 35px, then add a Motion Blur of Distance 27px with the Angle set to 10.

Step 27 – Light Shade on Rocks
As we previously said that the rocks are flying near the priestess we need to create the light shade on the rocks flying near the lantern.
Using the color #fca000 paint the light shade on the rocks as shown to create a natural depth.
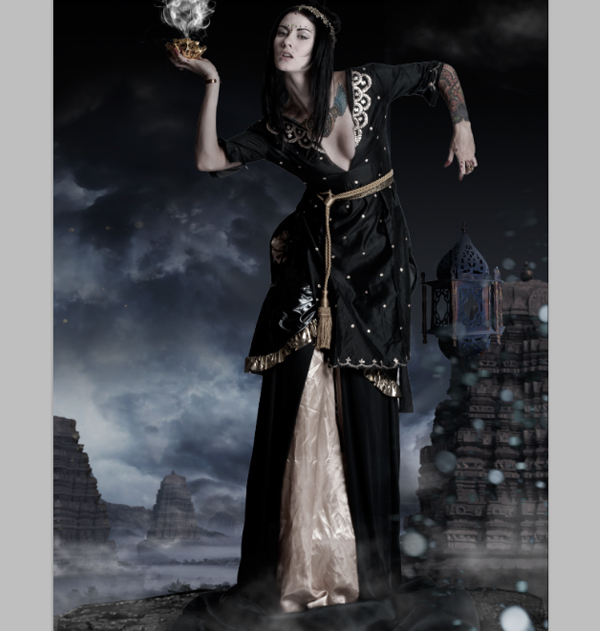
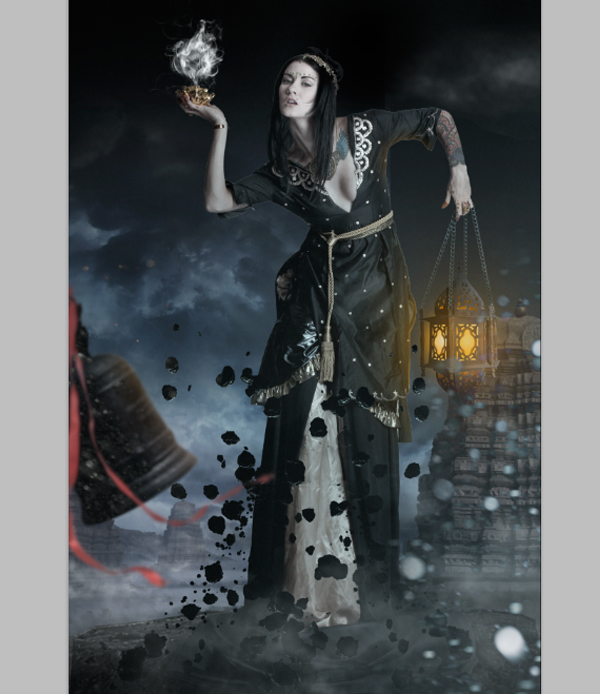
Final Result of the Fantasy Photo Manipulation


