


Matte Painting Photoshop tutorial : Create A Distressed Surreal Cityscape
Notes
- This tutorial is for Photoshop users with intermediate to advanced skills
- All the keyboard shortcuts are mentioned within ( )
Resources
If you are following along, you’ll need to grab the following resources.
- Buildings
- Distressed Buildings
- Destroyed Building 1
- Destroyed Building 2
- Destroyed Building 3
- Destroyed Building 4
- Clouds
- Fog Brushes
- More Fog Brush Options
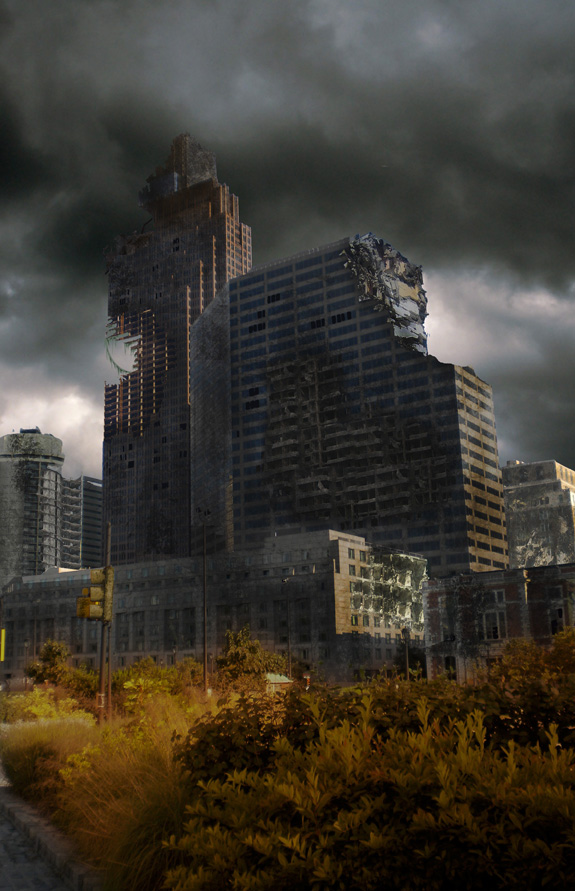
Preview
Before we begin, check out a quick preview of what we will be creating.

Step 1
Just like every construction needs a red print, so do matte paintings. Here’s a little sketch I created to map out my project. The numbered sections shown here will be used as a reference throughout this tutorial.

Step 2
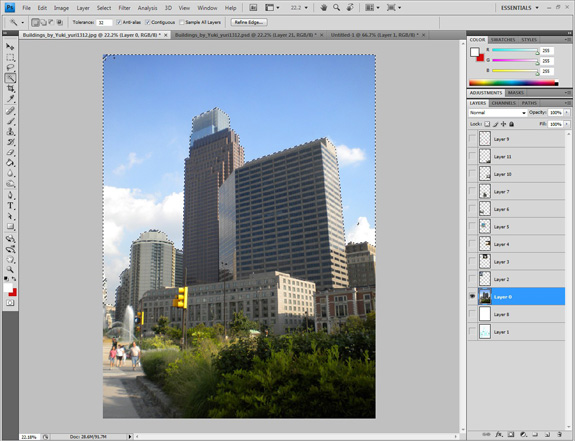
I found this picture which is a perfect fit for the blue print. Open it in photoshop, and remove the clouds using the Magic Wand (W) tool, or whichever pixel cutting technique you are most familiar with.
Step 3
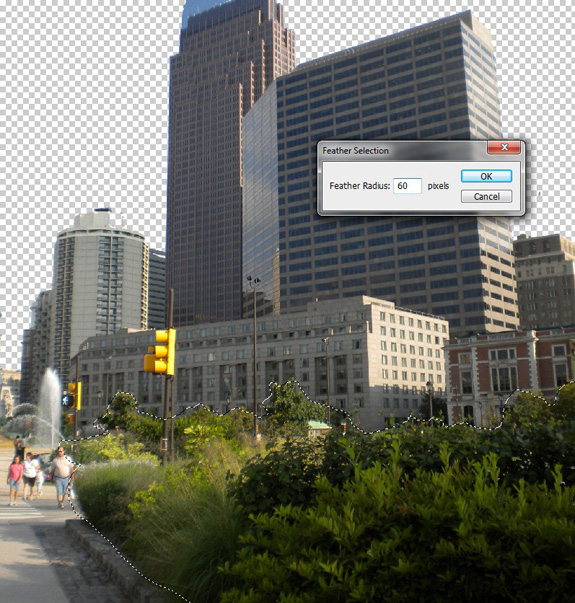
In this painting we could do without any green foliage, so turn the plants in the foreground into pigmentless plants. Select the Lasso Tool (L) and roughly draw around the bushes as shown, and set the Feather Radius to 60. Then alter the curves to approximately what is referenced below.

Step 4
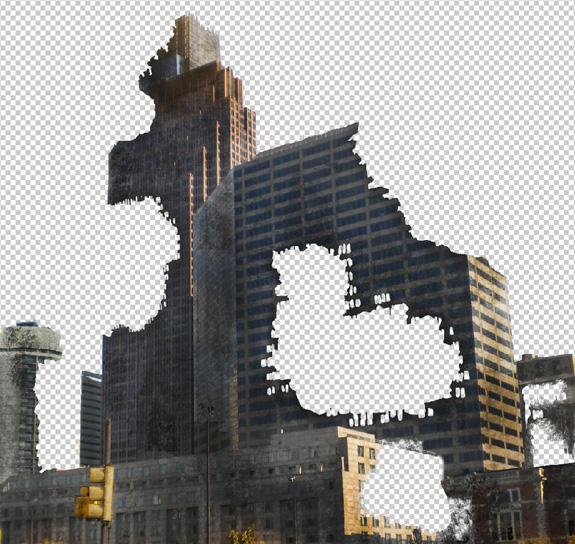
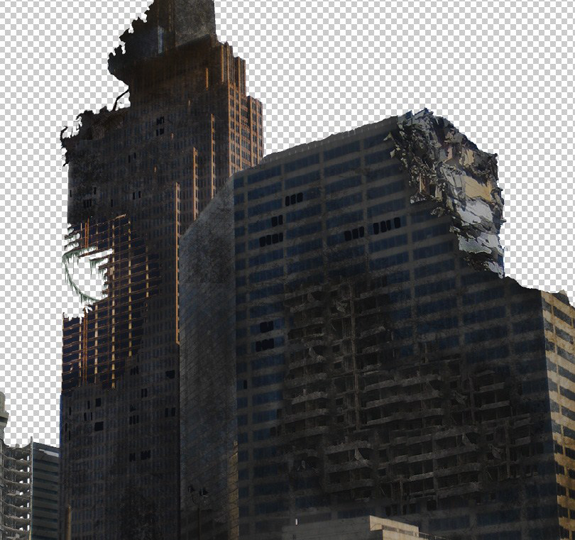
This step requires some decision making on your part. Choose which portion of the building you’d like to destroy. Then use the Lasso Tool (L) to roughly make your selections. Lastly, erase the edges using the Eraser (E) tool.

Step 5
Next, darken the building by using the Burn Tool (O) with a rust brush. It’s the perfect tool to distress the buildings like what is shown below.
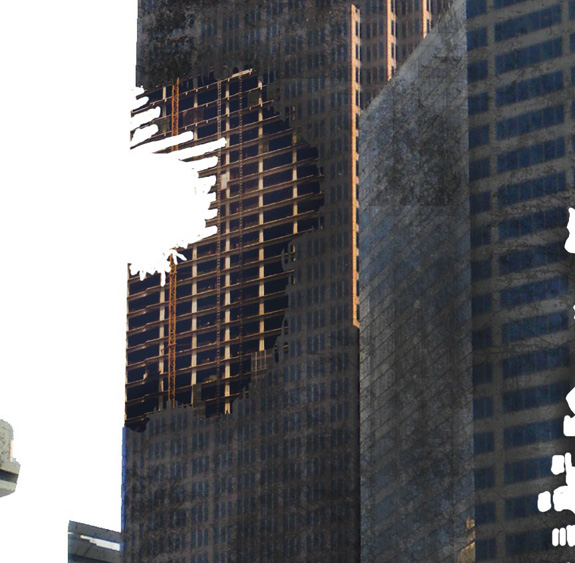
Step 6
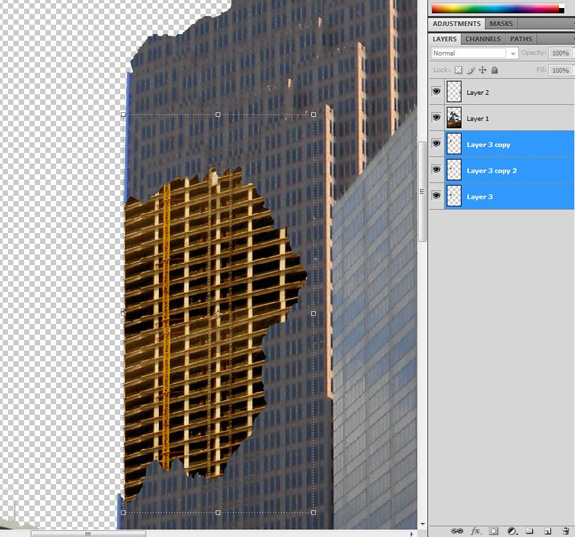
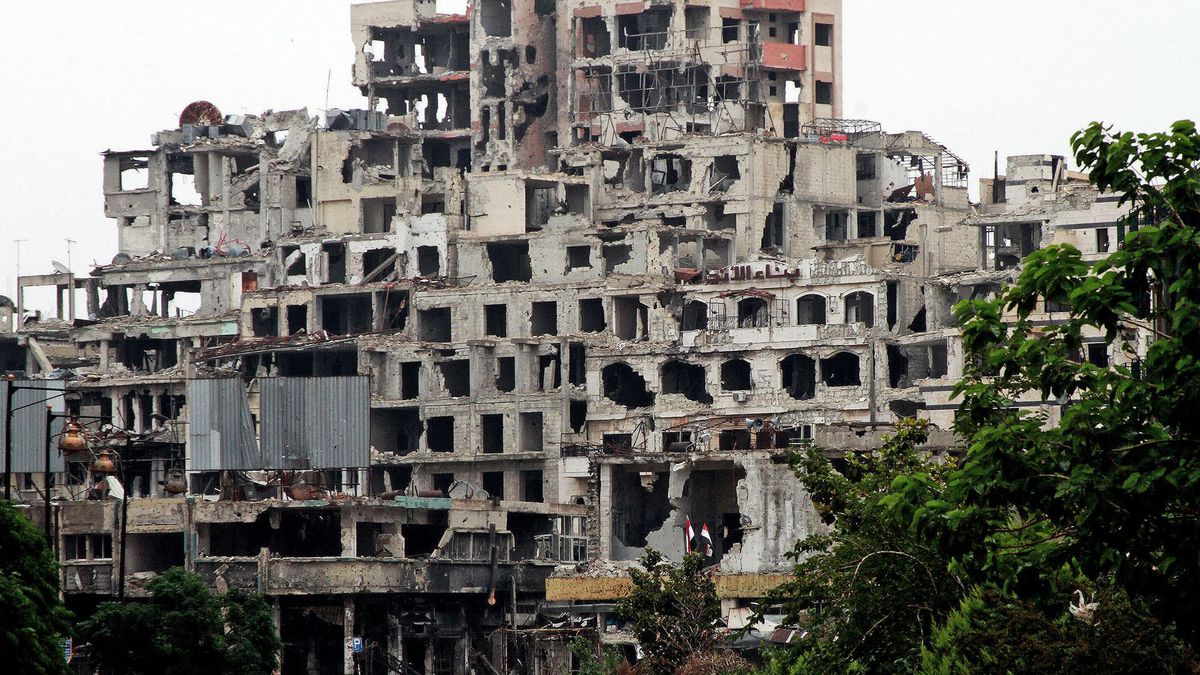
Now lets add some rubble and gutted patches to the buildings. Start in the sequence that was layed out in the blue print. I found this image suitable for the section marked as ‘B1′. Cut out the portion required, and name it (B1 Grid).

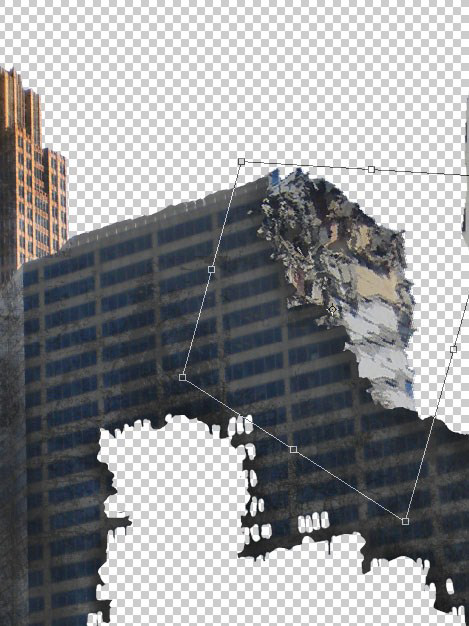
Step 7
Now paste that piece back into your original canvas and blend it with the prespective of the building. Select the Free Transform tool (Cmd / Ctrl + T), then with the Move Tool (V) selected while holding (Ctrl) move the edges to match the prospective.

Step 8
Once you are settled on the prospective, duplicate the layer untill the gap is filled. Then merge all those (B1 Grid) layers and erase some parts of the grid to show it’s broken.
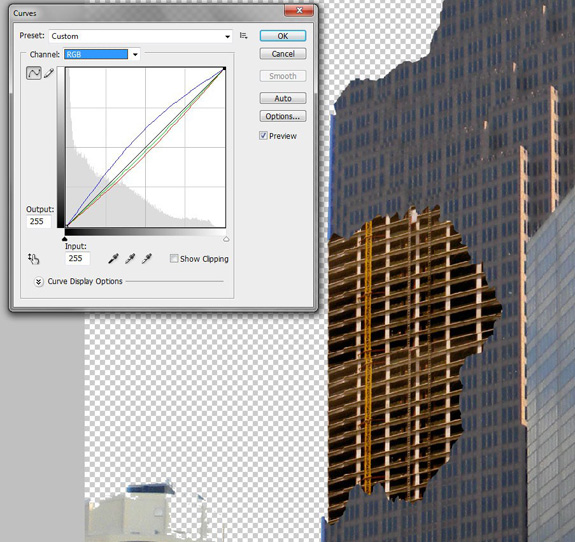
Step 9
Now adjust the curves to the following output. Red 150, green 122, and blue 95.
Step 10
Next, apply similar destroy and burn techniques that you used in steps 4 and 5. We will come back to this layer for more details later in this tutorial.
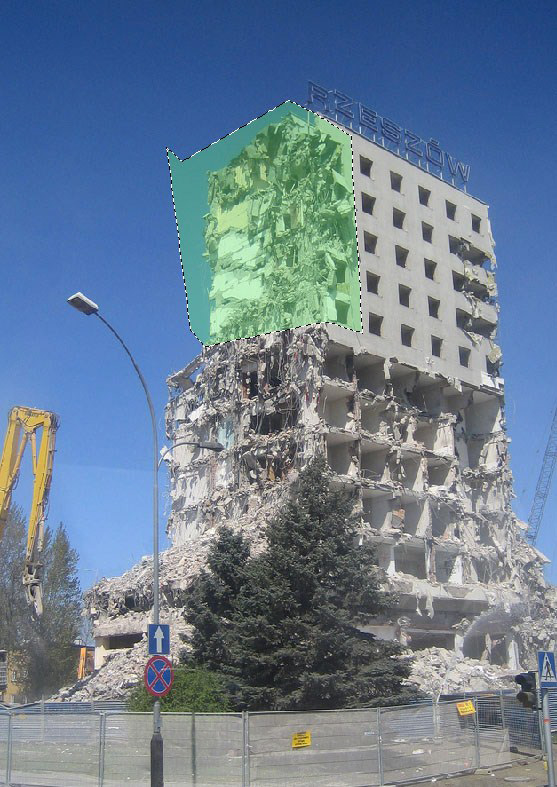
Step 11
Lets start to work on the B2 section. Choose the best pic for B2′s destruction, I used this image. Now, repeat the same steps you followed in step 7 while aligning the B1 Grid layer. Be sure to take your time with any of these perspective steps, getting them wrong will be detrimental to the entire effect.
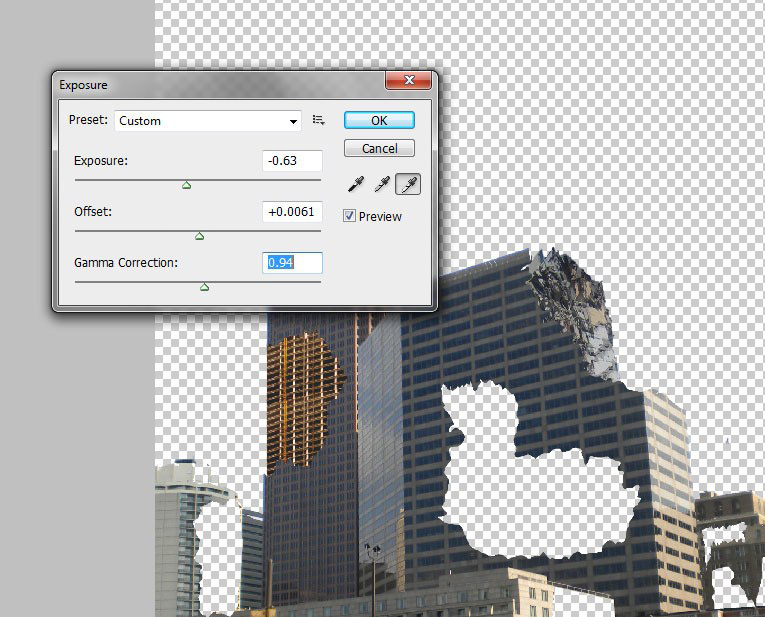
Step 12
Change the Exposure values to the following: Exposure: -0.63, Offset: +0.0061, Gamma Correction: 0.94.
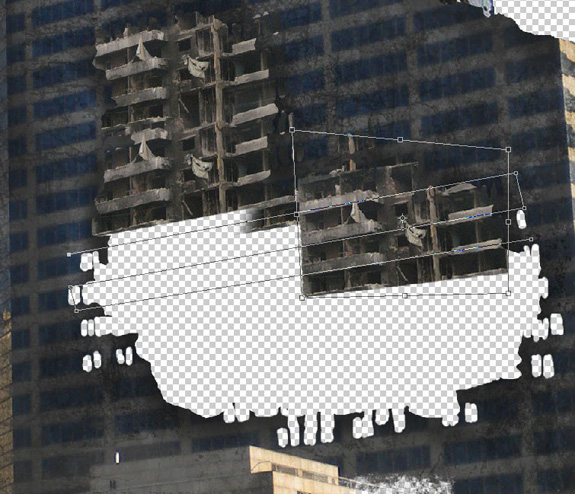
Step 13
Grab this photo to be used for the middle of ‘B2′ and name the layer ‘Broken Floors’. The floors in the middle of B2 need some attention. We should concentrate on the perspective. First, draw some lines matching the perspective using the Pen Tool. Then use the Free Transform tool to adjust the floor lines with the building lines.

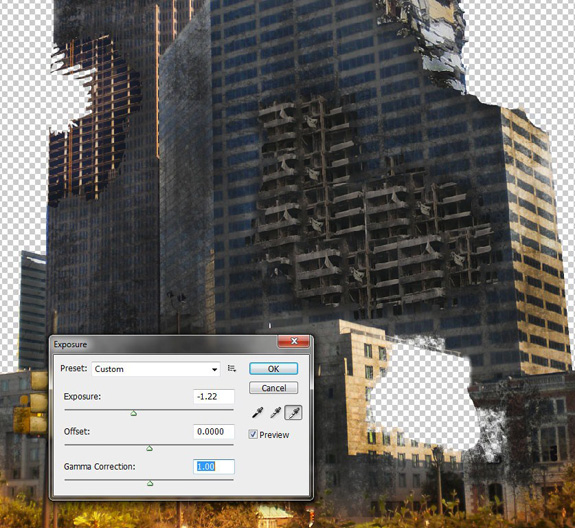
Step 14
Change the exposure values to: Exposure: -1.22, Offset: 0, and Gamma Correction: 1.00. Then select the Burn Tool (O) and use your creativity to make it look old and destroyed.
Step 15
Now it’s time to let your creative juices flow. In much the same way as the previous steps begin filling in the gaps with distressed buildings. Remember this is a surreal destroyed cityscape, so you can’t go too wrong, as long as you’re creative and maintain consistent color, perspective and shadows. The steps I used are referenced in the sample pics below.

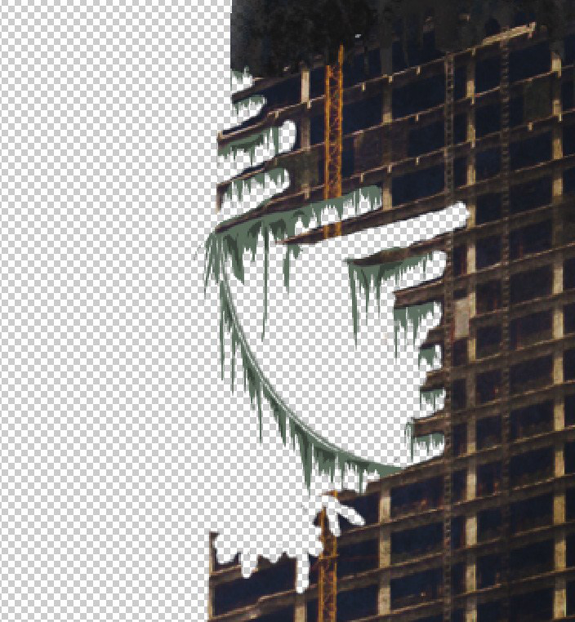
Step 16
Now lets add some details to the ‘B1 Grid” layer. Add a new layer, then select the Lasso Tool (L) and outline some hanging grass. Fill your selections with the colour #5d6e5e. Again select the Lasso Tool (L) and add shades to the grass with colour #3a413a.
Step 17
Every abandoned building needs some broken windows, so lets add a few. Select the Brush Tool (B) and choose the colour #0c0d11, now start painting some random boxes which represent the broken windows. When it comes to painting details, your creativity is what makes the difference between a beginner and a professional.
Step 18
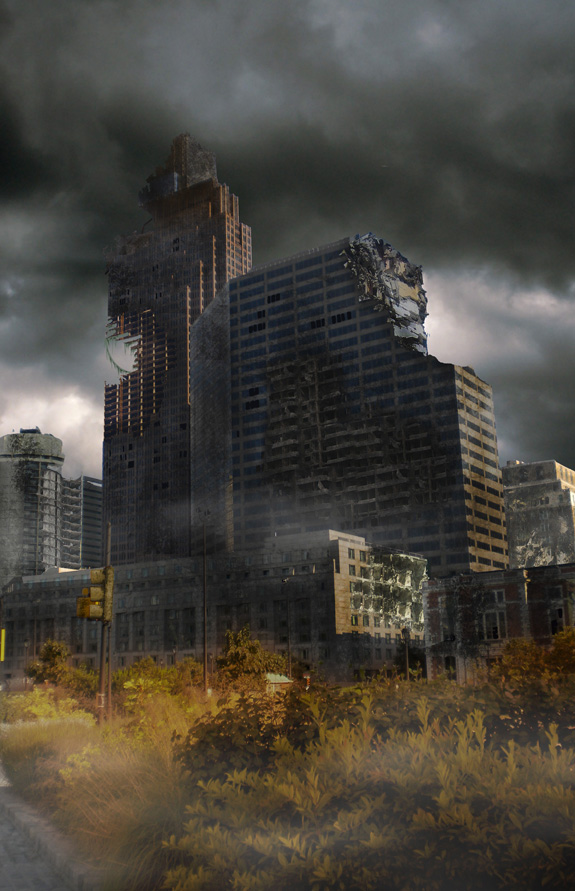
Now add some clouds to the backdrop which suits the environment we created. Drop them into our cityscape behind all the building layers.
Step 19
Grab some fog brushes and make the scene more realistic by brushing some fog where it’s needed. Be wary not to go overboard with this step.
That’s A Wrap
That wraps up this tutorial on matte painting. Let us know what you think, drop a comment using the form below.


