Sci Fi Series: Space Vixen Photoshop Tutorial
Whether they’re big budget smashes or critical failures, movie posters represent some of the best compositing work on the planet. In this walkthrough we’ll be using compositing techniques, lighting and type to create a Sci Fi flavoured ‘one-sheet’ to promote a fictional film. There’s a lot to be learnt from this style of Photomanipulation, so if you ever had the itch to star in your own Sci Fi epic, now’s your chance!!
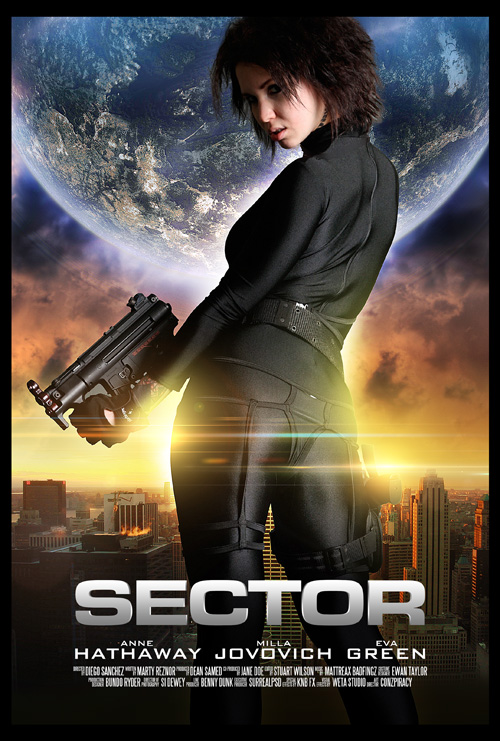
Here the final result
STEALING COMPOSITION
The number one problem new digital artists face, is the issue of composition. Many get the processing and style right early on, but fail to arrange the elements in an impactful manner. One of my favourite ‘tricks’ is to look at successful movie posters, and literally steal the composition. There’s a great resource I use to check out loads of posters in one place, and that’s Massive Movie Poster Cliches article at TheChive ( original author Christophe Courtois ).
For this piece, Im going for the From the Back ( with weaponry ) look – here’s a collection containing similar layouts / poses:
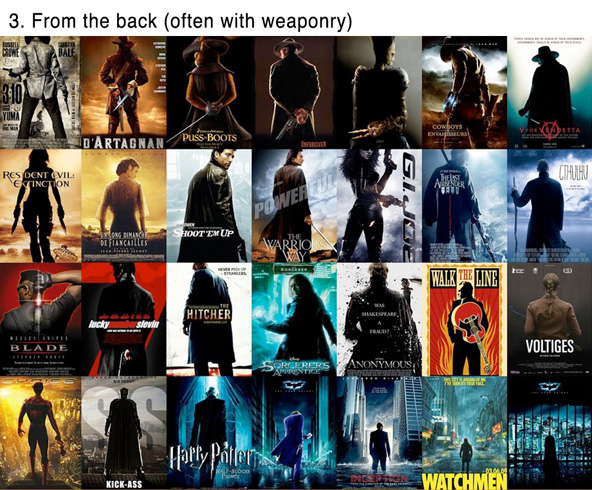
One of the main pointers I give my students, is to increase the prominence / size of their foreground elements or stock models. As you can see, most of these figures take up a lot of ‘real estate’.
THE STOCK
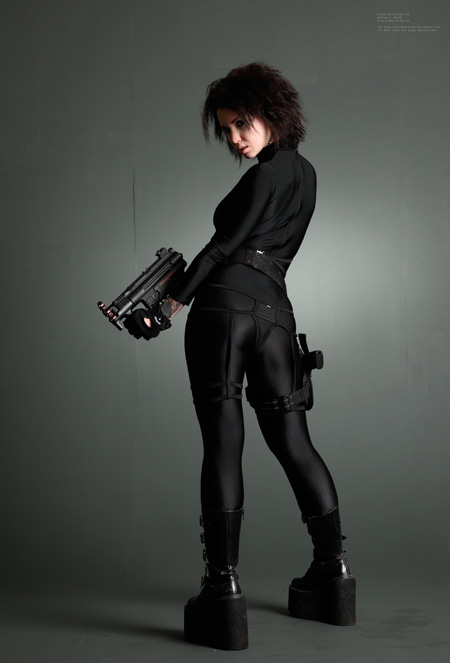
For this piece, I need a suitably badass character, who fits the sci fi tone and is posed like the characters Ive been referencing. The DeviantArt stock gallery usually comes up with the goods for figurative images, and fortunately world-famous Marcus J. Ranum has provided us with a great selection to choose from. Ive opted for ‘ Veteran of the Psychic Wars 11 ‘, there’s plenty there – have a look and see what takes your fancy
DOCUMENT SETUP
If you want to produce top-tier digital art, you gotta work BIG!! For the example Im working at 300DPI, and a size that works with the standard ‘One-Sheet’ dimensions. You can check out the values Ive used below. The only issue with working big, is that it gets harder finding suitable stock at the right size – remember, you don’t want to be ‘stretching’ your pixels if it can be helped.

COMPOSITING YOUR CHARACTER
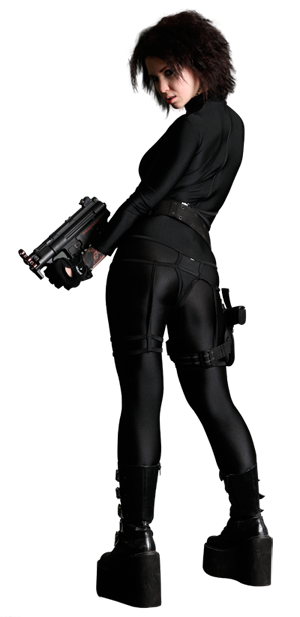
The character I’d like to use is larger than the document Im working in, so I create a new document at A3 ISO size ( File > New > Preset > International Paper > Size: A3 ) and paste in the image of the stock model. This gives us room for maneouvre!!
The method used for ‘cutting out’ this character is to add a Layer Mask to the stock image, and remove the background elements using the Pen Tool for the body / face and the Refine Edge tool for the hair. These are advanced compositing methods, which we’ve covered previously in-detail. Check out our compositing walkthroughs if you are uncertain of any of these methods:
• Core Skills: Photoshop Layer Masks
COMPOSING THE FOREGROUND
With your stock model ‘cut-out’ – you can now click and drag the layer into your work document. Scale the figure as necessary using Transform ( Ctrl/Cmd + T ), hold Shift whilst scaling to maintain the proportions. Ive gone for a cropped, high-impact composition like so:
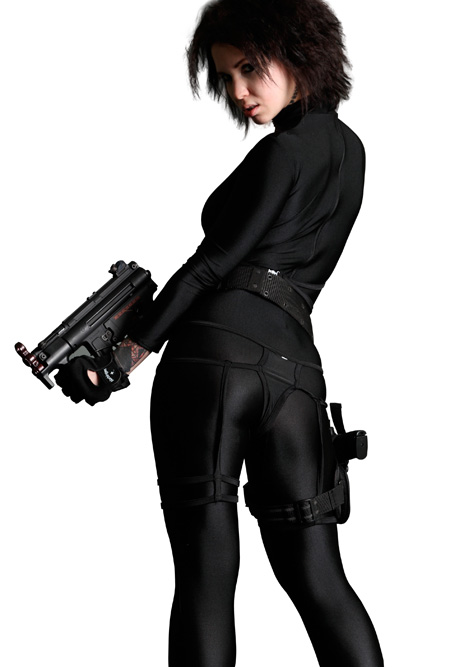
Ive said it before, and I’ll say it again.. get used to using Layer Groups !! Create a new Layer Group ( Ctrl/Cmd + G ) and name it ‘Stock Model’ or ‘Girl / Man’ etc. and move your stock model into the new group. This is essential for keeping organised, and allows for a faster workflow. Makes all the difference when working to deadline!!
CITYSCAPE
Hide the ‘Stock Model’ Layer Group by clicking the eye icon on the layer stack. The first step is to bring in a dramatic looking city skyline, I used Skyline Sunset by Designdivala (DeviantArt) – you can find plenty more at the DA Stock Gallery and also Freeimages. Paste your selected city image into the workspace and scale as necessary using Transform ( Ctrl/Cmd + T ). The city should ideally be located within the bottom third of the layout:
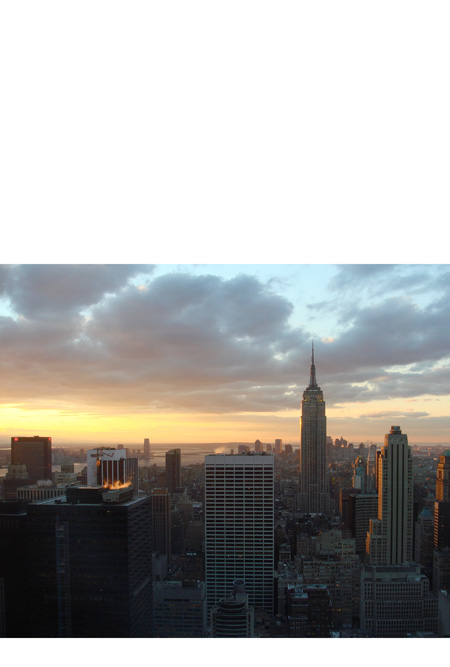
Add a Layer Mask to your city layer. Using a very large Soft-Edged Brush (B) set to Black (D), paint at the top and bottom edges, gently removing the sharp edges of the image. Normally, when using brushes of 1500px width or higher, you’ll need to zoom out ( Ctrl/Cmd – ) considerably to get a feel for what’s going on.
At this stage it’s not going to look great, but we’ll even things out as the composite progresses. Here’s a look at the blend so far, it’s a little ‘rough n ready’!!

Create a new layer ( Ctrl/Cmd, Shift + N ), ensuring it’s under your city layer in the stack. Select the Brush Tool (B), and hold Alt to sample colours from the city stock image. What you want to do here is sample dark tones from the bottom and paint on the new layer underneath. Repeat this process for the top part of the image, sampling the sky colours. This softens the transition and covers the background layer:

DRAMATIC CLOUDS
It’s time to bring in some suitably epic clouds into our composition. There is no shortage of cloud stocks online to choose from, I opted for Dramatic Clouds by wilddoug (DeviantArt) , there’s also a huge selection of great looking clouds that can be found at Mayangs Texture Library that are worth a look.
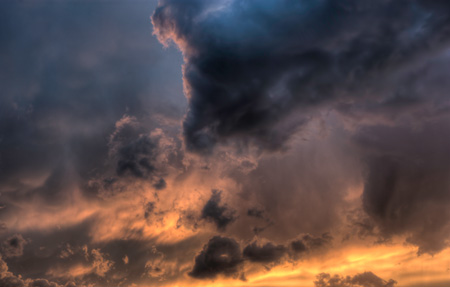
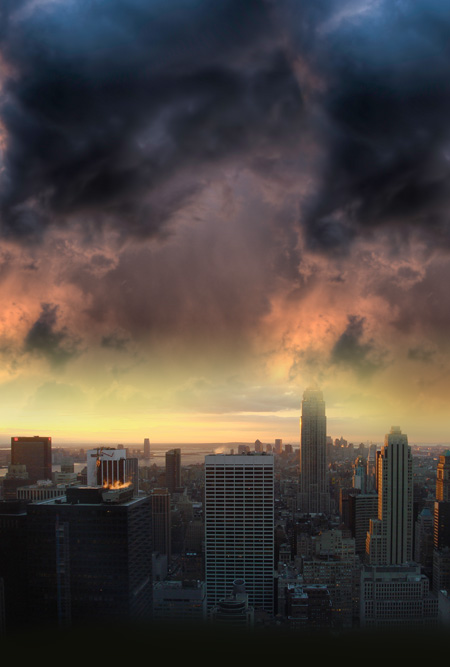
Paste your selected cloud image into the composite, and ensure it is at the bottom of the layer stack, below the city and paint layers. For the example, I duplicated the cloud layer ( Ctrl/Cmd + J ) and used Layer Mask blending to create a ‘new’ cloud formation, more suited to my needs. This additional step isn’t essential, but can definitely help if you want to increase drama or reshape clouds:
INCREASE VIBRANCY
Here’s a simple little trick that can really push up the vibrancy and saturation of a composite. Create a new layer at the top of the stack set to Overlay. Sample a bright tone from the image ( I chose a ‘Michael Bay’ orange ), and use a very large Soft Edged Brush to paint over your cityscape / clouds. For the example I left the Overlay layer set to 100%, however tweak as necessary with your own experiments.
Here’s a before and after – a subtle change, but very cinematic in appearance.
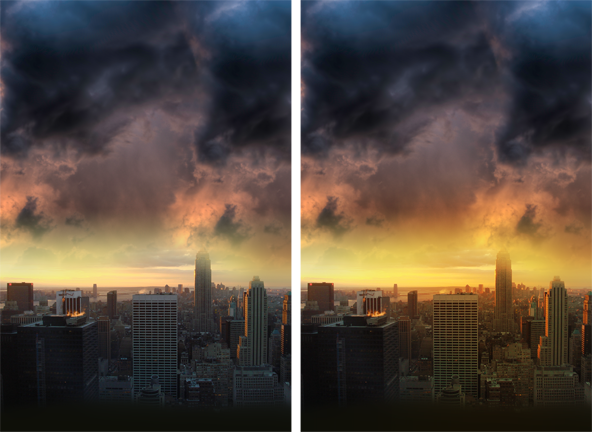
‘ Bad Boys, Bad Boys, Whattcha gonna do??! ‘ Ahem.. Excuse me..
BIG PLANET
To really drive home the concept of a cosmic event, a big ol’ planet really sets the mood. You can find plenty of Planet Stocks at DeviantArt , Ive used a PNG resource from a great pack by DemosthenesVoice . Bring your planet into the composite and mask if neccesary, pull it into it’s own layer group named ‘Planet’ and set the layer mode to ‘Linear Dodge (Add)’. If that doesn’t work too well, try with another layer mode. Position your planet at the top, for a real foreboding mood:

PLANET ATMOSPHERE
You can increase the ‘haze’ of you planet using Gaussian Blur ( Filter > Blur > Gaussian Blur ). The best method for doing this is to duplicate your original planet layer ( Ctrl/Cmd + J ), and apply a Gaussian Blur at the necessary strength ( Filter > Blur > Gaussian Blur ). You’ll want to delete the blur that covers the planet itself, leaving only the haze that extrudes from the outer rim. You can delete this by using a selection based on the original planet layer:
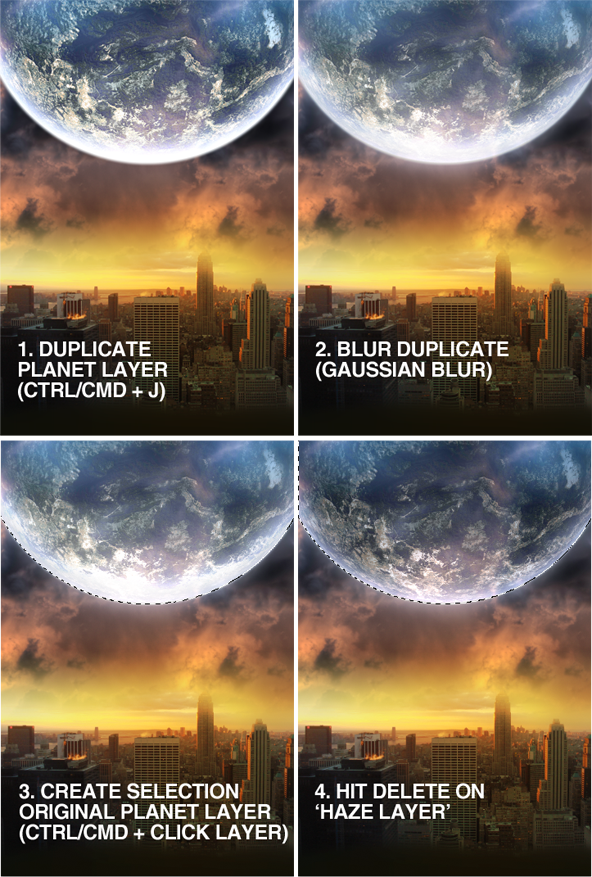
This step will leave you with a ‘haze’ on it’s own layer. You can duplicate ( Ctrl/Cmd + J ) this layer as many times as you want for an increased effect. For the example I used a combination of duplicates set to Overlay and Color Dodge layer modes. Before and after duplicating the haze layer:
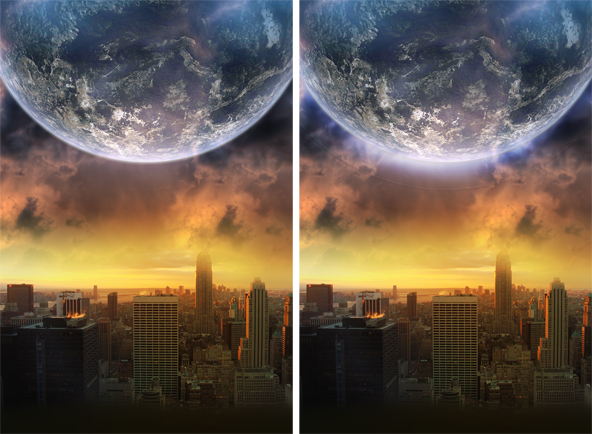
For a final boost, you can duplicate the original planet layer and set the mode to Color Dodge or another ‘brighten’ mode, and tweak the opacity as necessary. The example image used a duplicate set to Color Dodge, Opacity 30%.
STOCK MODEL REFINEMENT
Make the stock model visible again by showing the layer group ( click on eye icon ). For the example piece, a few little amendments were required to brighten up the stock model and add some realism. The following steps were undertaken:
1. Stock Model layer group made visible.
2. Stock Model layer duplicated, and set to Screen layer mode. A Layer Mask was added, inverted to Black ( Ctrl/Cmd + I ), and then a large Soft Edged Brush (B) was used to selectively ‘paint-in’ the brighten effect.
3. A new layer is created above the Stock Model Layer, set to Multiply layer mode. A selection is made based on the original Stock Model layer ( Ctrl/Cmd + click layer icon ), and then a dark tone is used to paint in the shadow on the new Multiply layer.
4. A new layer is created below the Stock Model layer, and set to Overlay layer mode. A large Soft Edged Brush (B) set to white is used paint in some illumination behind the figure, pushing the stock model forward with more impact.
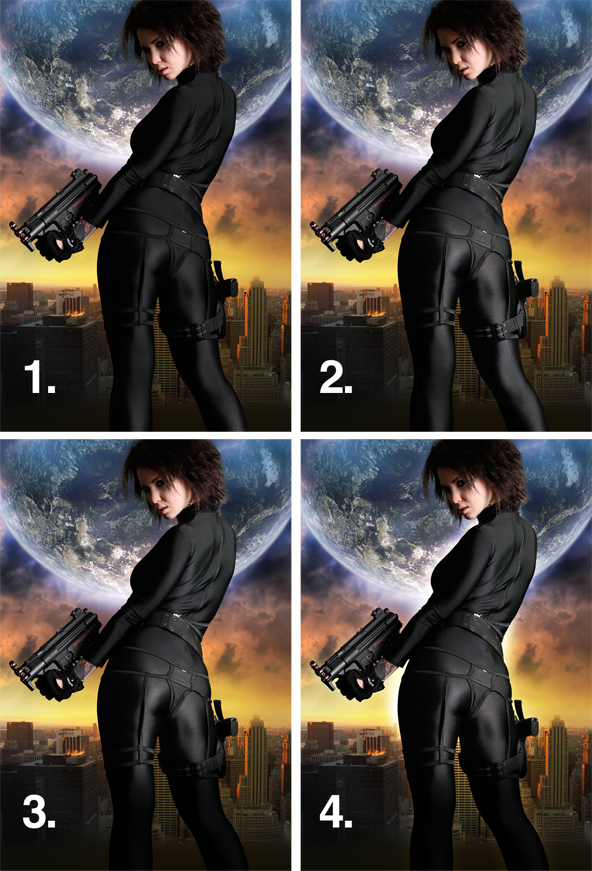
Here’s a look at the layer group for the Stock Model and amendments, showing the layer modes and opacity:

FLARES N’ GLARES
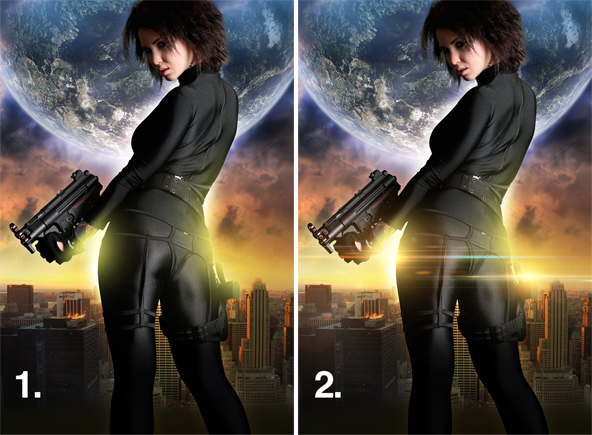
When a subject is backlit, more often than not the light ‘seeps’ through – and this is a technique often used in movie posters to add realism and drama. To add light glare, simply add a new layer above the Stock Model and use a large Soft Edged Brush to paint in the glare ( sampling a bright tone from the existing scene using Eyedropper I ). The example uses a Normal layer mode, 100% Opacity, the strokes were kept within the confines of the body by creating a selection of the original stock model layer ( Ctrl/Cmd + click layer icon ) (image 1).
For the flares, I got the Optical Flares pack from psdbox.com – pasted the ones I wanted into the image, scaled with Transform (Ctrl/Cmd + T), and set the flare layers to Screen (image 2):
TYPE
The title for this poster was created using the Epic Movie Type technique, that we released previously – head on over and check the full tutorial if you want to use this style. The actors names used Bank Gothic Typeface and were three individual layers. You may want to tweak the leading via the Type Tool doalog box to amend the verticle distance between the words. The credits are created using Steel Tongs, which you can get for free at Fonts101 .
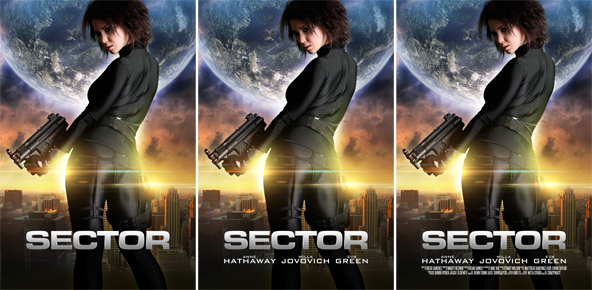
SECTOR – COMING SOON TO A CINEMA NEAR YOU!
Here’s a fullsize look at the finished composite. Best of luck with yours!

REVIEW
We have one more Sci Fi Tutorial, and then a change of pace with a new season focusing on Fantasy Techniques!! Keep your eyes peeled for our new training package that should be live by September 2017; which will cover the FULL ‘Art System’ used to create most works on this site. Subscribe at the top right to get site exclusives, updates and unreleased tutorials!!


