Create Surreal Photo Manipulation Desert Fish
In this Awesome Photoshop tutorial, i’m going to show you how to create a surreal composition using photo manipulation and illustration techniques. Have fun.
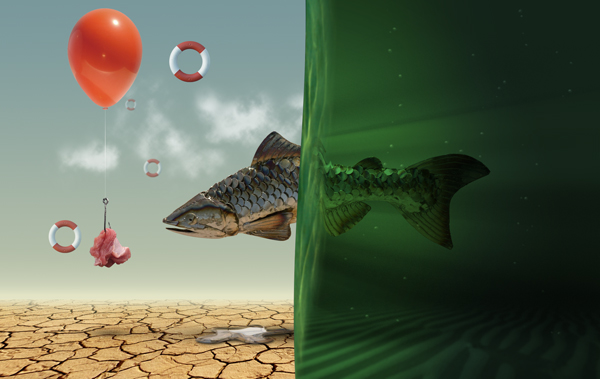
Here is the Final Image
Before we start lets see the final image we’ll create through out this tutorial.

Tutorial Details: Software Used: Adobe Photoshop
Tutorial Time: 30mn
Difficulty Level: Intermediate
Files to Download:
Cracked Earth
Desert
Fish
Fish Bait
Water Surface
Red Balloon
Life Buoy
Create a New Document
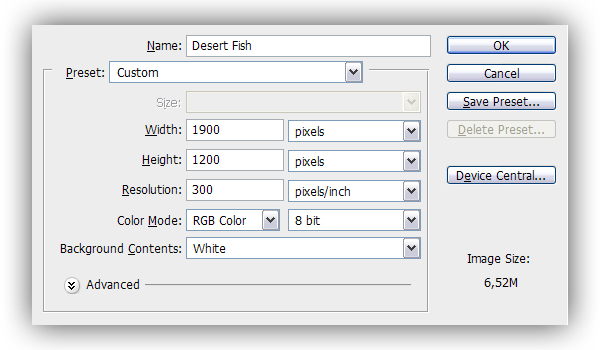
Lets start by creating a new document which is 1900 pixels wide and 1200 pixels at a resolution of 300 pixels/inch, make sure Color Mode is set to RGB and name it “Desert Fish” .
Open the Earth Texture
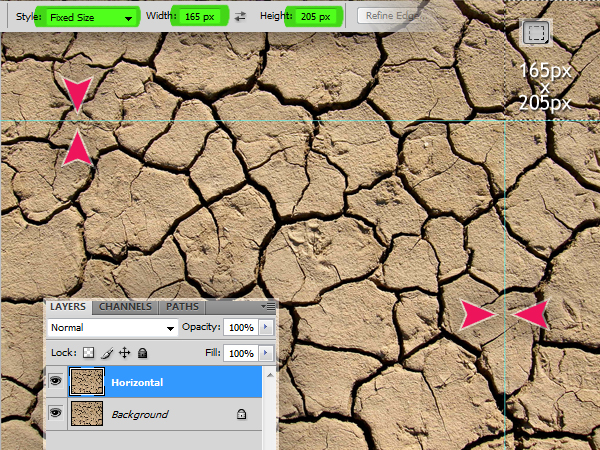
First we’ll work on the cracked earth texture and make it seamless. Open the cracked earth image in Photoshop. Duplicate the Background and name it “Horizontal”. Get the Rectangular Marquee Tool, set Style to Fixed Size and set Width to 165 px and Height to 205 px. Click on the canvas and place the selection at the top right corner. Drag one vertical and one horizontal guide and snap them around the selection. Then deselect by hitting Command + D [Ctrl + D for Windows] .
Horizontally Seamless
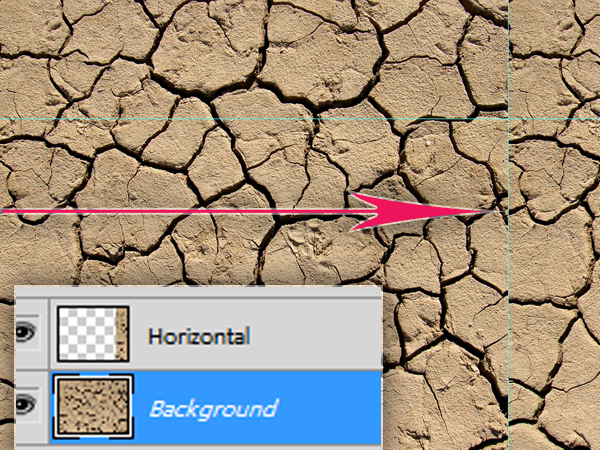
Get the Move Tool and holding down the Shift key [to prevent dragging vertically] drag the “Horizontal” layer right and snap the left edge of the layer to the vertical guide .
Horizontally Seamless
Get the Polygonal Lasso Tool and make a selection like in the below image over the craks, leaving the black crack lines outside the selection and hit Backspace to clear and deselect . Hit Command + E to merge the layers.
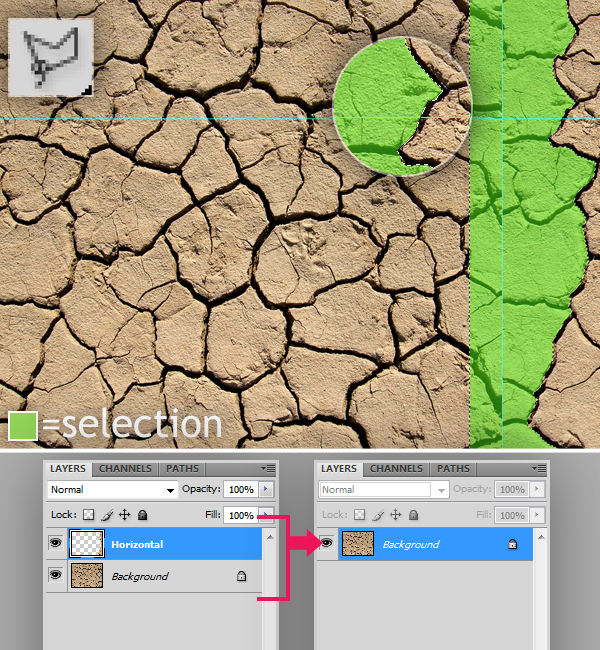
Vertically Seamless
Duplicate the Background and name it “Vertical”. Get the Move Tool and holding down the Shift key drag the “Vertical” layer up and snap the bottom edge of the layer to the horizontal guide .

Vertically Seamless
Get the Polygonal Lasso Tool, hit Command+H to hide the guides for now beacuse the Lasso Tool will snap to them and make it diffucult to select. Now make a selection like in the below image over the cracks, leaving the black crack lines outside the selection and hit Backspace to clear. Hit Command + E to merge the layers again . Hit Command+H again to show the guides.

Make it Seamless
Get the Crop Tool and make a selection like in the below image, then drag the selection and align it to the top right of the document. Double click inside to crop. Now we have a seamless ground texture .

Define Pattern
Hit Command+A to select all, go to Edit > Define Pattern and name the pattern Cracked Earth, hit OK .
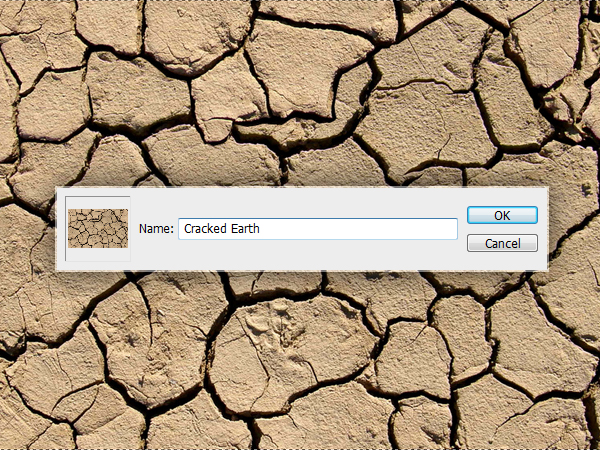
Create the Sky
Go back to “Desert Fish.psd” document, create a new layer and name it “Sky”. Get the Gradient Tool, set Foreground Color to #bec5ab, Background Color to #79989c. Pick Foreground to Background gradient and apply a Linear gradient like in the below image .

The Ground
Create a new layer. Fill it with any color, hit Command+T and set Horizontal Scale to 225% and apply. Apply a Pattern Overlay Layer Style using these settings: Blend Mode => Normal, Pattern => Cracked Earth, Scale => 100%. Now we should merge the pattern with the layer so create a new layer on top and name it “Ground”. Select both “Ground” and “Layer 1” layers and hit Command + E to merge .
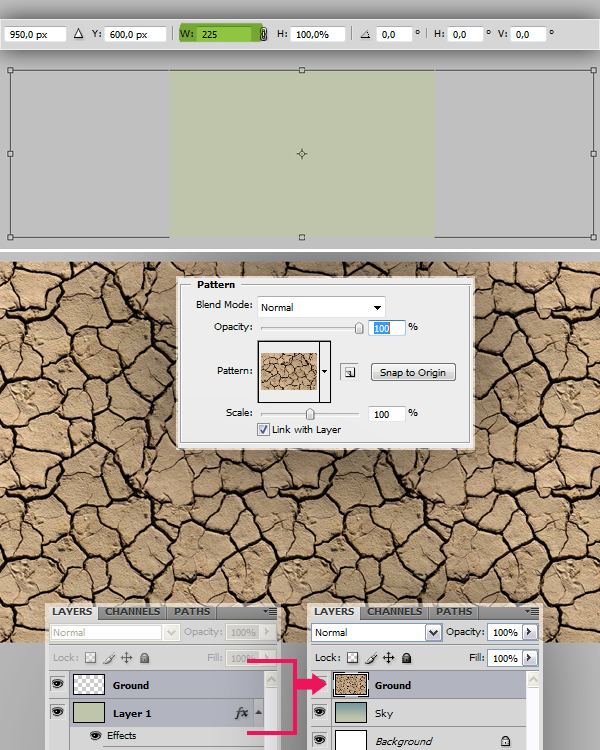
The Ground
Hit Command+T, set Reference Point Location to middle bottom, set Vertical Scale to 21% and apply. Then go to Edit > Transform > Perspective. You may need to zoom out to see the bounding box. Adjust the perspective as in the below image . Hit Command+T again and set Horizontal Scale to 125 to enlarge the cracks.
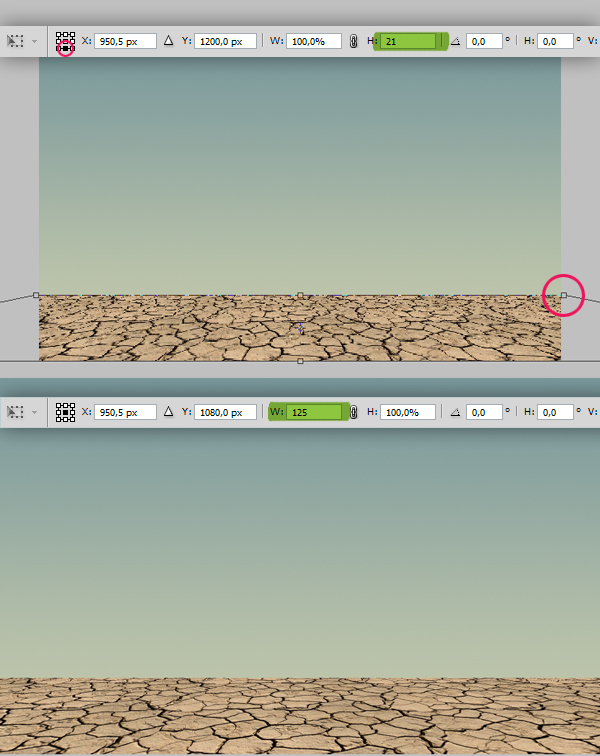
The Ground
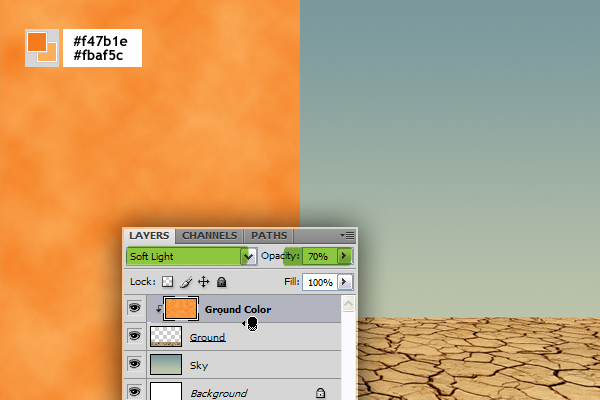
Create a new layer on top and name it “Ground Color”. We’ll use this layer to adjust the color of the ground. Set your Foreground Color to #f47b1e and Background Color to #fbaf5c. Go to Filter > Render > Clouds. Alt click the line between “Ground Color” and “Ground” layers to mask the “Ground Color” layer. Set Layer Blend Mode to Soft Light and Opacity at 70% .
The Clouds
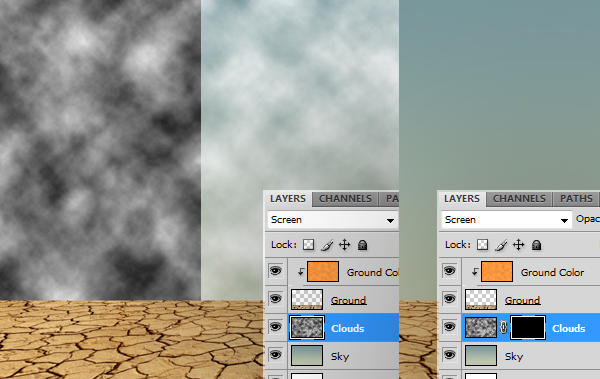
Sure you can find some sky photo and blend it with the “Sky” layer, but i preferred showing you a simple way of creating clouds. So create a new layer above the “Sky” layer and name it “Clouds”, hit D on the keyboard to set Foreground and Background colors to Black and White. Go to Filter > Render > Clouds. Set Blend Mode to Screen. Now click the Add Layer Mask button located at the bottom of the Layers Palette and fill it with Black .
The Clouds
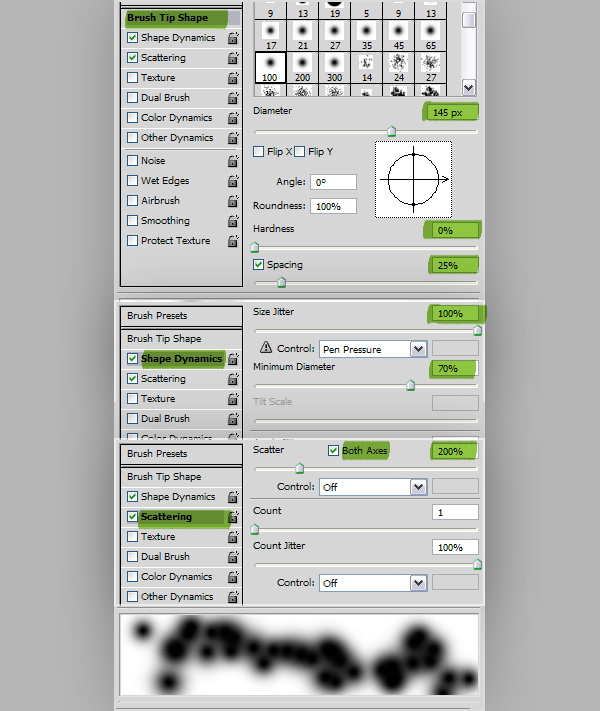
Now get the Brush Tool, Set Diameter to 145 pixels, set Spacing to 25%, set Hardness to 0 and have a look at the below image and change the Shape Dynamics and Scattering settings accordingly .
The Clouds
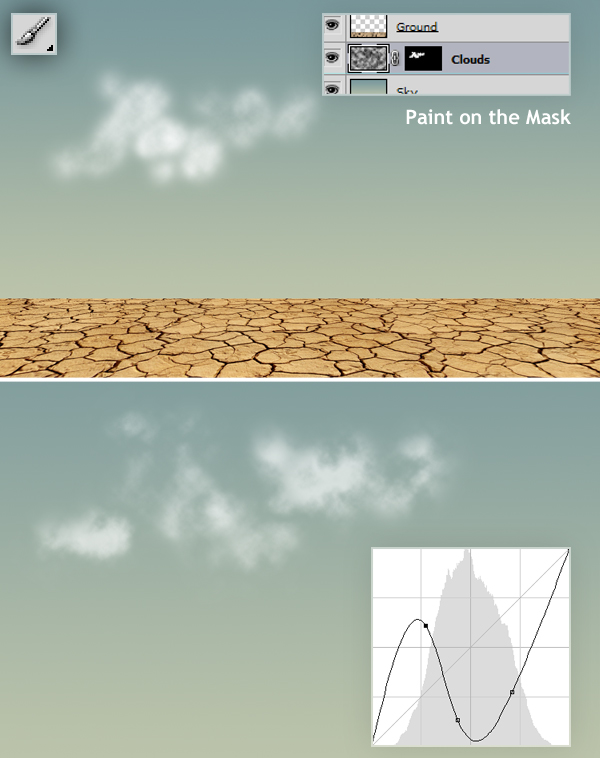
Click the “Clouds” layer mask thumbnail to select, set Foreground Color to White and paint on the mask as in the below image. Click the “Clouds” layer thumbnail to select the layer, hit Command+M to bring up the Curves dialog and tweak it to have a nice cloudy effect.
The Horizon
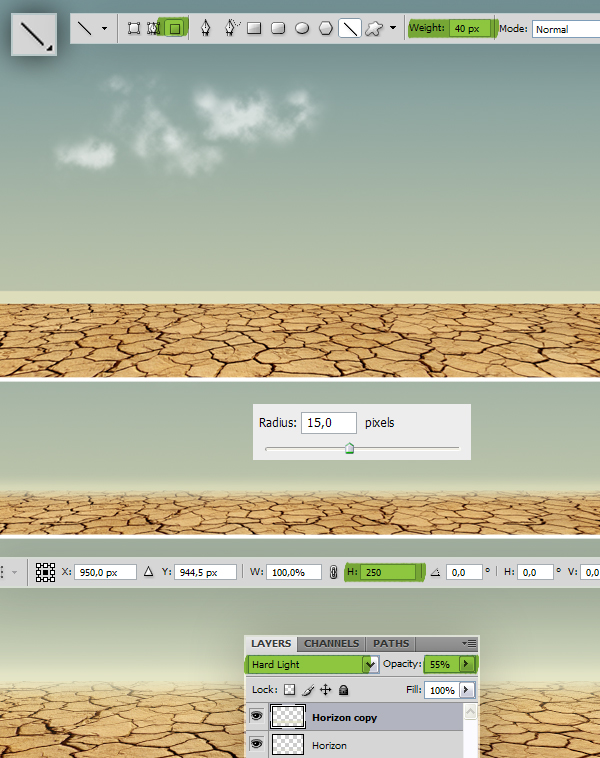
Create a new layer on top and name it “Horizon”. Set Foreground Color to #dadaba. Get the Line Tool, set mode to Fill Pixels and Weight to 40 pixels. Draw a straight line [holding down the Shift key] over the horizon. Go to Filter > Blur > Gaussian Blur and apply with a Radius of 15 pixels. Then duplicate the “Horizon” layer. Hit Command+T and set Vertical Scale to 250% and apply. Set Layer Blend Mode to Hard Light and Opacity at 55%.
The Fish
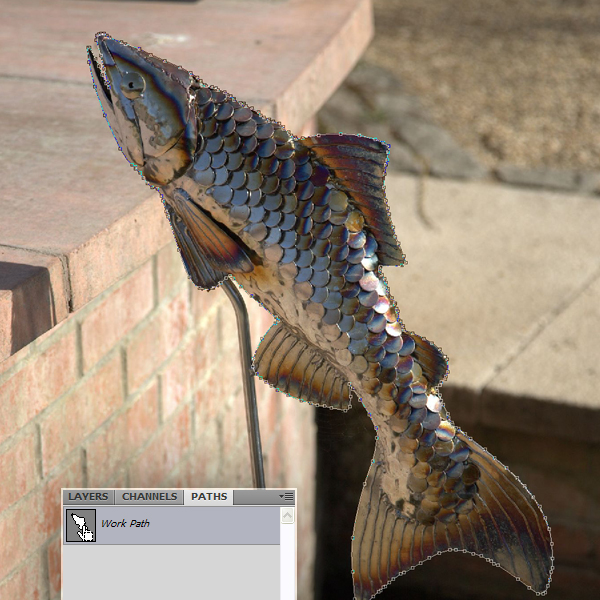
Now open the fish image, get the Pen Tool, set Mode to Paths and draw a path tightly around the fish. Make sure to close the path finally clicking on the first point you have created. Go to Paths Panel and Command-click the Work Path to make a selection out of the path. Go back to Layers and hit Command+C to copy the selected area .
The Fish
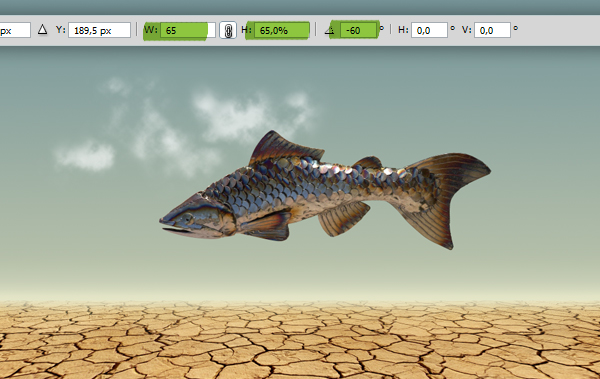
Go back to the “Desert Fish” document and hit Command+V to paste, name the layer “Fish”. Hit Command+T and set Rotation to -60 and set Horizontal and Vertical Scales to 65% and place it like in the below image.
Blend The Fish
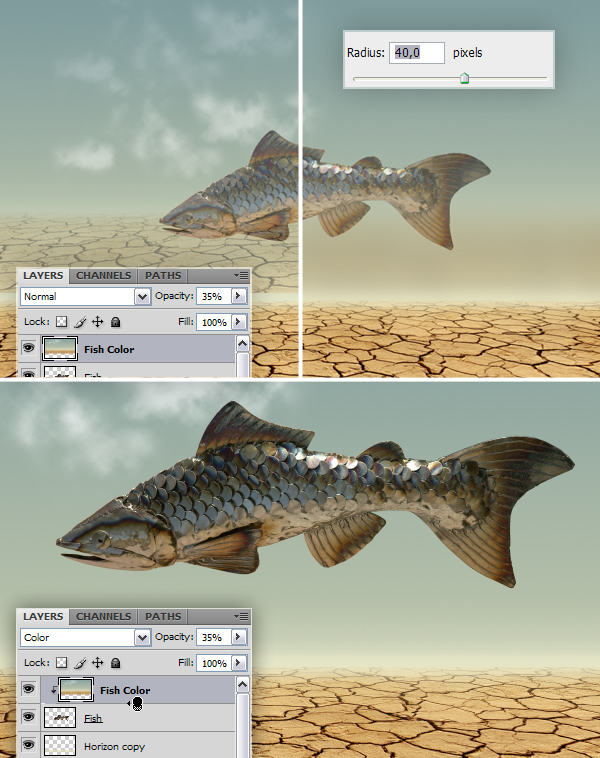
We’ll now try to simulate the ambient colors. Create a new layer on top and name it “Fish Color”. Make the “Fish” layer invisible for now. Go to Image > Apply Image and hit OK. Now we have everything merged in the “Fish Color” layer. Turn the “Fish” layer back to visible. Set layer opacity for the “Fish Color” layer to 35% and move it above. The sky color should cover the top part, the ground color should cover the bottom of the fish. Now Alt-click the line between the “Fish” and the “Fish Color” layers to mask the above layer. Set Blend Mode to Color. Now the fish is better blended with the environment .
The Shadow
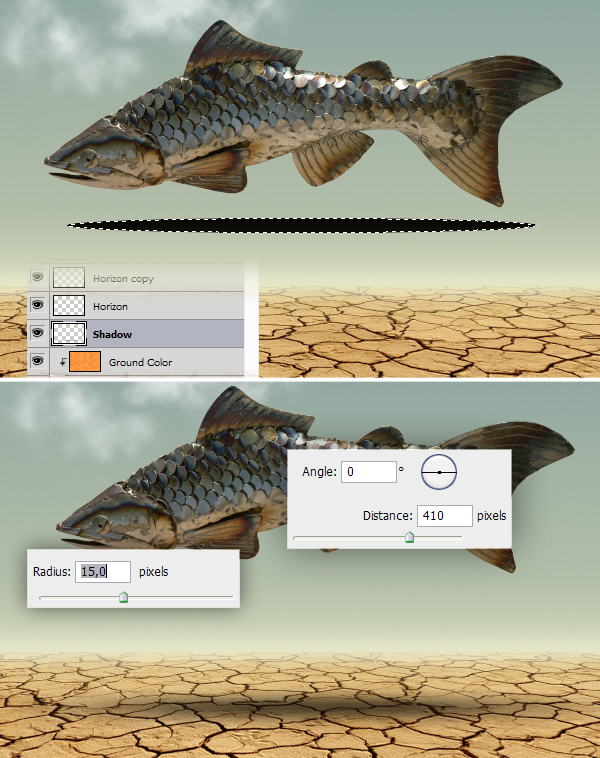
Create a new layer below the “Horizon” layer and name it “Shadow”. Get the Elliptical Marquee Tool and make a selection like in the below image and fill it with black. Hit Command+D to deselect and apply a Gaussian Blur filter with a Radius of 15 pixels, then apply a Motion Blur filter with Angle set to 0 and Distance set to 410 pixels. Finally hit Command+T and holding down the Alt key scale the shadow down horizontally .
This is a Two-Parts tutorial, so Don’t Miss the Second Part
This is the end of part 1, the second part will be available very soon. Hope you liked it so far.
