


Create a Cyborg with Photoshop
Difficulty : Intermediate
Time Taken : 2 Hours
Download Files : Cyborg Tutorial Files
When i think of cyborgs i think of the terminator, i robot and other such great movies and if you thought cyborgs belonged solely in the realms of science-fiction movies, think again.
Cybernetics IS with us now In the form of artificial limbs and organ supplements, and also the implantation of bio-compatible computer chips and stem-cell research. So how will our species adapt to change – will the future of the human race ultimately be a fusion of microchips and living cells?
In this tutorial you’ll discover how to incorporate mundane, everyday objects into a cyborg creation. Combining household objects with 3D renders is a technique that can have interesting results. This will also give you an opportunity to get to grips with the Pen tool, the Dodge and Burn tools and blending modes, as well as the Transform and Warp functions to make it even more realistic. Be inspired and shoot some of your own material and see what you come up with! Or you can follow allow with the bits and pieces we used by downloading the zip file above.
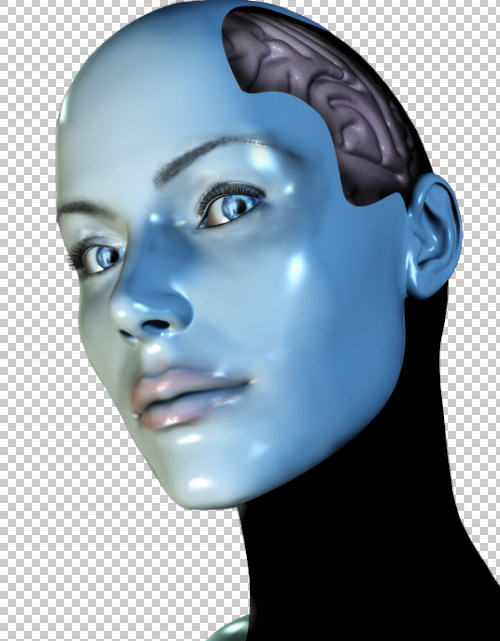
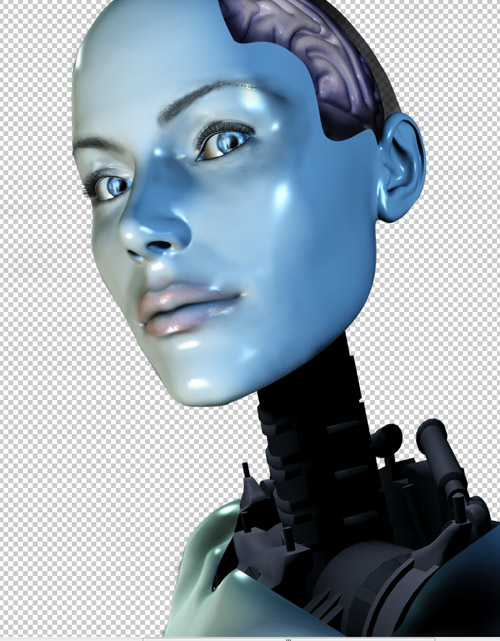
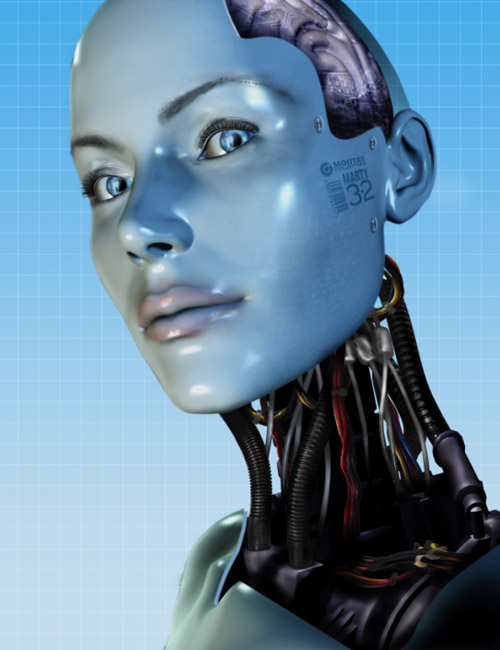
Preview of Final Result:

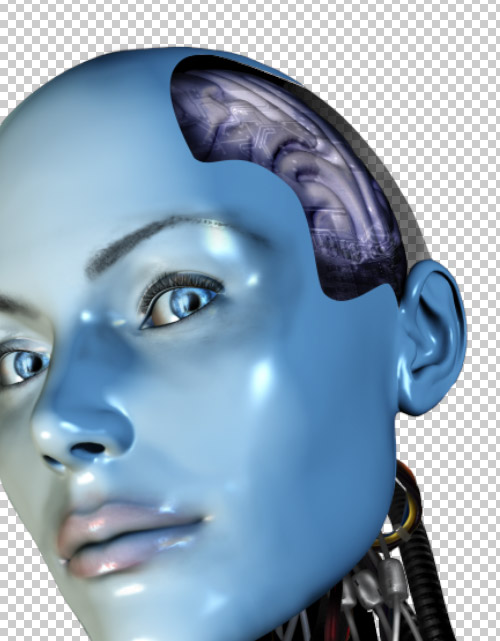
Make a start by opening the ‘Cyborg_render.png’ ( this was created using poser ) from the tutorial files and create a new layer. Using the Smudge tool, with the Sample All Layers option selected, smooth out any rough areas using a medium, soft-edged brush with Opacity at 10%. When you’re happy hit Cmd/Cntl+E to merge the layer.

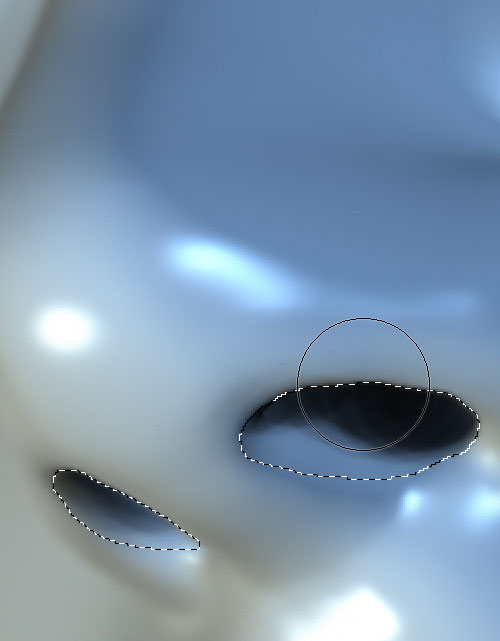
Darken the nostril areas by drawing closed paths with the Pen tool. Make a path-based selection and feather it by 1 pixel, On a new layer set to Multiply, use a medium, soft-edged brush, and with a low Opacity, paint within the selection. Adjust the layer Opacity slider to suit and merge the layer again.
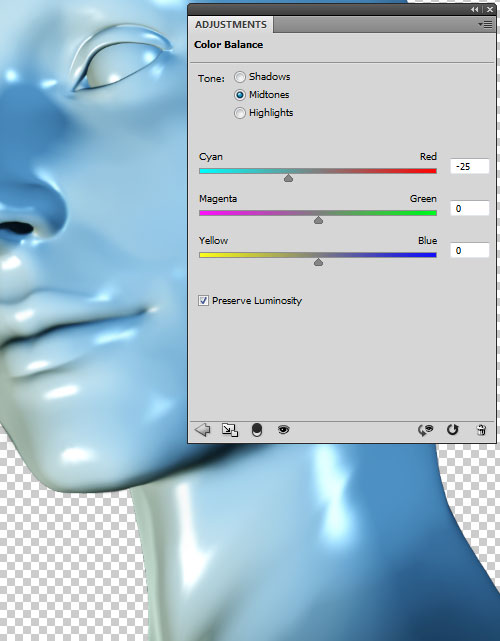
Add more contrast by duplicating the background layer and setting the blending mode to Soft Light Next, increase the amount of Cyan by adding a Color Balance adjustment layer using the drop-down Create New Fill or Adjustment Layer icon at the foot of the Layers palette. Set the Red to ·24 in the Midtones and merge the layer
To add some human features, open the ‘ Skin_render.png ‘ file and Shift-drag into your working document as a new layer, setting the blending mode to Hard Light Hit Cmd/Ctrl+U to access the Lasso tool and, ensuring the Add to Selection option is selected, roughly select the eyes and lips. Hit Cmd/Ctrl+Shif+I to inverse the selection and hit Delete.
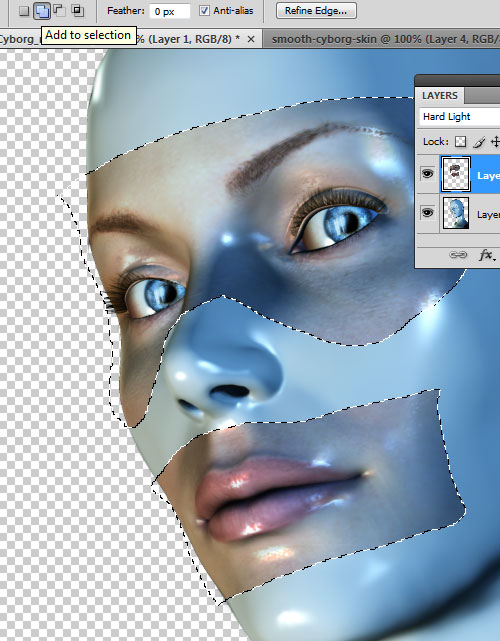
Add a layer mask and use a soft-edged brush to blend the remaining skin. Vary the brush Opacity as you work, leaving the eyes, eyebrows and lip areas. Next, add a Hue/Saturation adjustment layer while holding Alt and check the Use Previous Layer to Create Clipping Mask option. In the Edit drop-down list set all the colors to -100 Saturation except the Cyan.

Reinstate selected color areas by targeting the adjustment layer’s mask and use a soft-edged brush to paint out the eyes and lips. Your cyborgs face should now resemble a hybrid of flesh and plastic By default an adjustment layer comes with a mask, which is great for carrying out this type of selective correction.

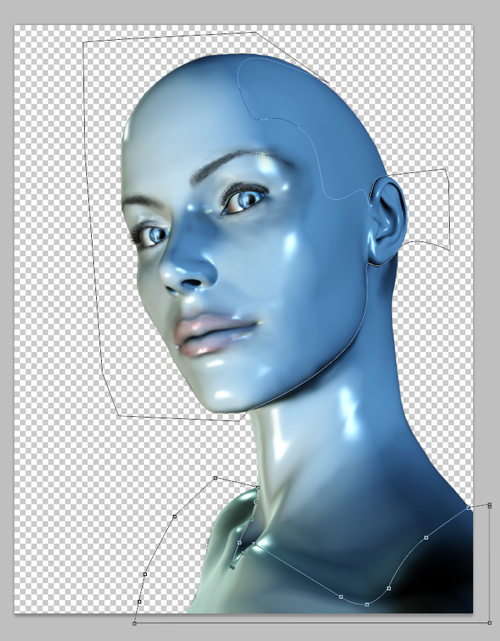
Use the Pen tool with the Paths option selected to draw around the head areas as shown. Use the Alt, Ctrl and Shift modifier keys as you work. Remember, you can fine-tune your path by holding the Cmd/Ctrl key to access the Direct Selection tool to adjust the direction/anchor points later. Ensure the Pen tool options are set to Add to Path Area and continue around the shoulders.
Shift-click all the layer thumbnails and merge them as before. Next, switch to the Paths palette and generate a selection, return to the Layers palette, hit Cmd/Ctrl+J to float the selection as a new layer and name it “Face and torso’ Now target the original layer, make a layer based selection, fill with 100% black and name it ‘Black’.

Open ‘ brain.png ‘ and Shift-drag into your working document as a new layer, flip it horizontally then rotate and transform.
Also use the Transform > Warp functions to make it fit neatly inside the cavity. Next hit Cmd/ Ctrl+L to access the Levels and adjust the Midpoint slider to 0.28 then name the layer ‘Brain’.

Position the Brain layer under the Face/torso layer and hit Cnd/Ctrl-l to access Hue/Saturation. Enter a Hue of +45 and a Saturation of -68.
Next, create a new layer above the Brain layer and set its blending mode to Multiply. Using a medium soft-edged brush with a low Opacity, add some shadow areas. Adjust the Opacity to taste and name it ‘Brain Shadow’.
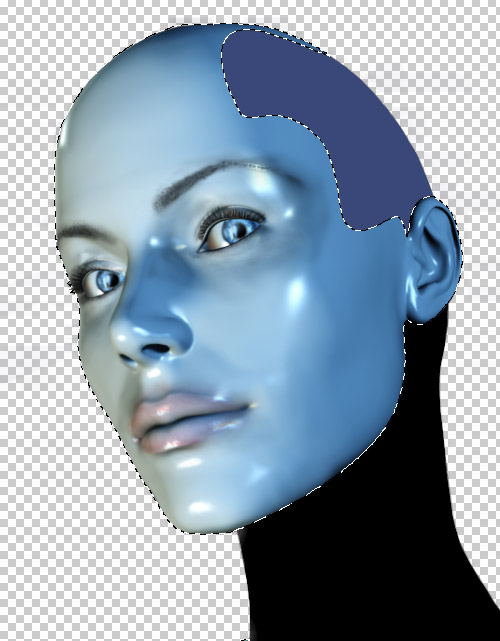
Generate a selection from the bottom Black layer and create a new layer under the Face/torso layer. Pick a mid grey/ blue and using a large, hard-edged brush at 100% Opacity, paint inside the selection.
Delete any underlying overlaps by generating a selection from the Face/torso layer and hitting Delete. You should now just have the top portion of grey remaining. Name the layer ‘Brain Dome’
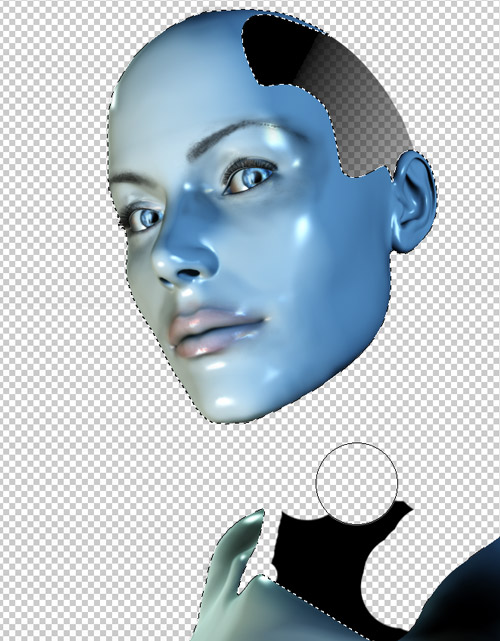
Generate a selection from the Face/torso layer, target the Black layer and use the Eraser tool with a medium soft-edged brush to create a gradient effect within the Brain Dome.
Next, inverse the selection, and switching to a large, hard-edged brush erase the whole of the neck area. We’ve disabled the visibility of some layers for clarity in this screengrab.
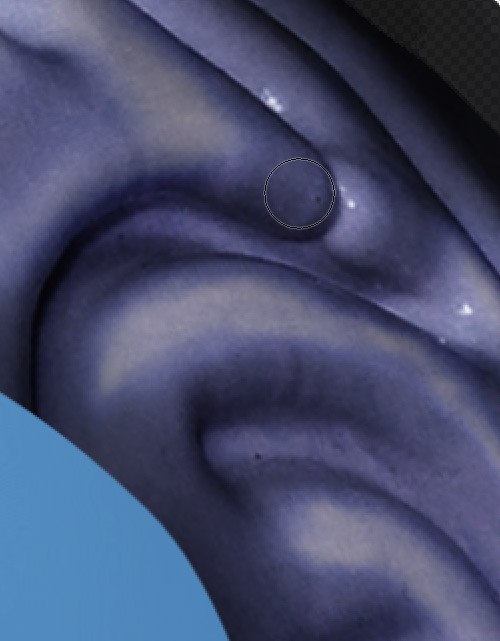
Target the Brain Dome layer and set the blending mode to Soft Light and Opacity to around 75%. Now, using the Dodge tool set to Midtones and with a large soft-edged brush, add some highlight details. It’s best to use a fairly low Opacity of around 40% to build up the highlight strength until you’re happy.
Open ‘ Inner_workings.png ‘ and drop it in as a new layer, position above the Black layer and name it accordingly.
Now generate a selection from the new layer, and using a large soft-edged black brush, blend the top of the neck into the head. Again, we’ve disabled the visibility of some layers for clarity in this screengrab.

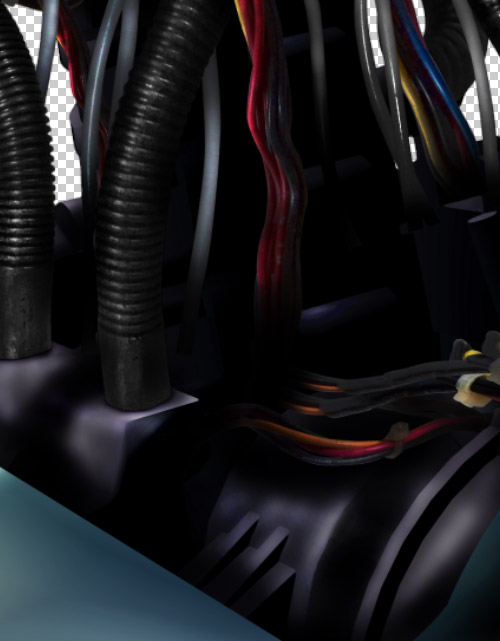
Open ‘ Pipe_1.png ‘ and Shift-drag into your working document as a new layer above the Inner Workings layer. Scale/position and use the Layer Matting options (Fringe and Remove White Matt) to remove any unwanted halo edges.
Next, using the Eraser tool, delete the bottom section with a small soft-edged brush. Make the pipe blend with the rest of the composition by adding highlight and shadow areas with the Dodge and Burn tools.
Follow the same techniques for the remaining pipe images ( ‘Pipe_2.png’ through to ‘Pipe_ 6.png’ ), scaling, flipping and rotating them to fit.

The aim here is to get all the elements looking as if they all belong within the composition, so adjust each accordingly using a combination of Levels, Hue/ Saturation adjustments and the Dodge and Burn tools.

Open the ‘Wire_1.png’ through to ‘Wire_6. png’ images and drag/drop as new layers, again adjusting each layer’s color and tone accordingly. Now duplicate some layers, flip them so as to avoid repetition and move their hierarchy within the layer stack to hide areas. You can also generate selections from other layers and delete areas not required.
Open the ‘Wire.png’ file and drag and drop as a new layer, then scale and position. Generate selections from some of the pipes and wires and, with the new layers targeted, hit Delete. Don’t forget to use Dodge and Burn to add highlight and shadow on any ‘underlying wires. Generate a selection from the Face/ torso layer, target all Pipe and Wire layers you want hidden and hit Delete. .
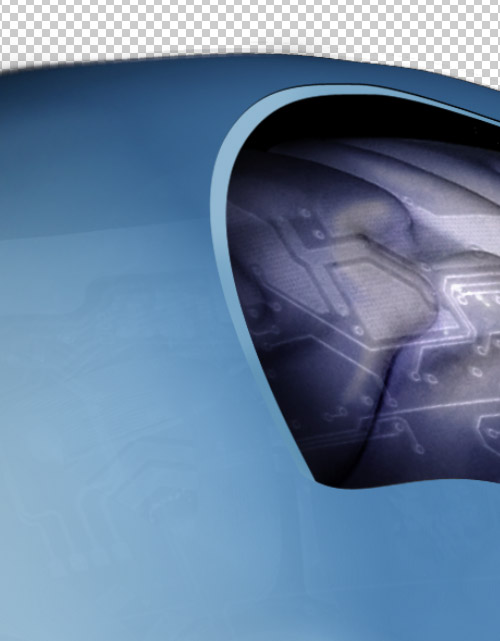
Open the ‘Circuit , 1.jpg’ image and then copy and paste above the brain. Hit Cmd/Ctrl+U and set the Hue to 0, Saturation to 16 and Lightness to +35.
Go to Edit> Transform>Warp to fit over the brain. Scale and rotate until you’re happy and set the blending mode to Soft Light. Open ‘CircuiC2. jpg’, scale, warp, then rotate and position, setting the blending mode to Luminosity and the Opacity to 40%. Now blend both layers with the Eraser tool using a medium, soft edged brush.
Open the ‘Circuic3.jpg’ and then copy and paste under the Face/torso layer, setting the e blending mode to Screen and the Opacity to 50%. Use the Warp transformations to roughly follow the contours of the face, then use an inversed selection from the Face/torso layer to delete areas. Add a layer mask and use a large soft-edged brush on the right-hand side. Add a mask to the brain and repeat.
Finally, set the Opacity ofthe Face/torso layer to 87% to reveal the detail. We’ve disabled the visibility of some layers for clarity in this screengrab.

You’ll notice the Inner Workings layer has a .hard-edged 3D rendered look. Eliminate this by going to Filter > Noise > Median and enter a value of 3 pixels.

Next, adjust the layer’s Hue/Saturation by entering +22 under the Master Hue/Saturation slider, and in the drop-down menu set the Blues to +15. Now use the Burn tool to create shadows that correspond with the pipes and wires.
Create a thickness to the cyborg’s ‘skin’ by generating a selection from the Face/ torso layer, add a new layer above it and nudge 5 pixels left and 3 down, then fill with a pale blue.
Generate a selection from the Face/ torso layer again, ensure the new layer is targeted and hit Delete. Use the Marquee tool around any areas not required (temple, ear and jaw line) and hit Delete. Now use Dodge/ Burn and adjust the layer’s Opacity to taste.
Open the ‘Screw_head. jpg’ file and use the Marquee tool to draw a central selection. Feather by 5 pixels, and then copy and paste at the top of the layer stack.
Scale non-proportionately and rotate, duplicate the layer a few times, then merge them and set the blending mode to Hard Light and the Opacity to 70%. Next, add a Bevel and Emboss layer style.

Open the ‘Head_graphic.png’ and drag/drop as a new layer at the t6.p of the layer stack, setting the blending mode to Multiply and the Opacity to 50%. Next, go to Filter>Distort>Sphereize and enter a setting of 80%.
(You could also use Photoshop’s Warp transformations to achieve a similar effect.)
Now scale and rotate the graphic to fit the angle of the head.
![]()
Zoom in and check the image for any small imperfections. The Skin Depth layer we created in step 22 heeds a little retouching.around the collar area, so draw a closed path around the missihg area and qenerate a path-based selection. Next,use the Clone tool with Sample All Layers unchecked and use a small brush to fix it.
Hit Crnd/Ctrl t Shift+E to Merge Visible and create a new layer underneath. Pick a pale blue for the background and a slightly darker blue for the foreground,then add a linear gradient.
On the merged layer select quick Mask mode (double-click on the Quick Mask icon and ensure Selected Areas is checked), and using a medium soft-edged brush, paint over some of the hard edges. Exit Quick Mask and add a Gaussian Blur of2 pixels.

Now to create the ‘blueprint’ background. With the grid visible, go to Photoshop>Preferences> Guides, Grids & Slices and enter a gridline for every 100 pixels with a Subdivision of 1.
Create a new channel and zoom in. Ensure Snap is selected under View, and draw a square with the Marquee tool anywhere and fill with white. Nudge the selection twice down and twice right and fill with black. Now nudge it back to its original position and go to Edit>Define Pattern.

Create a new layer above the background and go to Menu > Edit > Fill > Pattern. Ensure your pattern is selected under Custom Pattern, then set the blending rnode to Screen and the Opacity to 40%. Screen Mode does the opposite of Multiply, so any black areas will not be visible on this layer. You can now disregard the extra channel.
Open the ‘Logo.png’, drag and drop it as a new layer above the grid, setting the blending mode to Multiply and the Opacity to 50%.To make the keyline borders, create a new layer above the grid, and with the Paths option selected use the Pen tool to draw a closed path, snapping it to the grid as you work.


