Dreamy Painted Style Photoshop Tutorial
‘ve always admired the Digital Artists who could go beyond the medium, and create ‘real’ fine-art. The painterly, natural media look is awesome, and I’ve always been jealous of those that can do it well. In a new experiment, I set out to replicate these techniques – and in todays tutorial, I’ll be sharing my new process with you. A wacom tablet is definitely handy for this walkthrough, but you can still get by using a mouse. Intrigued to see how it’s done? Read on…
Tools used:
- Photoshop CC
- Stocks
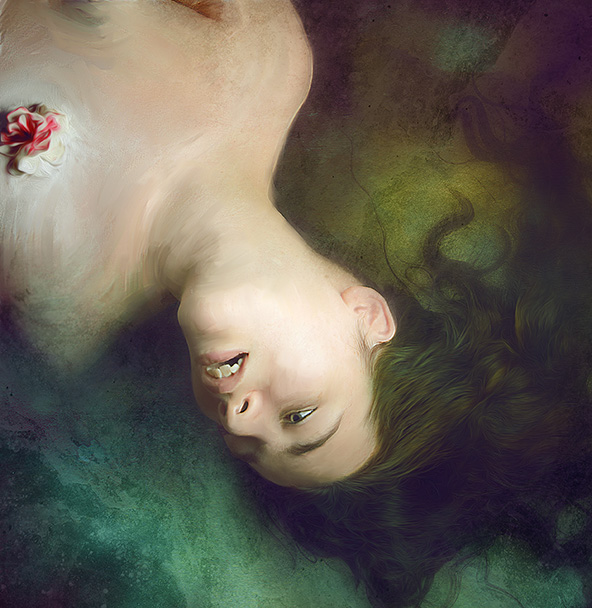
Final Image Preview:
The Look
The overall style is heavily inspired by the Pre-Raphaelite era, with deep hues and a soft, tactile finish. Different stocks, brushes and technique will give different results, so there’s no limit to where you can go with this process.

Compositing
Select a figure for your foreground element. For the example piece I used the image Virgin 7 by AimeeStock (DeviantArt) , you can find a huge selection of free figurative stock resources using the DeviantArt Stock Browser .
Create a new document in Photoshop ( Ctrl/Cmd + N ) and paste in your figurative stock image. Use your chosen method to remove the background from your stock image – for the example piece, I used a slightly different process than usual, here is how it was done:
1. A duplicate was made of the stock model layer ( Ctrl/Cmd + J ), and hidden by clicking the ‘eye’ icon on the layer stack.
2. A Layer Mask was added to the visible model stock layer. Using the Pen Tool (P) , paths were made around the ‘sharp’ areas of the model, and filled with black.
3. Using a Soft-Edged Brush (B) set to black, the hair was ‘painted out’ using the Layer Mask .

The trick I used to composite the hair for this piece, is based on the Brunette Background Removal process, posted previously on TutsPs.
The layer that was duplicated earlier was made visible again, and set to Multiply layer mode. A Layer Mask was added, and cleaned up a little. The Multiply Layer mode maintains the darks of the hair, but knocks out the whites. You can use the Levels command ( Image > Adjustments > Levels ) to boost the values of the darks and the lights if necessary.

The real magic of this technique comes into play when you bring in a background.
The background for this piece is from Marcela Bolivar’s outstanding Atmosphere texture pack, that she recently released, which you can get here: Atmosphere FREE Texture Pack .
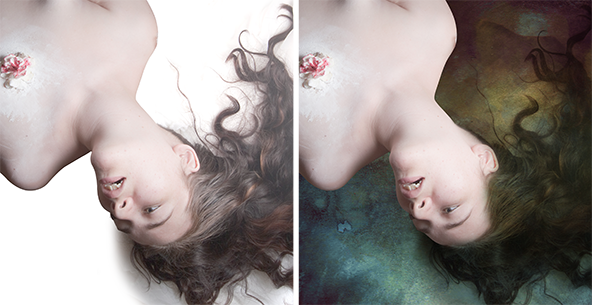
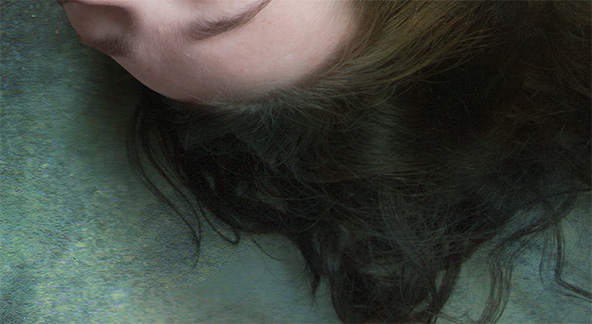
If we take a closer look, you can really see the level of detail retained by the technique, and the rich hues that come through from underneath:
A look at the layer stack:

General Tweaks
At this compositing stage, make any final tweaks necessary to ensure everything comes together as you wish.
For the example piece, I blended body parts using a Layer Mask and added some subtle shadow under the figure ( New Layer set to Multiply, moved underneath figure layer, shadow painted in with dark tone, using Soft-Edged Brush B ):
Global Colour
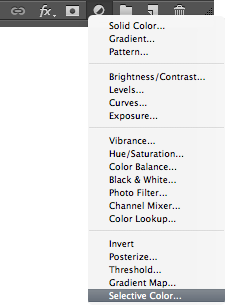
A great method for applying a ‘Global Colour-Cast’ to bring together your composite, is using a Selective Color Adjustment Layer .
You can access the Adjustment Layers panel via the dialog at the bottom of the layer stack:
There’s no real ‘definitive’ guide for using Selective Color – as the options you choose will largely depend on the look you’d like to achieve.
A good starting point is to tweak the values of the Blacks, Neutrals and Whites – you’ll be able to achieve an infinate number of colour styles:

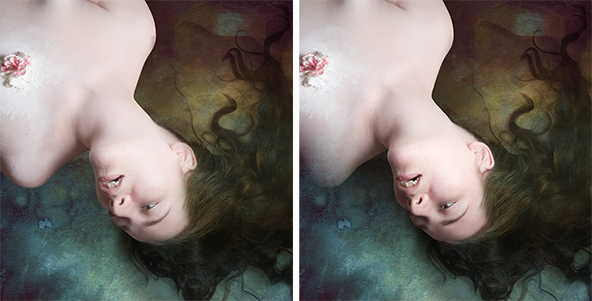
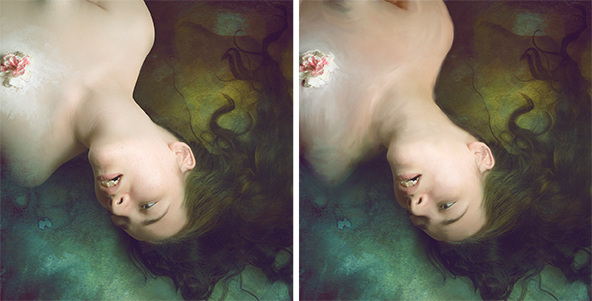
A look at the example piece, before and after the Selective Color processing. The effect is subtle, but does a great job of unifying the piece:

Over-Painting with the Mixer Brush
This is the stage where we start to work over the composite, using the Mixer Brush (B) to create a tactile, painted look.
Add a new layer at the top of the layer stack ( Ctrl/Cmd, Shift + N ), this is where the painting will occur. You may want to give this layer a name, such as ‘Paint Layer’.
Select the Mixer Brush Tool (B) from the tools dialog ( click and hold on the brush to make the extra options visible ). Ensure ‘Sample All Layers’ is checked, this allows us to work on the new, clean layer:
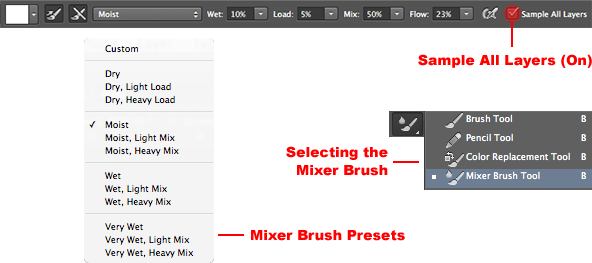
The Mixer Brush really is a complex bit of kit. You have the option to tweak the Wetness, Load, Mix and Flow of the brush, or alternatively you can use the presets. Try experimenting with presets first, and then tweak the seperate values to refine the brushes for your needs.
This is how it works…
1. You ‘load-up’ your Mixer Brush by holding down Alt – this turns the brush into an Eyedropper Tool, click a colour to sample the tone. When you let go of Alt, the tool reverts back to a brush.
2. With your tone sampled, paint in strokes, following the natural direction and contours of the image:

With each new stroke, resample new tones by holding Alt and clicking.
Experiment with different Brush settings, within Photoshop there are various natural media brushes that you can use to achieve a tactile look:

Working on a seperate ‘paint layer’ gives us a lot of control, here’s a look at the paint-work so far with all other layers turned off:
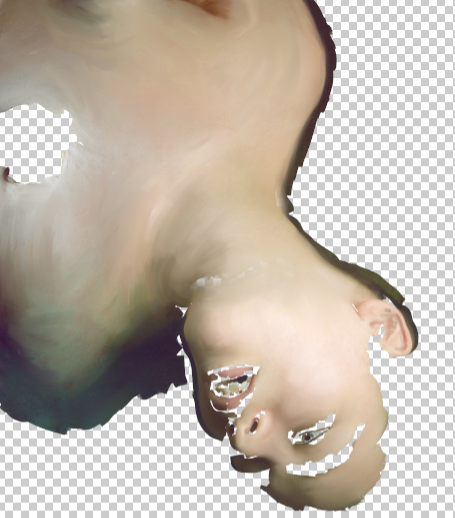
For more delicate details, you can zoom in (Ctrl/Cmd, +) and use a smaller width brush.
Already the composite takes on a more ethereal appearance:
Hair and Eyebrows
To work the hair, eyebrows and other more intricate areas, there’s a nifty technique that you can use – a recent addition to the filter menu, called Oil Paint ( Filter > Oil Paint ).
Create a ‘snapshot’ of your composite ( Ctrl/Cmd, Shift, Alt + E ), this shortcut will copy everything in it’s entirety and paste as a new layer. With this new snapshot layer active, use the Oil Paint filter to stylise the hair. This dialog box shows some experimentation with the settings, and the effect it’s having on the hair shown underneath:

Add a Layer Mask to your snapshot layer, and invert the mask to black ( Ctrl/Cmd + I ) – this will hide everything.
Set your foreground colour to white, and use a Soft-Edged Brush (B) to selectively paint back in the hair, eyebrows and any other details you’d like the effect to be applied to. Here you can see the mask is used to display the Oil Paint effect to the hair and also the eyebrow:
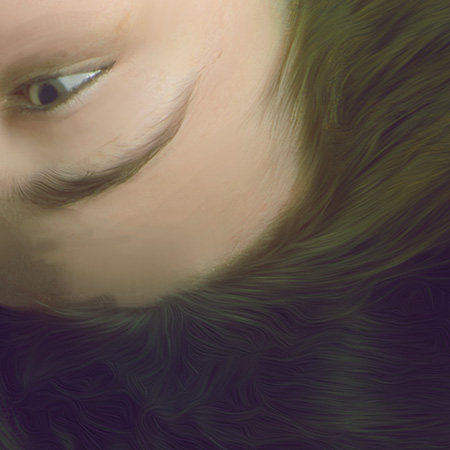
Before and after the Oil Paint processing:

Add Your Own Tweaks
To finalise, add your own textures, additional colour processing or sharpening effects!
The example piece in it’s dream-like final state – great fun!!

Review
As you’ll have noticed, there’s been a bit of a mixed media vibe here at TutsPs recently.. Stay locked for more full-length walkthroughs, tips and guides – which are now posted every week.


