


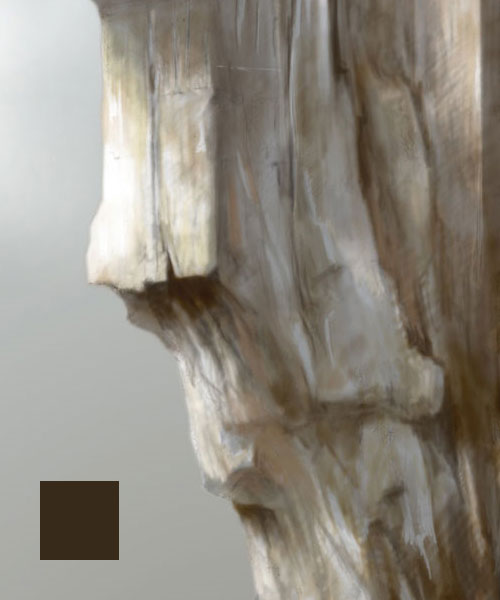
How to paint stone and rock in photoshop
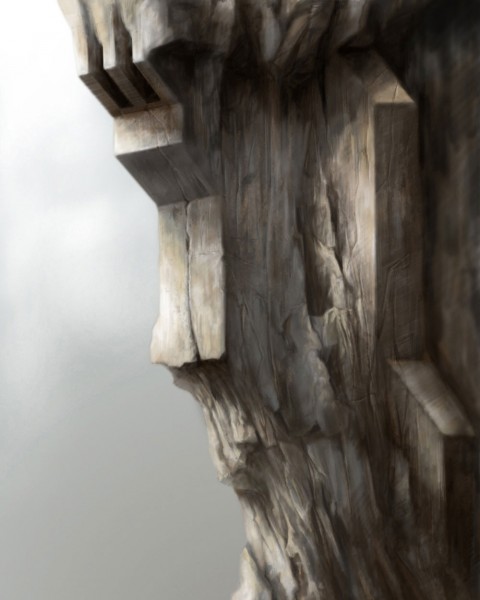
Final Image Preview
Painting or drawing Stone and Rock in photoshop can seem difficult. But in reality its not that hard. We are going to show you how you too can draw realistic stone and rock in photoshop using just a couple of techniques. With a little bit of practice you will master this art form.
Step 1
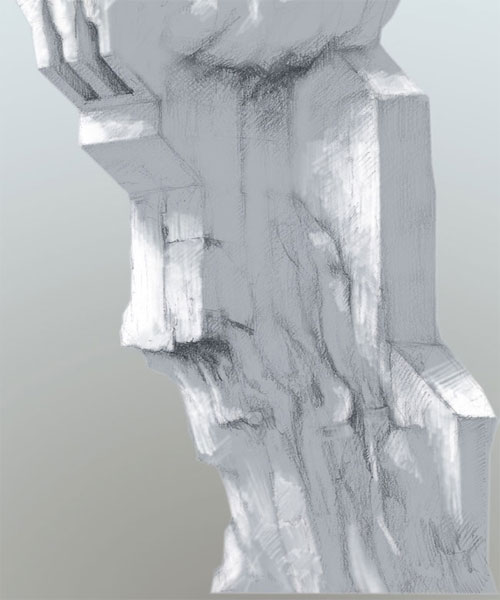
The first stage which forms the starting point for most of my digital work is a sketch done on paper. This is where I assemble any unformed ideas and decide on how the composition will be structured and try and give myself a template to begin working from. In picture below you can see a pencil sketch that I scanned in which would form the basis of my final painting. You can download the tutorial files to follow along.
For this tutorial I wanted to combine a natural looking rock face that incorporated some element of architecture that had been carved into the stone.

Step 2
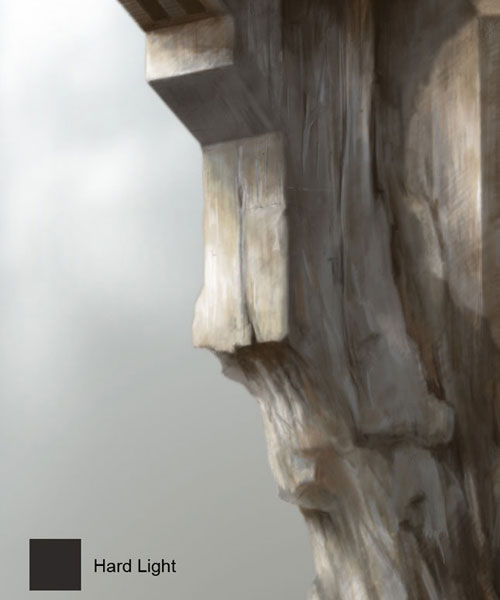
The next stage was to get rid of the glaring white of the image and so I traced around the drawing and on a separate layer which I named Background, I used the Gradient tool fading from a pale to a darker green. On another new layer set to Hard Light I used a dark grey and filled in the area that makes up the rock itself and then to establish the light source I simply erased parts of this layer to reveal the white underneath, see the picture below.
It is important to define the light source as this is paramount in how the viewer reads the image and interprets the forms. Rock can be a difficult subject to paint as it varies tremendously, not only in its coloration but more importantly in its structure and the types of formations it adopts. Because its surface is so uneven with so many undulations and crevices it is easy to loose sight of the overall form and get too involved with details.
In order to keep control of the painting process I find it is best to work on a larger scale to begin with and gradually work your way down to the finer detail. In other words, decide on a light source and block in the main highlights and shadows and carve out the general structure and form of your image before concentrating on the numerous incidental passages that will help add interest and detail to the final piece.
Step 3
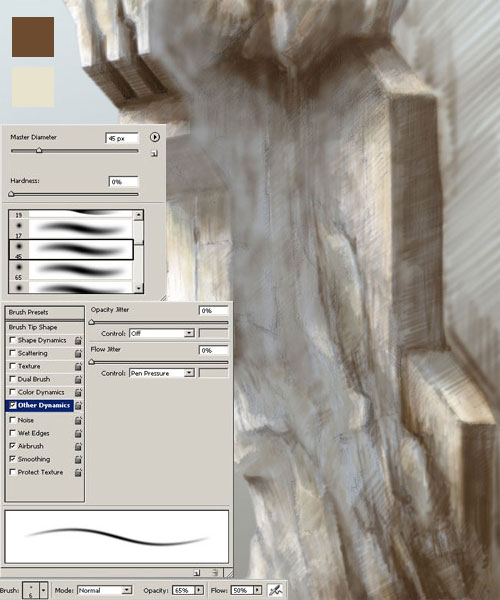
In Fig03 you will notice that I have added a new layer which I called Main and begun to rough in some of the areas that fall into shadow and started to shape some of the crevices. I used warm tones ranging between those seen on the left using a standard soft round airbrush with a varied diameter.
I set the opacity to between 65 and 100% and the flow to around 50% using pen pressure to control it as shown below the brush pre-sets. It does not matter too much how rough your marks are at this stage as the painting will go through a process of refinement until it is finished.
Quick and seemingly random marks are perfectly suitable and may even inadvertently suggest part of the final outcome so be bold and carefree!
Step 4
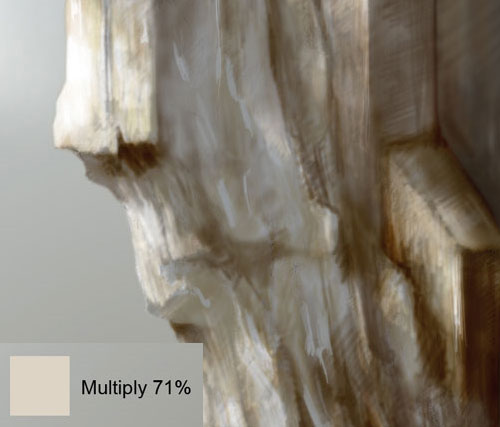
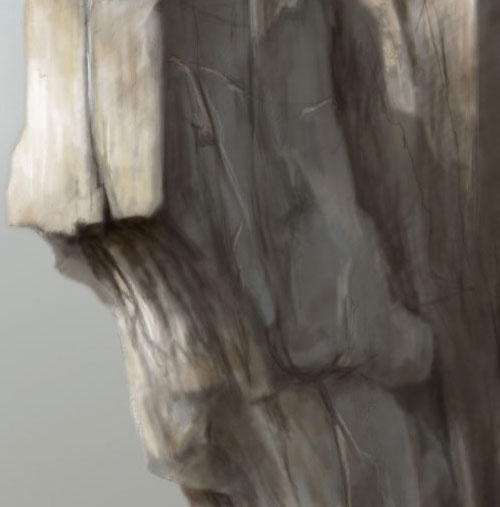
At the moment the light areas on the rock face appear far too light. I want to create quite a smooth and reflective surface but white should only be reserved for the extreme highlights and not used across the entire picture. In order to tone it down Ive added a new layer set to multiply at 71% which I called Overlay, and with a very pale brown filled in some warm tones to soften the contrast and reduce the white to certain areas see below.
Step 5
Because there will be a strong light source in the upper left of the picture with some very bright highlights it is only fitting that there will be some strong shadows to match. So on another layer which I named Dark areas, I used a dark brown as seen in Fig05 to accentuate the forms and add volume to the rock face.
Step 5
The image is now starting to take shape and we can see how the eventual rock face will look. The two vertical uprights on the left and right are meant to almost form a right angle but at the moment the rock in between appears to be on a similar plane and so in order to remedy this I am going to add a Shadow layer set to Hard Light at about 50% opacity and using a dark grey, block in a large area that signifies shadows cast by the sun, see below.
At this stage we have the main elements firmly established and we can now begin the final phase which is that of refining what we already have and painting in some details across the rock face. You can either do this on separate layers, work on the existing ones or even flatten the PSD file and then continue it is up to you. It is wise not to continually create new layers as the file will become very large and navigating through it will become a chore just preserve the key layers if need be.
Also do not be afraid to change anything if you feel it is wrong no matter how advanced the painting is; it is never too late to re-work problem areas!
Step 6
To the details then! You will have noticed from the image up above that I had painted in some cracks, most notably the one running up the flat face on the left. However the overall surface still looks flat and uninteresting and so needs far more fractures and undulations. I started by erasing parts of the original grey layer (part2) to create highlights exactly as before.
Knowing that the light is being cast from the top left I then traced a darker line to the left of these lines on the Dark areas layer where the shadows would reside. With the large shadow layer above all other layers it means that when erasing the grey it does not reveal a white anymore, see the image below.
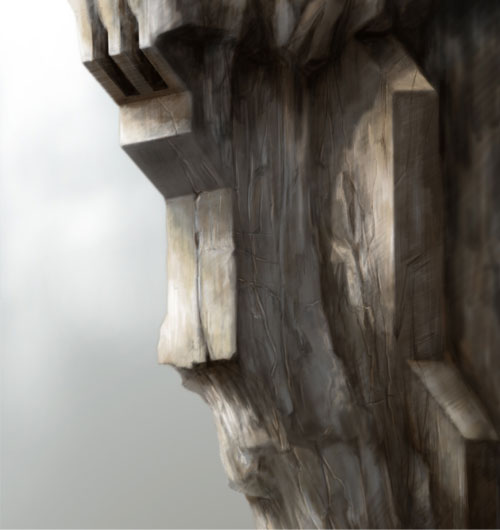
Step 8
In the picture below you will see that Ive added a lot more detail in the form of cracks and crevices as well as darkening the shadows around the top and bottom of the picture. The best approach is to be quite loose and free about the way you apply marks to begin with if they are wrong you can simply erase them (if you are erasing from a layer such as the grey one, just add in more grey to undo it).
There is no logical pattern or set of rules to follow here, just use your intuition and add detail where you see fit. This is when I use some of the initial marks made in stage 3 to suggest how and where to place the details. You can see when you compare this image with step 6 that there is now more clarity and definition and the whole image looks less sketchy.
Step 9
The final phase of the tutorial involves improving the detail further and using a customised brush to add a subtle pattern across certain areas to break up the surface somewhat.
tarting with a default Dry brush I then opened up the brush presets and chose a suitable Dual brush and altered the Scattering settings until I ended up with a result similar to that shown below.

You could do this on separate layers if you wish and set the blending mode either to Soft light or Multiply depending on the area and desired effect it is up to you. You can see in the picture where I have applied the marks, numbered 1- 4. With a bit more work and a few tweaks I arrived at the final result as shown below.


