


Falling Fantasy Photomanipulation
Combining photomanipulation techniques with painting techniques can open up a variety of possibilities in digital art. They can allow artists to repair or recreate areas on a photographic subject, or they can allow artists to create entire elements to include in their art.
In this tutorial, you’ll learn how to create a falling fantasy photomanipulation using stock images and some digital painting techniques. You’ll learn how to extract, preserve and recreate flowing hair, and you’ll learn how to manipulate twirling vines.
Let us know what you think of the tutorial, as always, if you have any questions, comments or requests, let us know!
Tools Used:
- Abobe Photoshop
Resources:
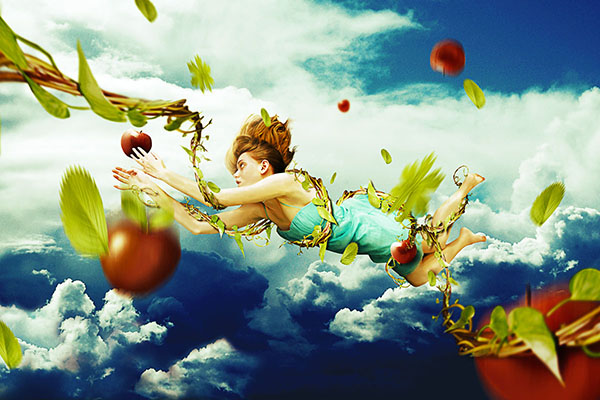
Final Image Preview
Step 1:
Open a new document, it should be 4200 pixels width and 2800 pixels high and set the Resolution at 300dpi with a white background

Step 2: Model extraction
Drag the model stock to our new document, rename the layer “Girl” and carefully and extract it from the background with the pen tool.
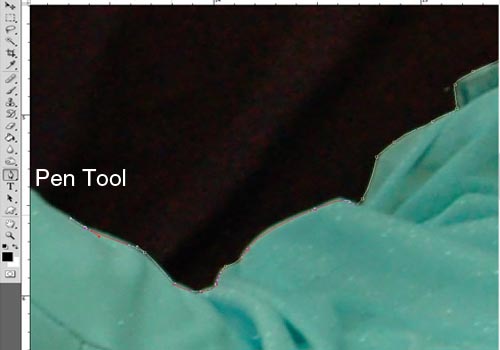
Be sure to keep all the paths a little bit inside the objet we are trying to extract so it doesn’t show hard edges and try to keep as much detail as possible using a 400% zoom will help.

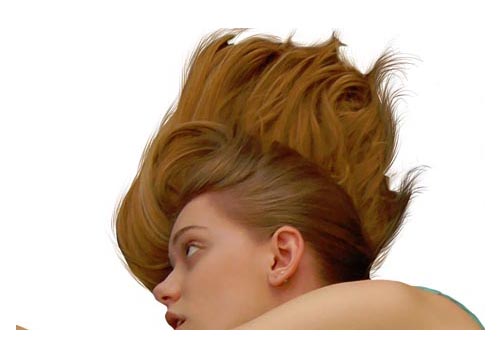
When you reach the hair dont worry if the selection is not perfect , we are gonna make some new hair to make it flow better.

Once you close the path right-click the image and click on make selection, select a feather radius of 0 and click ok.


Step 3: Hair
Now we are gonna fix the hair and give it texture and flow.
Create a new layer and rename it Hair.
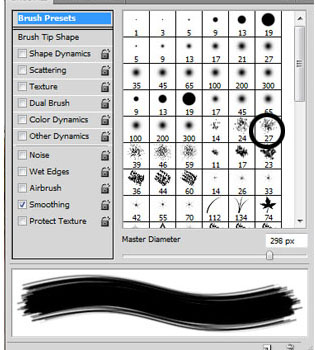
Select the brush tool with a round small brush about 3 px with 100% hardness and set the same settings as in the next image.

Press and hold the Alt key while on the brush tool and click on some part of the hair to sample the color (make sure the hue is close to the desired color we want so it blends nicely with the hair we already have).
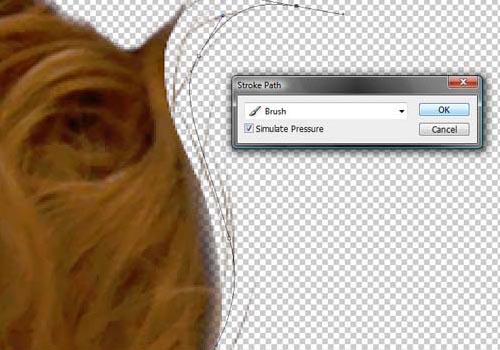
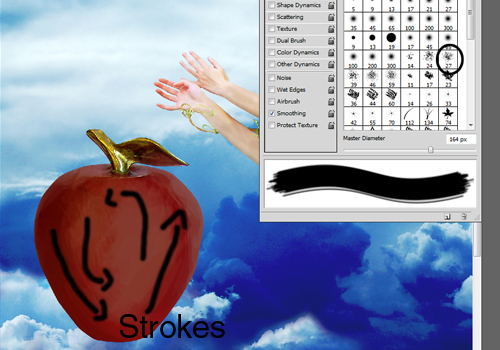
Now select the pen tool and start making some paths around the head that flows with the hair movement.
Once you have the path , right-click and select Stroke path on the drop down menu select the Brush tool and check the simulate pressure button , click ok.
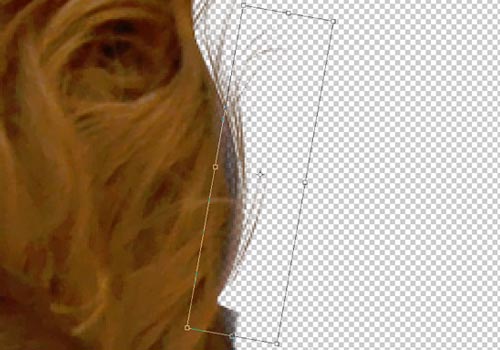
Now you may want to stroke many paths with different sizes arround the same area to create the hair.
One thing you can do after you have many stroked paths is that you can duplicate the layer and use the transformation tools (edit > free transform) to resize and rotate the hair giving it more depth.
Also you can try sampling different tones of the hair to make it more realistic.
Keep doing some more strokes , duplicating rotating and resizing the hair layers until they look blended.
Do the same in each section of the head.

Once you have a nice result , select all the hair layers and merge them (ctrl+e)
Step 4: Sky
Drag and drop the Sky stock into the document and place it below the “girl” layer and strech it to fill the whole background.

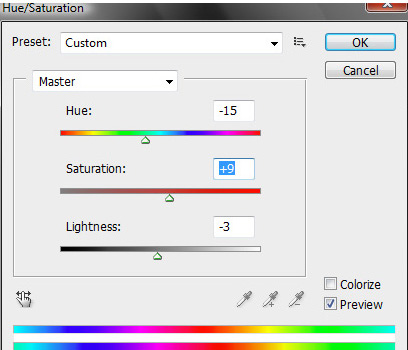
The sky needs a richer blue hue.. so apply the following setting to get a nice colouring:


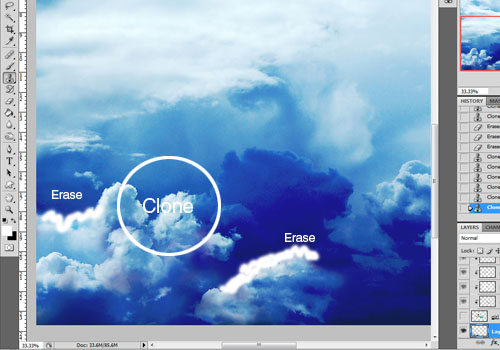
Right now the lower left part of the sky looks a little empty so we are gonna clone some of the clouds on the other side.
Grab the Clone Stamp tool and sample some of the clouds on the other side of the sky.Use a soft round brush about 300px wide.

Now clone where you think it need some more clouds.
Grab a Soft round brush about 150 px wide and gently erase all the parts where there may be hard highlights ot part that don’t fit well with the image.
Step 5: Girl skin painting
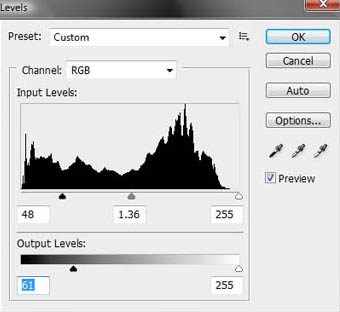
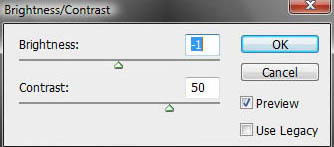
Apply the next contrast setting on the “girl” layer

Create a new layer, place it over the “girl” and rename it paint.
Clip mask it by holding ALT and clicking on the line between the two layers.
Now grab a 150 px Round brush with hardness set to 0 and set the opacity of the brush to something like 20% or 15 % leave the flow on 100%
Hold ALT and click to sample a color on the skin and gently stoke over it…Do this as many times as you need to achieve the paint effect that you want.
I suggest you start by sampling the lighter colors and make your way into the darker ones.

Sample as many times as you have to and change the opacity and size of the brush when you feel needed..
Be sure to make the brush strokes flow with the shape of the body to achieve a realistic result.
You can also use a wet textured brush set to a low opacity to get some texture on the skin just create a new layer and clip mask it over the “paint” layer.
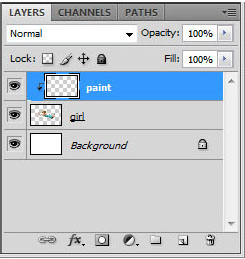
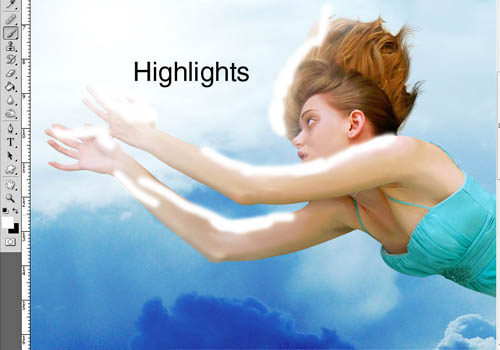
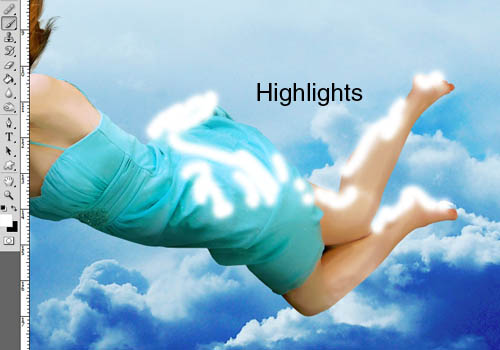
Step 6: Highlighs and Shadows
Create two more layers over the “girl” layer. Rename one as Highlights and the other one as Shadows.

Using the same tecnique we did for the skin , Grab a 200 px soft round brush set to 20% opacity and set foreground color to white ,select the “Highlights” layer and start painting Highlighs to match the light of the sky.
Now select the “Shadows” layer and do the same thing with a black foregound.

Step 7: Vines
Extract the vines stocks from their background just like we did to our model stock.. Try to keep as much detail as possible to get a better effect. After you extract them you should get something like this:

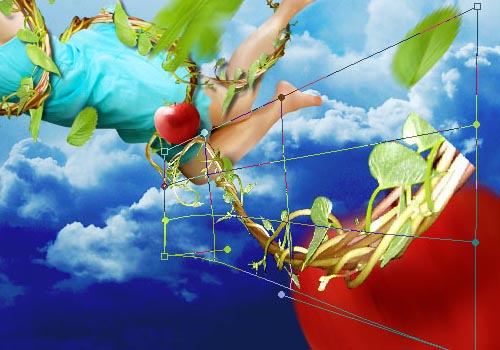
Now grab one of the Vines and place it over our model.. Use transformation tools like warp and perspective to make the vines flow with the body

Use any other of the vines to fill the parts where they are missing.
Try to keep perspective and proportion as similar as possible. Use the Eraser tool to erase all the parts you don’t need or use layer masks.
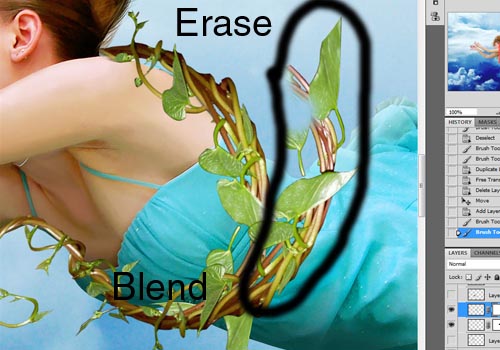

Keep adding vines , duplicate, rotate and transform them ,use layer masks to hide some parts to get a wrapping effect around her body.

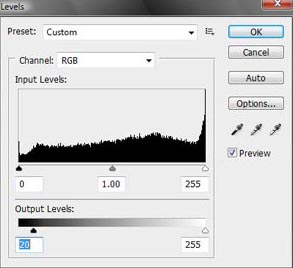
Be sure to use Levels and contrast to change the light of the vines according to the ambient lightning

Once you have a nice result add some shadows:
Duplicate all the vines layers and merge them, place the merged layer under all the vines. Go to image>adjustments>hue and saturation and turn the lightness to -100.
Go to filter>blur>gaussian blur and add a blur of 8..0 px and lower the layer opacity to a 20%
Move the layer a bit to the right and down where the shadow naturally falls , add a layer mask and erase all the shadows that don’t hit the girl:
Slect all the vines and group (CTRL+G) them , rename the group vines.
Step 8: Apples and Leaves
Open the Apple stocks and Extract them from their background using the pen tool. If you want you can create a new group and drop the apples there to keep things in order because we are going to duplicate many layers.
Do the same with the leaves.
Since the leaves have a plain white background and a lot of detail , there is another way we can extract them:
Duplicate the leaf layer and then go to image>adjustments>desaturate .Apply the next settings:


After that, you should have something like this:

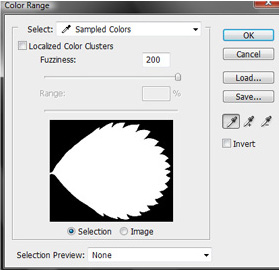
Go to select>color range and click on the black part of the image and click OK
Now back to your original leaf stock and delete the selection. You should have the object prefectly extracted. (if you accidentaly deleted the leaf just go back one step and invert the selection (CTRL+SHIFT+i) so you have the background selected and not the leaf the moment you delete it)
Now apply the next hue and saturation settings to get a richer green hue:
I want to get a painted effect on the apples so just do the same you did before:
Create a new layer on top of the apple and clip it. Grab a wet brush on a low opacity , sample a color on the apple and start stroking with the brush. (do not forget to paint also highlights to match the global lightning on our image)
Add some leaves to the apple to make it look more realistic and vibrant.
Grab a leaf and duplicate it twice.. give them a little bit of perspective with the trasnformation tools and place them on top of the object.Then merge the 3 layers to get 1 complete apple stock

Duplicate the two different apple stocks and place them around the girl..We want to have some depth in our composition so make sure you give the apple different sizes (the closer to the screen , the bigger they are)

Tilt them in different positions so that they look like they are falling from the sky.
Give the apples some more depth and motion by adding blurs.
Go to filter>blur>motion blur ,use a distance about 150px for the bigger apples and 80px for the smaller ones and use an angle of 90°.

Do the same thing for the leaves. Try not to clutter your composition. Experiment with the position and blurs you give your objects to make them flow nicely.


Add some shadows on the Apples and leaves that are closer to the girl.

Step 9: Details
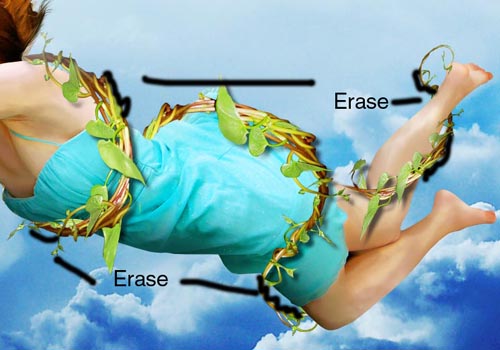
Now we are gonna add some vines reaching out for the girl to give even more depth to our image.
Grab one of the Vines and transform it giving it perspective and warp it.
Blend it with other vines to give the illusion that is grabing the girl. Do it the same way we did before with the Vines over the body.
Use the blur tool on the parts closer to the screen.

Don’t forget to cast shadows on the apple.

Now Merge all the layers of the vine and duplicate them.. Flip them vertically and rotate them…Place it on the top left side and use the warp tool to make it fit the composition. Place it on top of the girls arm and delete the parts you dont need.

You may also want to delete or move apples or leaves that dont fit with our new vines and the image.
Step 10: Color Adjustments
Create a new group on top of all the layers and name it Adjustments
Go to layer>new adjustment layer> and select Brightness and Contrast. Use the next settings.

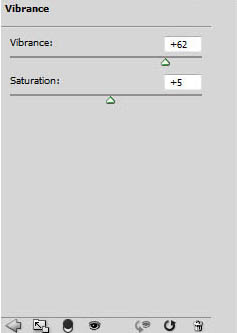
Add a Vibrance adjustment layer with the next settings.
Now we are going to add 4 Color Fill layers.. use the next set of colors , blending modes and opacities. The adjustment group should look like this:

Step 11: Sharpening
Save your image as a .jpg with maximum quality.
Open the .jpg on photoshop , go to image>image size and set the width to 1200, the height will automatically change with the new setting .Press ok.
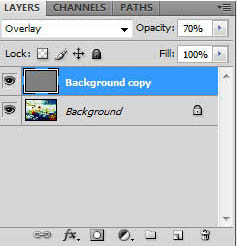
Duplicate the layer and go to filter>other>high pass use a radius of 2.0 pixels , set the layer blending mode to Overlay and lower the layer opacity to 70%
Save again the file as a .jpg and this is the final result:
Enjoyed this Post? Please Help spread the word and Share it!


