


How to create a Realistic Mist Photoshop Tutorial
Skill Level: Intermediate
In this tutorial you’ll learn how to add realistic mist to a photo, creating a moody atmosphere.
You’ll work with simple filters, and learn how to utilize layer masks to control their visibily.
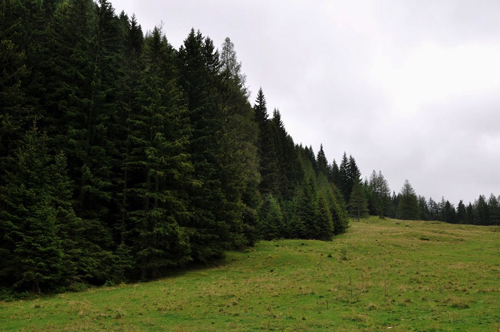
The stock photo I used for this tutorial can be downloaded for free here .
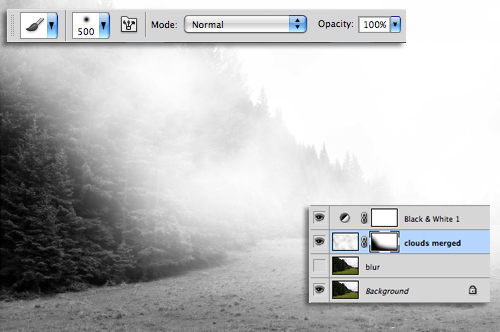
First we will desaturate the image.
With the photo open in Photoshop, click on the Adjustment Layer button at the bottom of the layers panel, and choose Black and White.

You can scroll down the filter options to find a preset that suits your photo, I chose the Green Filter for mine.
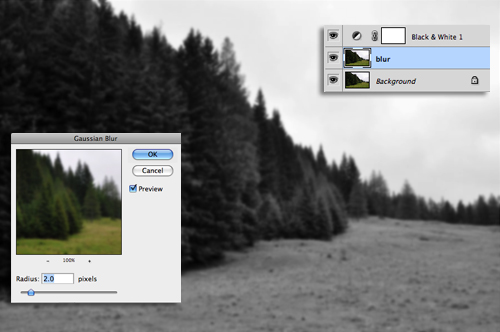
Next duplicate the Background layer, and call it ‘blur’.
Go to Filter > Blur > Gaussian Blur, and find a suitable amount of blur for your photo so it looks like the image above.
Once you’re finished, hide the blurred layer, we’ll come back to it later.

Add a new layer and go to Filter > Render > Clouds, then set the layer’s blending mode to Screen.
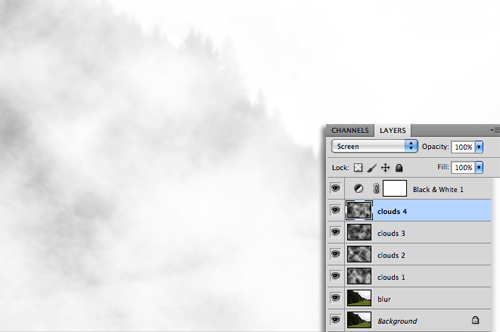
Add three or more layers, filled with clouds to build up a thick blanket of mist.

When you’re done, select all the cloud layers, right click on them and choose ‘Merge Layers’.
Then add a layer mask, by clicking on the Layer Mask button at the bottom of the layers panel.
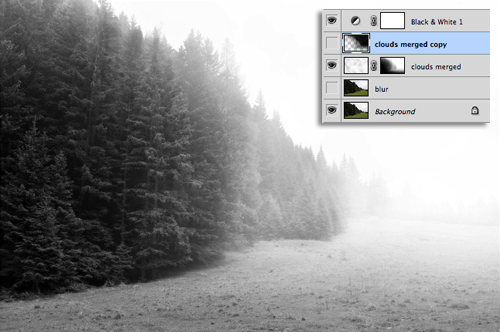
We’ll now work on thinning out the mist in the foreground of the photo.
With the layer mask thumbnail selected, take a very large soft black brush, and paint out the closest objects in the foreground.

Now reduce the size of the brush, and take the Opacity down to around 10%, and gradually paint away the mist on objects further away.

When your happy with the thickness of the mist over your image, duplicate the layer.
Right click on the duplicated layer’s layer mask, and choose ‘Apply Layer Mask’.
Invert the layer, by going to ‘Image > Adjustments > Invert, then hide the layer.
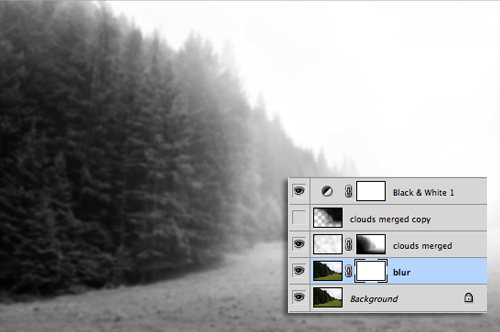
Now go back to your ‘blur’ layer. Unhide it, and give it a layer mask.
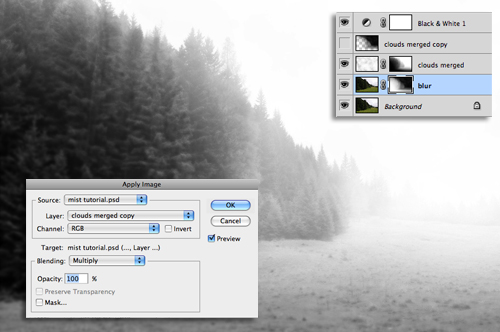
With the layer mask selected, go to Image > Apply Image, and chose the inverted mist layer that you hid earlier, as the Source Layer.

Now invert the layer mask.
You’ll see the blur is now stronger where the mist is thickest.
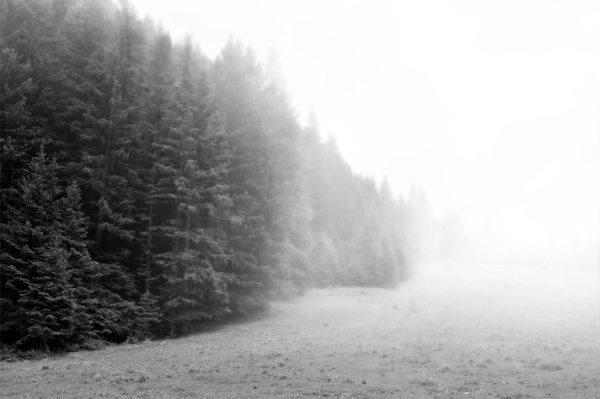
 Here’s how the final image looks with the mist applied.


