


Manipulate a Dancer Illustration in Photoshop
One of the most popular design styles of the past few years is to create interesting effects around a stock photo of a dancer or a person in motion. The motion offers a unique base around which to build creative elements.
In this Photoshop tutorial , you’ll see how to manipulate a single stock image in Photoshop to create a dance illustration.
If you have any questions or suggestions, let us know in the comments!
Tools Used:
- Adobe Photoshop
- A stock image
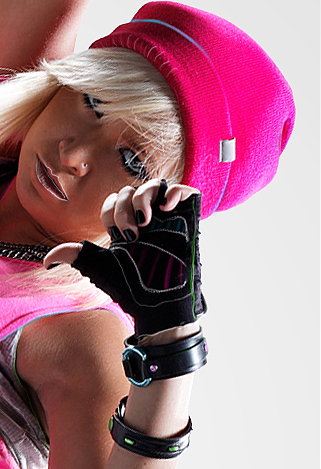
Final Image Preview

Step 1: Scene Setup
Ok so to start off, we need to create our background and our new document. Now like almost all of my tutorials the resolution is up to you, however I still suggest something large (I will be using 3000*2000) and now we need to make the background. To create the background choose a light grey and make a grey to white gradient, I went with the circular gradient with white in the center expanding into grey but whatever you like should work just fine for this.

Now we need our stock image! You can use any kind of model you like, I went with a dancer picture which can be seen below. Once you have your stock you will need to isolate it out using your pen tool and drop it into your scene.


Step 2: Simple Background Aesthetics
Now to start building our scene up with some easy tricks. The first of which will be to help lessen the negative space in the scene by creating something for the background. So create a new layer under your model and make a large colored circle (I went with pink). You can do this by using the circular marquee tool and then just filling it. Once you have made your circle turn the layers opacity down to about 20%.

Now we can create another new layer under the figure for our shadow. To create the shadow grab any old brush and just draw it out. Once you have loosely (very loose in my case) drawn the shadow just apply a Gaussian blur with a radius of about 15 depending on how large your shadow area is going to be and how condensed you want it to be.


Once you shadow is done we can make a duplicate of our figure and turn the opacity to 0%. Once you have done this go to the F on the layer toolbar and select ‘stroke’. Once you have done that set your stroke dialog up as mine is in the below screenshot, then just decrease the opacity and move it around a tad to the left or right.


Step 3: Figure Aesthetics
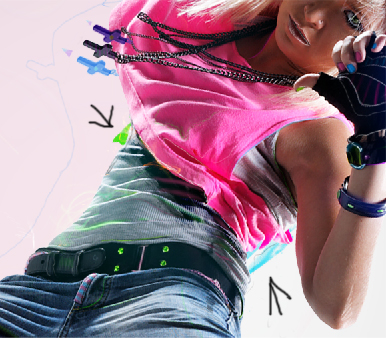
Ok now its time to start my favorite part! The sketching! So at this point you will want to grab your 3px hard brush and get started!

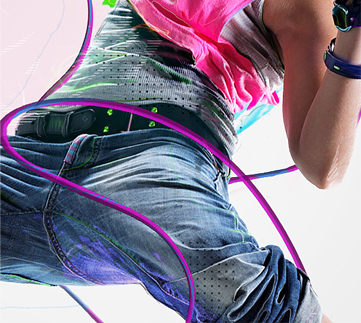
So basically what you want to do hear is to just trace, doodle and shade in random sections with different colors. I used black, white, pink, cyan and green for my colors. Starting with green and white then moving on to the other colors but your color selections can be whatever you like, just make sure they complement one another. And remember we are going for a traditional doodle/sketch look so don’t worry if yours looks rough!

You can also play around with other filters/tools while doing this. For example I smudged my green lines in the below screenshot.


Ok so now that you have sketched all over your stock its time to move on to the next step which may not be necessary or viable on your piece but we will go over it regardless just for the sake of learning!
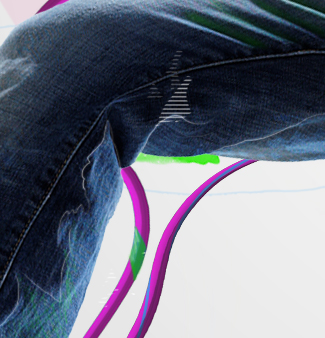
So what we are going to do is duplicate the cross on my figures necklace. So to do this in a cool way we will, isolate out the cross, drop it on a new layer and set it as an overlay layer at 100% and then under this layer on a new layer we will just fill in the cross. This way the solid cross that we just filled will have the shadows and highlights from the overlay cross and it will allow us to manipulate the colors much easier than with the standard hue adjustments.


You can also see where I drew (poorly) little loops to connect these new crosses to the original necklace, which you can add to yours if your doing something similar.
Now lets add some more color like effects. To do this just create a new layer above your figure and draw a bit patch on it in a color that fits with your piece (I went with blue). Then just apply a large Gaussian blur and set the layer up as a screen layer.


My document now looks like the below screen shot.

Now lets add some more to our figure! So grab one of your splat/brush stroke brushes ( see our tut on these here : http://design.creativefan.com/combining-custom-brushes-for-wild-effects-in-photoshop/ ) and throw down to in two different colors (I used dark purple and blue) then set them up as an overlay layer.

Now using some of the brushes just throw a few brush strokes on a new layer under your figure and some on top of your figure.

Step 4: Custom shapes
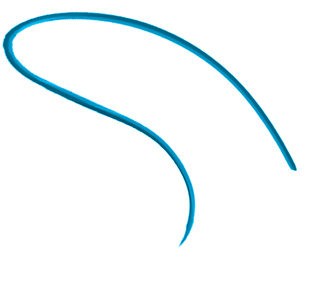
Once your brush strokes are all laid down we can move on to the next section, that being creating the dynamic swirly shapes! To do this start off by making a new document (you don’t have to but I find it easier) and then just using your pen tool make a quick random loop like shape. Then once you have your shape fill it with your desired color!


Now unlike our previous tutorials where we tried to create a light setup that related to the background this time we can just go all random. Just burn/dodge what you think looks good. Because in the end if you think it looks good, what else matters? If your having trouble at this step, or don’t know what im referring to I suggest you take a look at one of our tutorials that covers this in full, which can be found at: here

Now we can create a new hue adjustment layer. This can be found in the layer drop down under adjustment layers -> hue and saturation. Once you have create a new adjustment layer and set it up to your desired color then just edit it like you would any mask! For example erasing a line would create a line in a different color and painting a line would do vice-versa. I used the pen tool to create my color swirls but you can just marquee them out or just paint them on, whatever is easier for you!


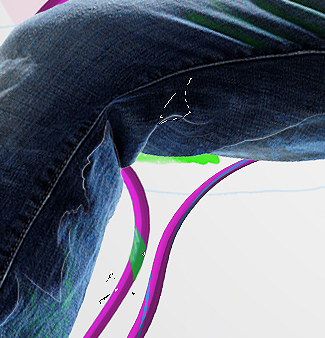
Now just drop it into your dance picture. The idea here being that part loops behind the figure whilst another part stays on top of the figure creating a 3D like illusion. As you can see in the below screen shot, I put a ton!


Now we can repeat the process of making our swirly shape but this time just make a sphere which is a thousand times easier. Just lasso out a sphere, fill, burn, dodge and color! If your sphere looks a tad flat you can spherize it with the spherize filter located in the deformation drop down in your filter tab. But if you do this be sure that you have it set to 100% on both axis’!


Once the shapes are in lets do some more fine tuning. So head over to your layer tab and choose create new layer > Fill layer > Pattern layer and then just grab a scan line pattern. Once you have done this just make some random selections or random brush strokes etc… which will be your scan lines. You can use your polygon lasso here to make various weird shapes or some brushes you have lying about its up to you. I used a splatter brush as well as the poly lasso.


But don’t be afraid of just using one type of pattern! For example below you can see I used another pattern, a black halftone to be exact.
Next grab your poly lasso and just make a few rectangles and triangles in various shapes all over your figure. Then just copy and paste these sections of your figure on to a new layer. Once you have done that just move them around to create some abstract dispersion. Also if you wanted you could use the displacement filter for this, however keep in mind that doing it that way gives you a thousand times less control!


To finish off our piece we will need to add in something more, something to help bring everything together. That will be light stocks! So we will head over to SXC and grab this stock and drop it into our document. http://www.sxc.hu/photo/1114780

Once you have dropped the light stock into your document apply it as a screen beneath the figure. Then duplicate it and place it above the figure. Erase out the parts you don’t like that are on top of the figure and ta-da!
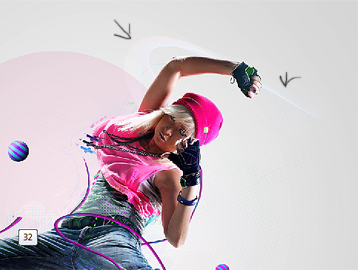

Now we are done! I finished my piece off with a bit more drawing and some graffiti work and my final image looks like the below screen shot.
I hope you enjoyed reading this tutorial and maybe learned a thing or two! If you have any questions regarding a technique don’t be afraid to post a message and ask!


